Latent Diffusion Models
arXiv | BibTeX
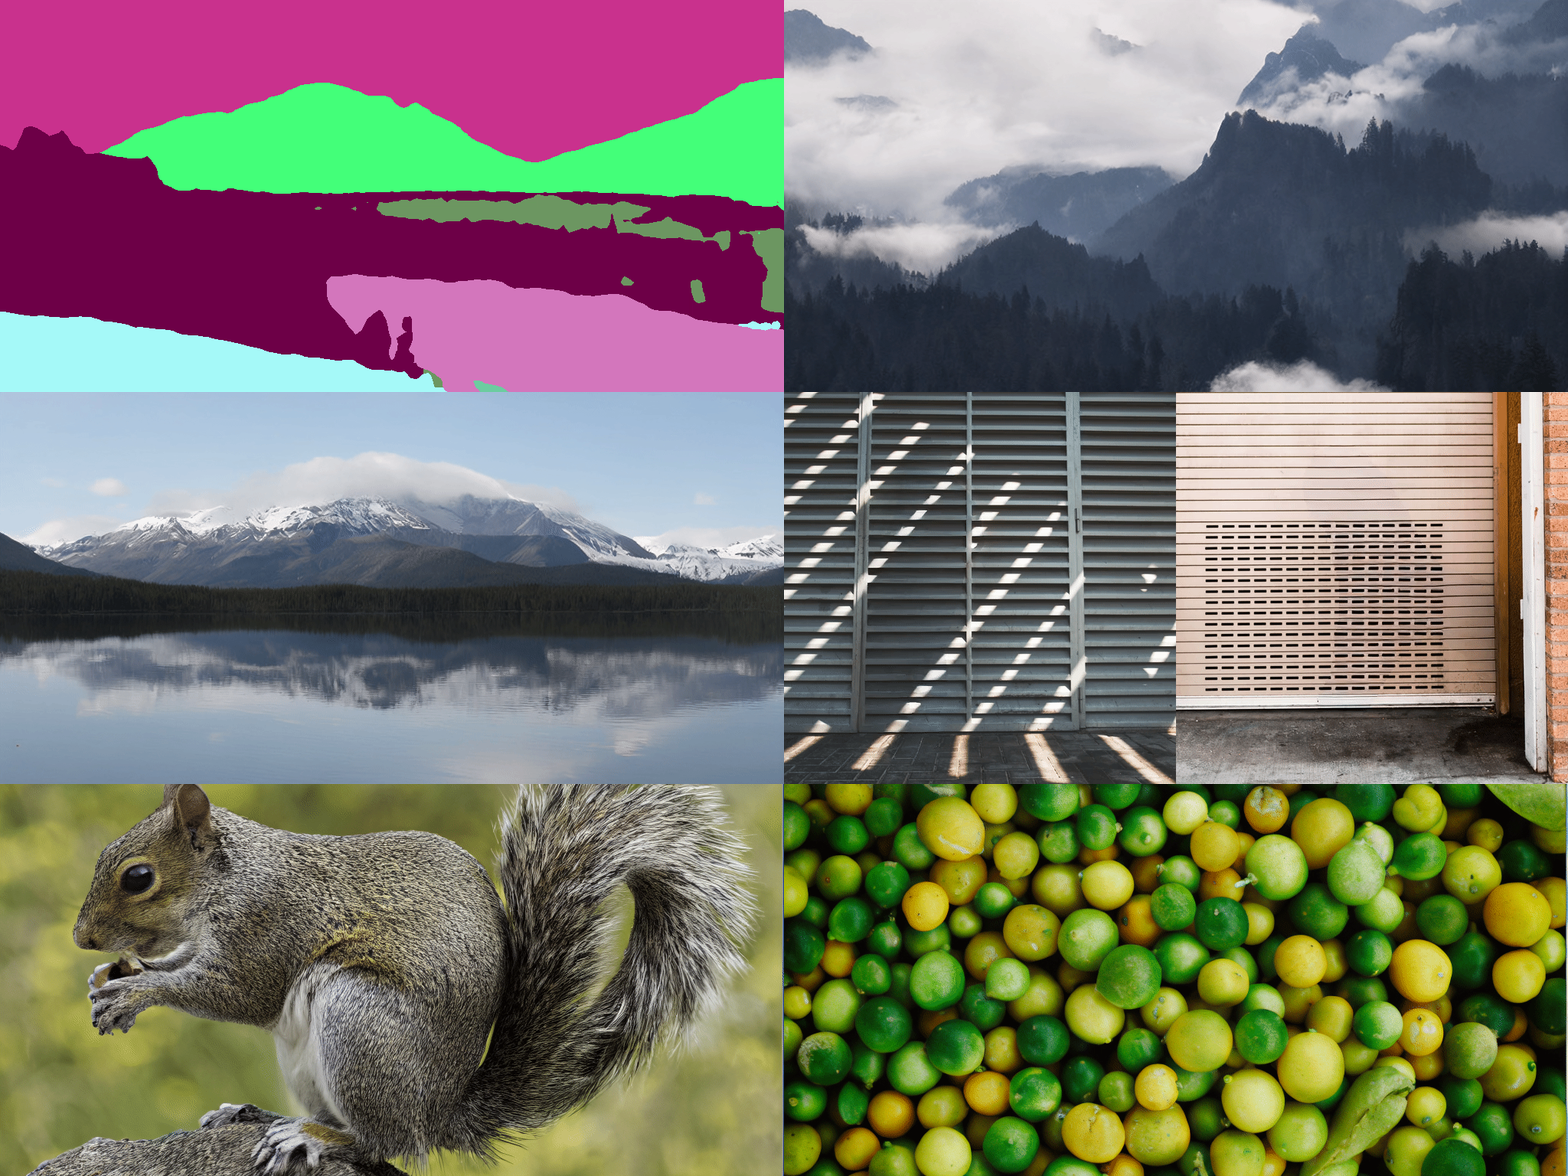
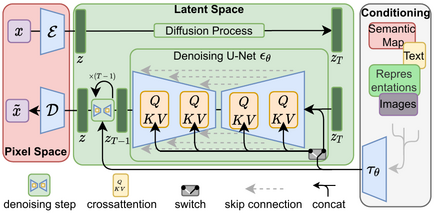
High-Resolution Image Synthesis with Latent Diffusion Models
Robin Rombach*,
Andreas Blattmann*,
Dominik Lorenz,
Patrick Esser,
Björn Ommer
* equal contribution
News
July 2022
April 2022
Requirements
A suitable conda environment named ldm can be created
and activated with:
conda env create -f environment.yaml
conda activate ldm
Pretrained Models
A general list of all available checkpoints is available in via our model zoo.
If you use any of these models in your work, we are always happy to receive a citation.
Retrieval Augmented Diffusion Models
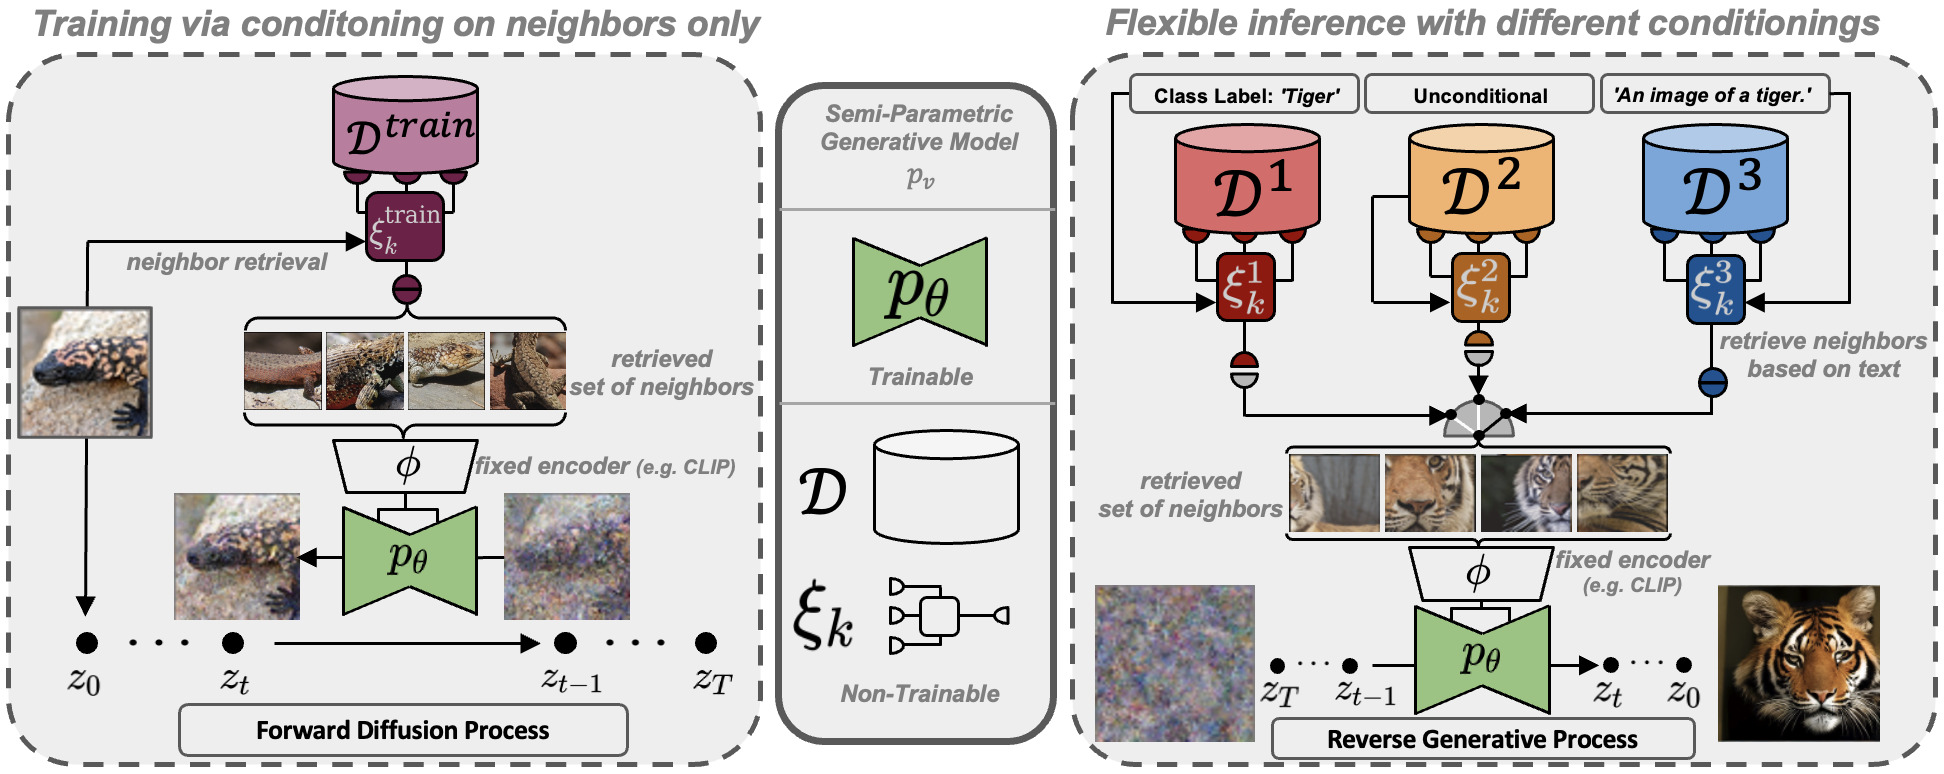 We include inference code to run our retrieval-augmented diffusion models (RDMs) as described in https://arxiv.org/abs/2204.11824.
To get started, install the additionally required python packages into your ldm environment
pip install transformers==4.19.2 scann kornia==0.6.4 torchmetrics==0.6.0
pip install git+https://github.com/arogozhnikov/einops.git
and download the trained weights (preliminary ceckpoints):
mkdir -p models/rdm/rdm768x768/
wget -O models/rdm/rdm768x768/model.ckpt https://ommer-lab.com/files/rdm/model.ckpt
As these models are conditioned on a set of CLIP image embeddings, our RDMs support different inference modes,
which are described in the following.
RDM with text-prompt only (no explicit retrieval needed)
Since CLIP offers a shared image/text feature space, and RDMs learn to cover a neighborhood of a given
example during training, we can directly take a CLIP text embedding of a given prompt and condition on it.
Run this mode via
python scripts/knn2img.py --prompt "a happy bear reading a newspaper, oil on canvas"
RDM with text-to-image retrieval
To be able to run a RDM conditioned on a text-prompt and additionally images retrieved from this prompt, you will also need to download the corresponding retrieval database.
We provide two distinct databases extracted from the Openimages- and ArtBench- datasets.
Interchanging the databases results in different capabilities of the model as visualized below, although the learned weights are the same in both cases.
Download the retrieval-databases which contain the retrieval-datasets (Openimages (11GB) and ArtBench (82MB)) compressed into CLIP image embeddings:
mkdir -p data/rdm/retrieval_databases
wget -O data/rdm/retrieval_databases/artbench.zip https://ommer-lab.com/files/rdm/artbench_databases.zip
wget -O data/rdm/retrieval_databases/openimages.zip https://ommer-lab.com/files/rdm/openimages_database.zip
unzip data/rdm/retrieval_databases/artbench.zip -d data/rdm/retrieval_databases/
unzip data/rdm/retrieval_databases/openimages.zip -d data/rdm/retrieval_databases/
We also provide trained ScaNN search indices for ArtBench. Download and extract via
mkdir -p data/rdm/searchers
wget -O data/rdm/searchers/artbench.zip https://ommer-lab.com/files/rdm/artbench_searchers.zip
unzip data/rdm/searchers/artbench.zip -d data/rdm/searchers
Since the index for OpenImages is large (~21 GB), we provide a script to create and save it for usage during sampling. Note however,
that sampling with the OpenImages database will not be possible without this index. Run the script via
python scripts/train_searcher.py
Retrieval based text-guided sampling with visual nearest neighbors can be started via
python scripts/knn2img.py --prompt "a happy pineapple" --use_neighbors --knn <number_of_neighbors>
Note that the maximum supported number of neighbors is 20.
The database can be changed via the cmd parameter --database which can be [openimages, artbench-art_nouveau, artbench-baroque, artbench-expressionism, artbench-impressionism, artbench-post_impressionism, artbench-realism, artbench-renaissance, artbench-romanticism, artbench-surrealism, artbench-ukiyo_e].
For using --database openimages, the above script (scripts/train_searcher.py) must be executed before.
Due to their relatively small size, the artbench datasetbases are best suited for creating more abstract concepts and do not work well for detailed text control.
Coming Soon
- better models
- more resolutions
- image-to-image retrieval
Text-to-Image
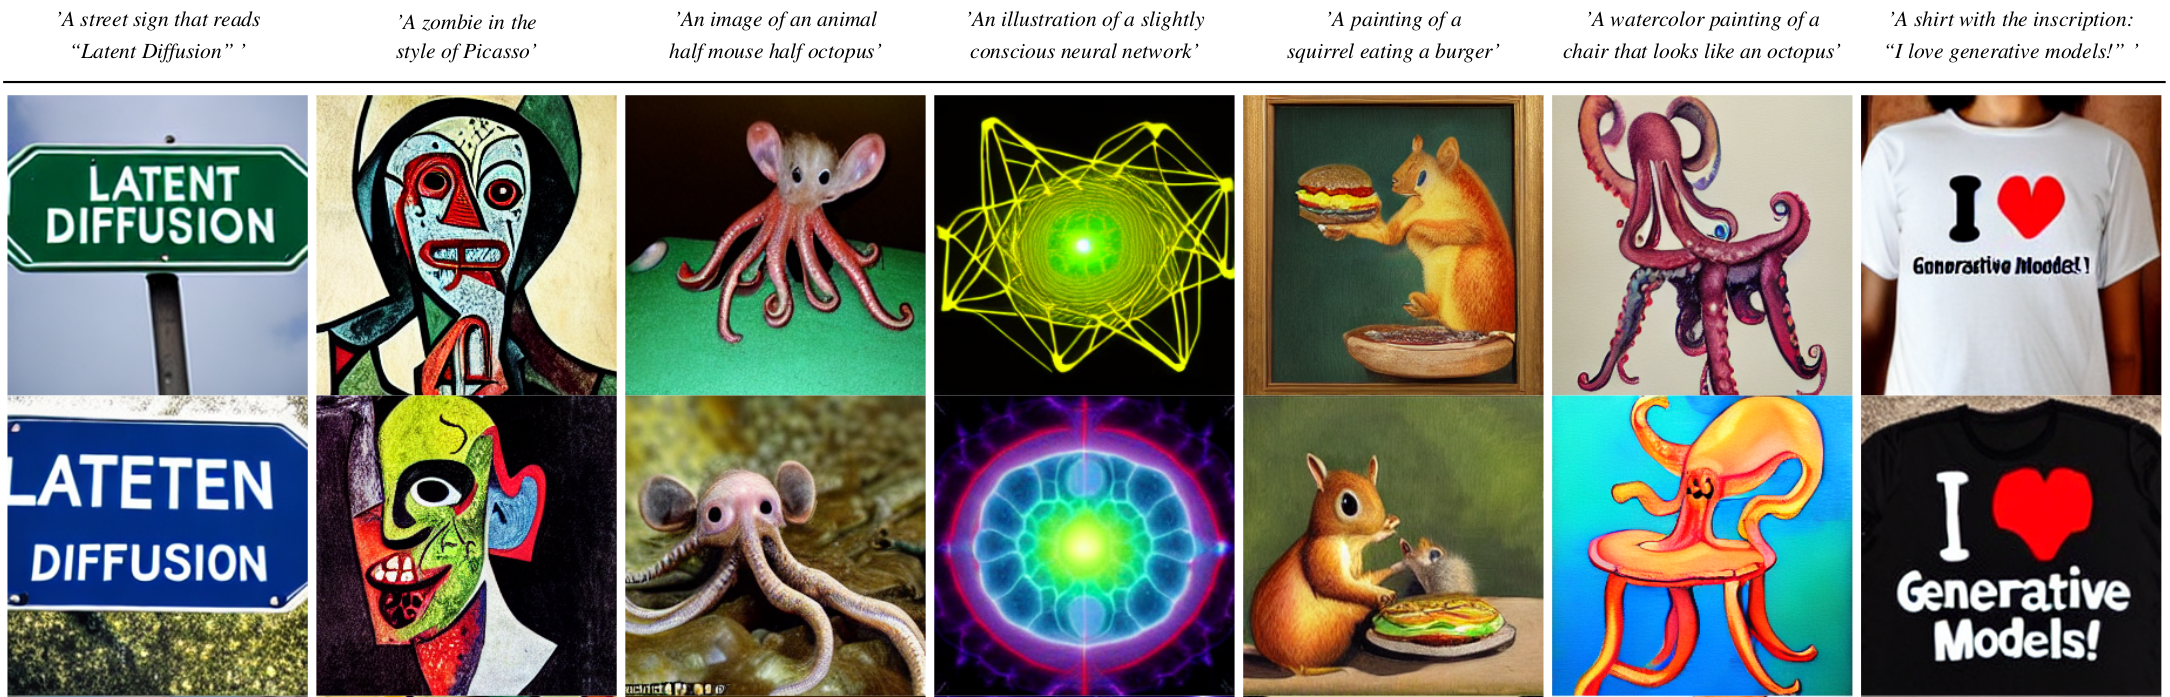
Download the pre-trained weights (5.7GB)
mkdir -p models/ldm/text2img-large/
wget -O models/ldm/text2img-large/model.ckpt https://ommer-lab.com/files/latent-diffusion/nitro/txt2img-f8-large/model.ckpt
and sample with
python scripts/txt2img.py --prompt "a virus monster is playing guitar, oil on canvas" --ddim_eta 0.0 --n_samples 4 --n_iter 4 --scale 5.0 --ddim_steps 50
This will save each sample individually as well as a grid of size n_iter x n_samples at the specified output location (default: outputs/txt2img-samples).
Quality, sampling speed and diversity are best controlled via the scale, ddim_steps and ddim_eta arguments.
As a rule of thumb, higher values of scale produce better samples at the cost of a reduced output diversity.
Furthermore, increasing ddim_steps generally also gives higher quality samples, but returns are diminishing for values > 250.
Fast sampling (i.e. low values of ddim_steps) while retaining good quality can be achieved by using --ddim_eta 0.0.
Faster sampling (i.e. even lower values of ddim_steps) while retaining good quality can be achieved by using --ddim_eta 0.0 and --plms (see Pseudo Numerical Methods for Diffusion Models on Manifolds).
Beyond 256²
For certain inputs, simply running the model in a convolutional fashion on larger features than it was trained on
can sometimes result in interesting results. To try it out, tune the H and W arguments (which will be integer-divided
by 8 in order to calculate the corresponding latent size), e.g. run
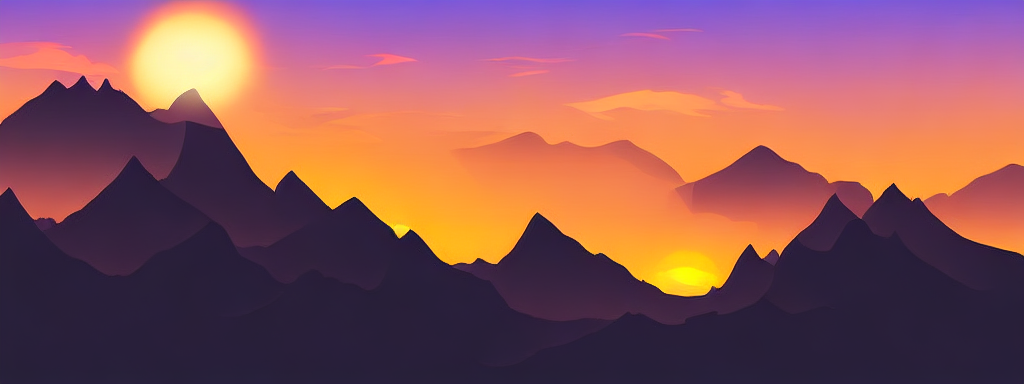
python scripts/txt2img.py --prompt "a sunset behind a mountain range, vector image" --ddim_eta 1.0 --n_samples 1 --n_iter 1 --H 384 --W 1024 --scale 5.0
to create a sample of size 384x1024. Note, however, that controllability is reduced compared to the 256x256 setting.
The example below was generated using the above command.
Inpainting
Download the pre-trained weights
wget -O models/ldm/inpainting_big/last.ckpt https://heibox.uni-heidelberg.de/f/4d9ac7ea40c64582b7c9/?dl=1
and sample with
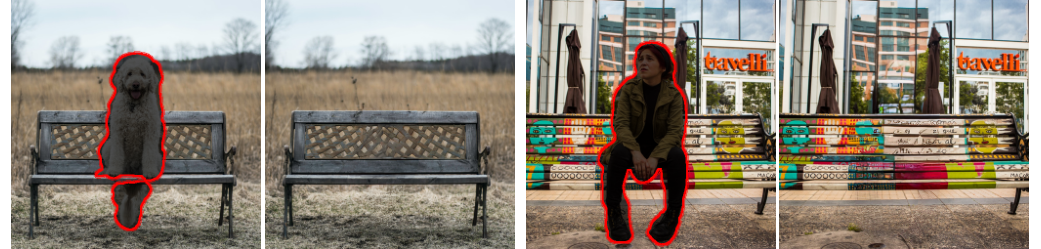
python scripts/inpaint.py --indir data/inpainting_examples/ --outdir outputs/inpainting_results
indir should contain images *.png and masks <image_fname>_mask.png like
the examples provided in data/inpainting_examples.
Class-Conditional ImageNet
Available via a notebook  .
.

Unconditional Models
We also provide a script for sampling from unconditional LDMs (e.g. LSUN, FFHQ, ...). Start it via
CUDA_VISIBLE_DEVICES=<GPU_ID> python scripts/sample_diffusion.py -r models/ldm/<model_spec>/model.ckpt -l <logdir> -n <\#samples> --batch_size <batch_size> -c <\#ddim steps> -e <\#eta>
Train your own LDMs
Data preparation
Faces
For downloading the CelebA-HQ and FFHQ datasets, proceed as described in the taming-transformers
repository.
LSUN
The LSUN datasets can be conveniently downloaded via the script available here.
We performed a custom split into training and validation images, and provide the corresponding filenames
at https://ommer-lab.com/files/lsun.zip.
After downloading, extract them to ./data/lsun. The beds/cats/churches subsets should
also be placed/symlinked at ./data/lsun/bedrooms/./data/lsun/cats/./data/lsun/churches, respectively.
ImageNet
The code will try to download (through Academic
Torrents) and prepare ImageNet the first time it
is used. However, since ImageNet is quite large, this requires a lot of disk
space and time. If you already have ImageNet on your disk, you can speed things
up by putting the data into
${XDG_CACHE}/autoencoders/data/ILSVRC2012_{split}/data/ (which defaults to
~/.cache/autoencoders/data/ILSVRC2012_{split}/data/), where {split} is one
of train/validation. It should have the following structure:
${XDG_CACHE}/autoencoders/data/ILSVRC2012_{split}/data/
├── n01440764
│   ├── n01440764_10026.JPEG
│   ├── n01440764_10027.JPEG
│   ├── ...
├── n01443537
│   ├── n01443537_10007.JPEG
│   ├── n01443537_10014.JPEG
│   ├── ...
├── ...
If you haven't extracted the data, you can also place
ILSVRC2012_img_train.tar/ILSVRC2012_img_val.tar (or symlinks to them) into
${XDG_CACHE}/autoencoders/data/ILSVRC2012_train/ /
${XDG_CACHE}/autoencoders/data/ILSVRC2012_validation/, which will then be
extracted into above structure without downloading it again. Note that this
will only happen if neither a folder
${XDG_CACHE}/autoencoders/data/ILSVRC2012_{split}/data/ nor a file
${XDG_CACHE}/autoencoders/data/ILSVRC2012_{split}/.ready exist. Remove them
if you want to force running the dataset preparation again.
Model Training
Logs and checkpoints for trained models are saved to logs/<START_DATE_AND_TIME>_<config_spec>.
Training autoencoder models
Configs for training a KL-regularized autoencoder on ImageNet are provided at configs/autoencoder.
Training can be started by running
CUDA_VISIBLE_DEVICES=<GPU_ID> python main.py --base configs/autoencoder/<config_spec>.yaml -t --gpus 0,
where config_spec is one of {autoencoder_kl_8x8x64(f=32, d=64), autoencoder_kl_16x16x16(f=16, d=16),
autoencoder_kl_32x32x4(f=8, d=4), autoencoder_kl_64x64x3(f=4, d=3)}.
For training VQ-regularized models, see the taming-transformers
repository.
Training LDMs
In configs/latent-diffusion/ we provide configs for training LDMs on the LSUN-, CelebA-HQ, FFHQ and ImageNet datasets.
Training can be started by running
CUDA_VISIBLE_DEVICES=<GPU_ID> python main.py --base configs/latent-diffusion/<config_spec>.yaml -t --gpus 0,
where <config_spec> is one of {celebahq-ldm-vq-4(f=4, VQ-reg. autoencoder, spatial size 64x64x3),ffhq-ldm-vq-4(f=4, VQ-reg. autoencoder, spatial size 64x64x3),
lsun_bedrooms-ldm-vq-4(f=4, VQ-reg. autoencoder, spatial size 64x64x3),
lsun_churches-ldm-vq-4(f=8, KL-reg. autoencoder, spatial size 32x32x4),cin-ldm-vq-8(f=8, VQ-reg. autoencoder, spatial size 32x32x4)}.
Model Zoo
Pretrained Autoencoding Models
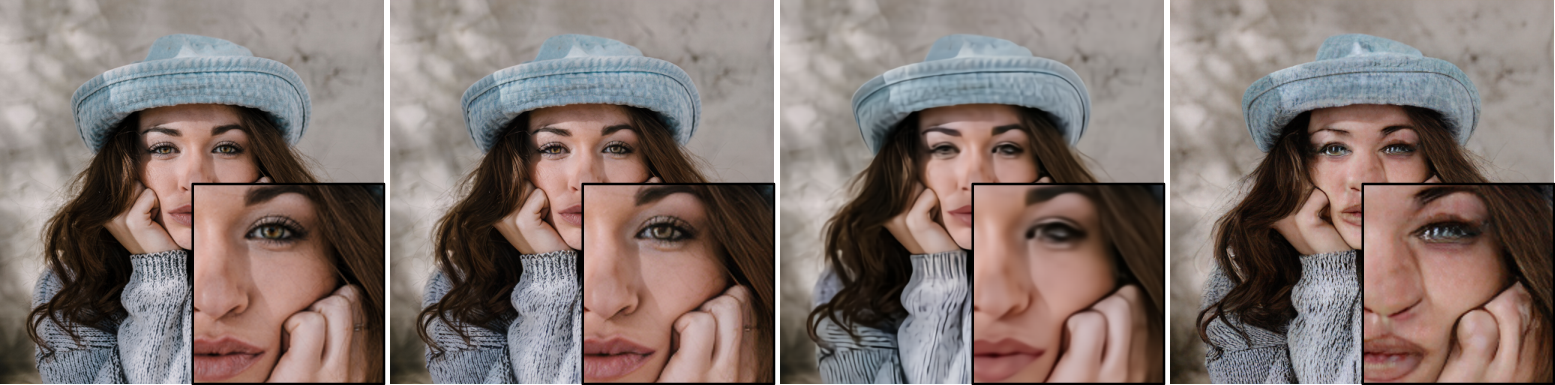
All models were trained until convergence (no further substantial improvement in rFID).
| Model |
rFID vs val |
train steps |
PSNR |
PSIM |
Link |
Comments |
| f=4, VQ (Z=8192, d=3) |
0.58 |
533066 |
27.43 +/- 4.26 |
0.53 +/- 0.21 |
https://ommer-lab.com/files/latent-diffusion/vq-f4.zip |
|
| f=4, VQ (Z=8192, d=3) |
1.06 |
658131 |
25.21 +/- 4.17 |
0.72 +/- 0.26 |
https://heibox.uni-heidelberg.de/f/9c6681f64bb94338a069/?dl=1 |
no attention |
| f=8, VQ (Z=16384, d=4) |
1.14 |
971043 |
23.07 +/- 3.99 |
1.17 +/- 0.36 |
https://ommer-lab.com/files/latent-diffusion/vq-f8.zip |
|
| f=8, VQ (Z=256, d=4) |
1.49 |
1608649 |
22.35 +/- 3.81 |
1.26 +/- 0.37 |
https://ommer-lab.com/files/latent-diffusion/vq-f8-n256.zip |
|
| f=16, VQ (Z=16384, d=8) |
5.15 |
1101166 |
20.83 +/- 3.61 |
1.73 +/- 0.43 |
https://heibox.uni-heidelberg.de/f/0e42b04e2e904890a9b6/?dl=1 |
|
|
|
|
|
|
|
|
| f=4, KL |
0.27 |
176991 |
27.53 +/- 4.54 |
0.55 +/- 0.24 |
https://ommer-lab.com/files/latent-diffusion/kl-f4.zip |
|
| f=8, KL |
0.90 |
246803 |
24.19 +/- 4.19 |
1.02 +/- 0.35 |
https://ommer-lab.com/files/latent-diffusion/kl-f8.zip |
|
| f=16, KL (d=16) |
0.87 |
442998 |
24.08 +/- 4.22 |
1.07 +/- 0.36 |
https://ommer-lab.com/files/latent-diffusion/kl-f16.zip |
|
| f=32, KL (d=64) |
2.04 |
406763 |
22.27 +/- 3.93 |
1.41 +/- 0.40 |
https://ommer-lab.com/files/latent-diffusion/kl-f32.zip |
|
Get the models
Running the following script downloads und extracts all available pretrained autoencoding models.
bash scripts/download_first_stages.sh
The first stage models can then be found in models/first_stage_models/<model_spec>
Pretrained LDMs
Get the models
The LDMs listed above can jointly be downloaded and extracted via
bash scripts/download_models.sh
The m


 这是 CompVis 论文《High-Resolution Image Synthesis with Latent Diffusion Models》的官方研究代码库。该论文提出了潜在扩散模型(LDM),即在压缩后的潜在空间而非原始像素空间中训练的扩散模型,用于高效地生成高分辨率图像。