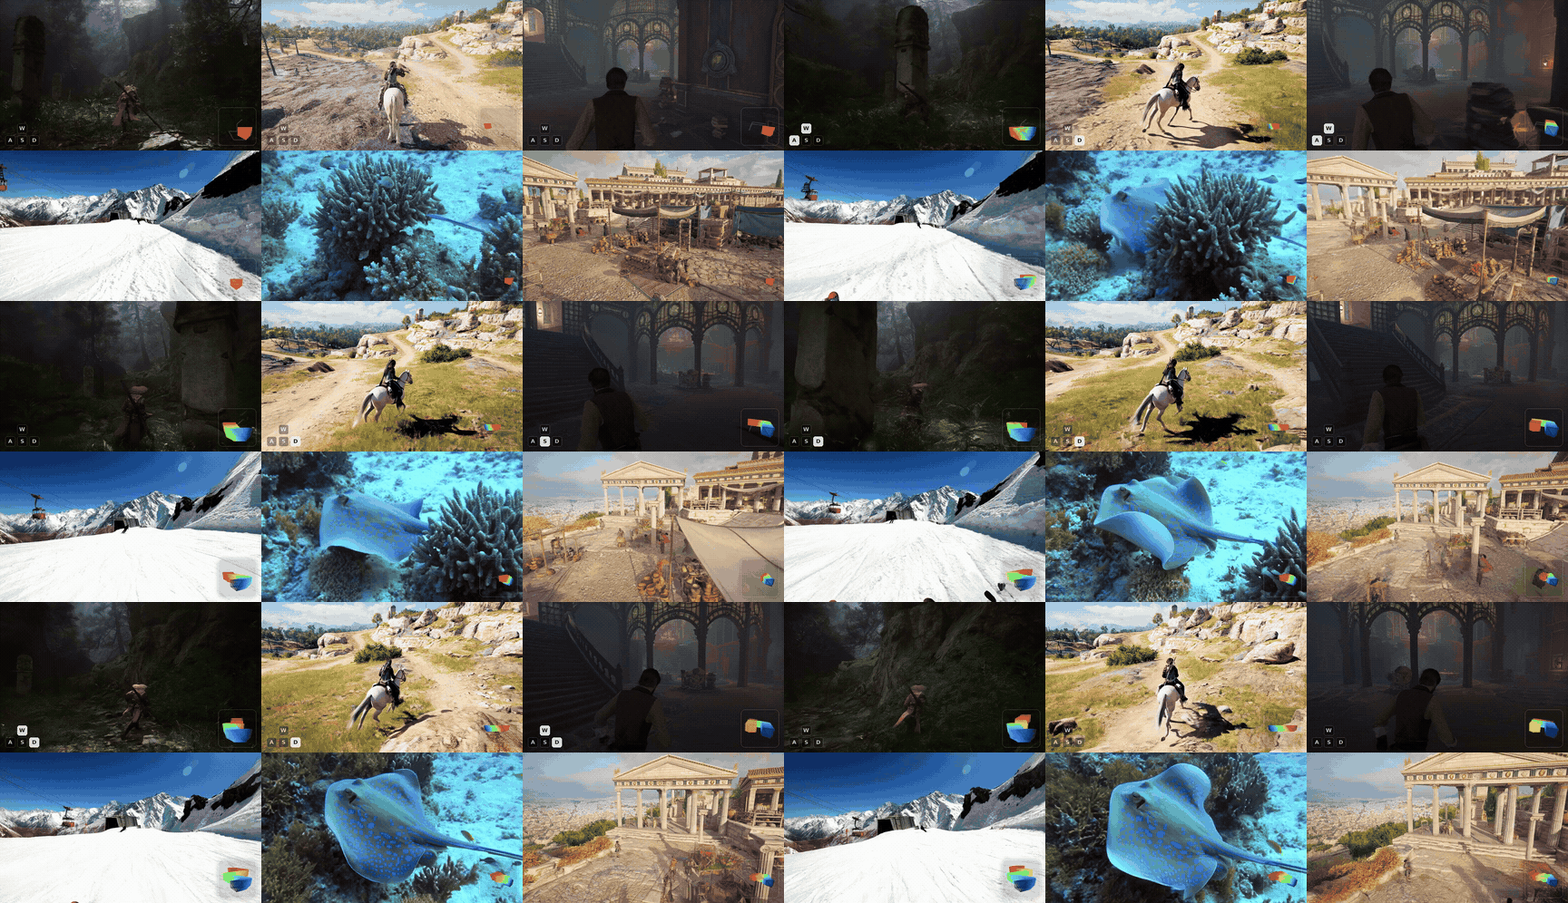
SCoPE adds camera sightlines as positional coordinates to a pretrained video diffusion
transformer. Given a first frame, a text prompt, and a camera trajectory, it generates a video
that follows the requested camera motion while preserving the original image-to-video prior.
🚀 Try It Online
Try SCoPE in your browser — no setup required: 🤗 Hugging Face Space
📑 Table of Contents
Overview
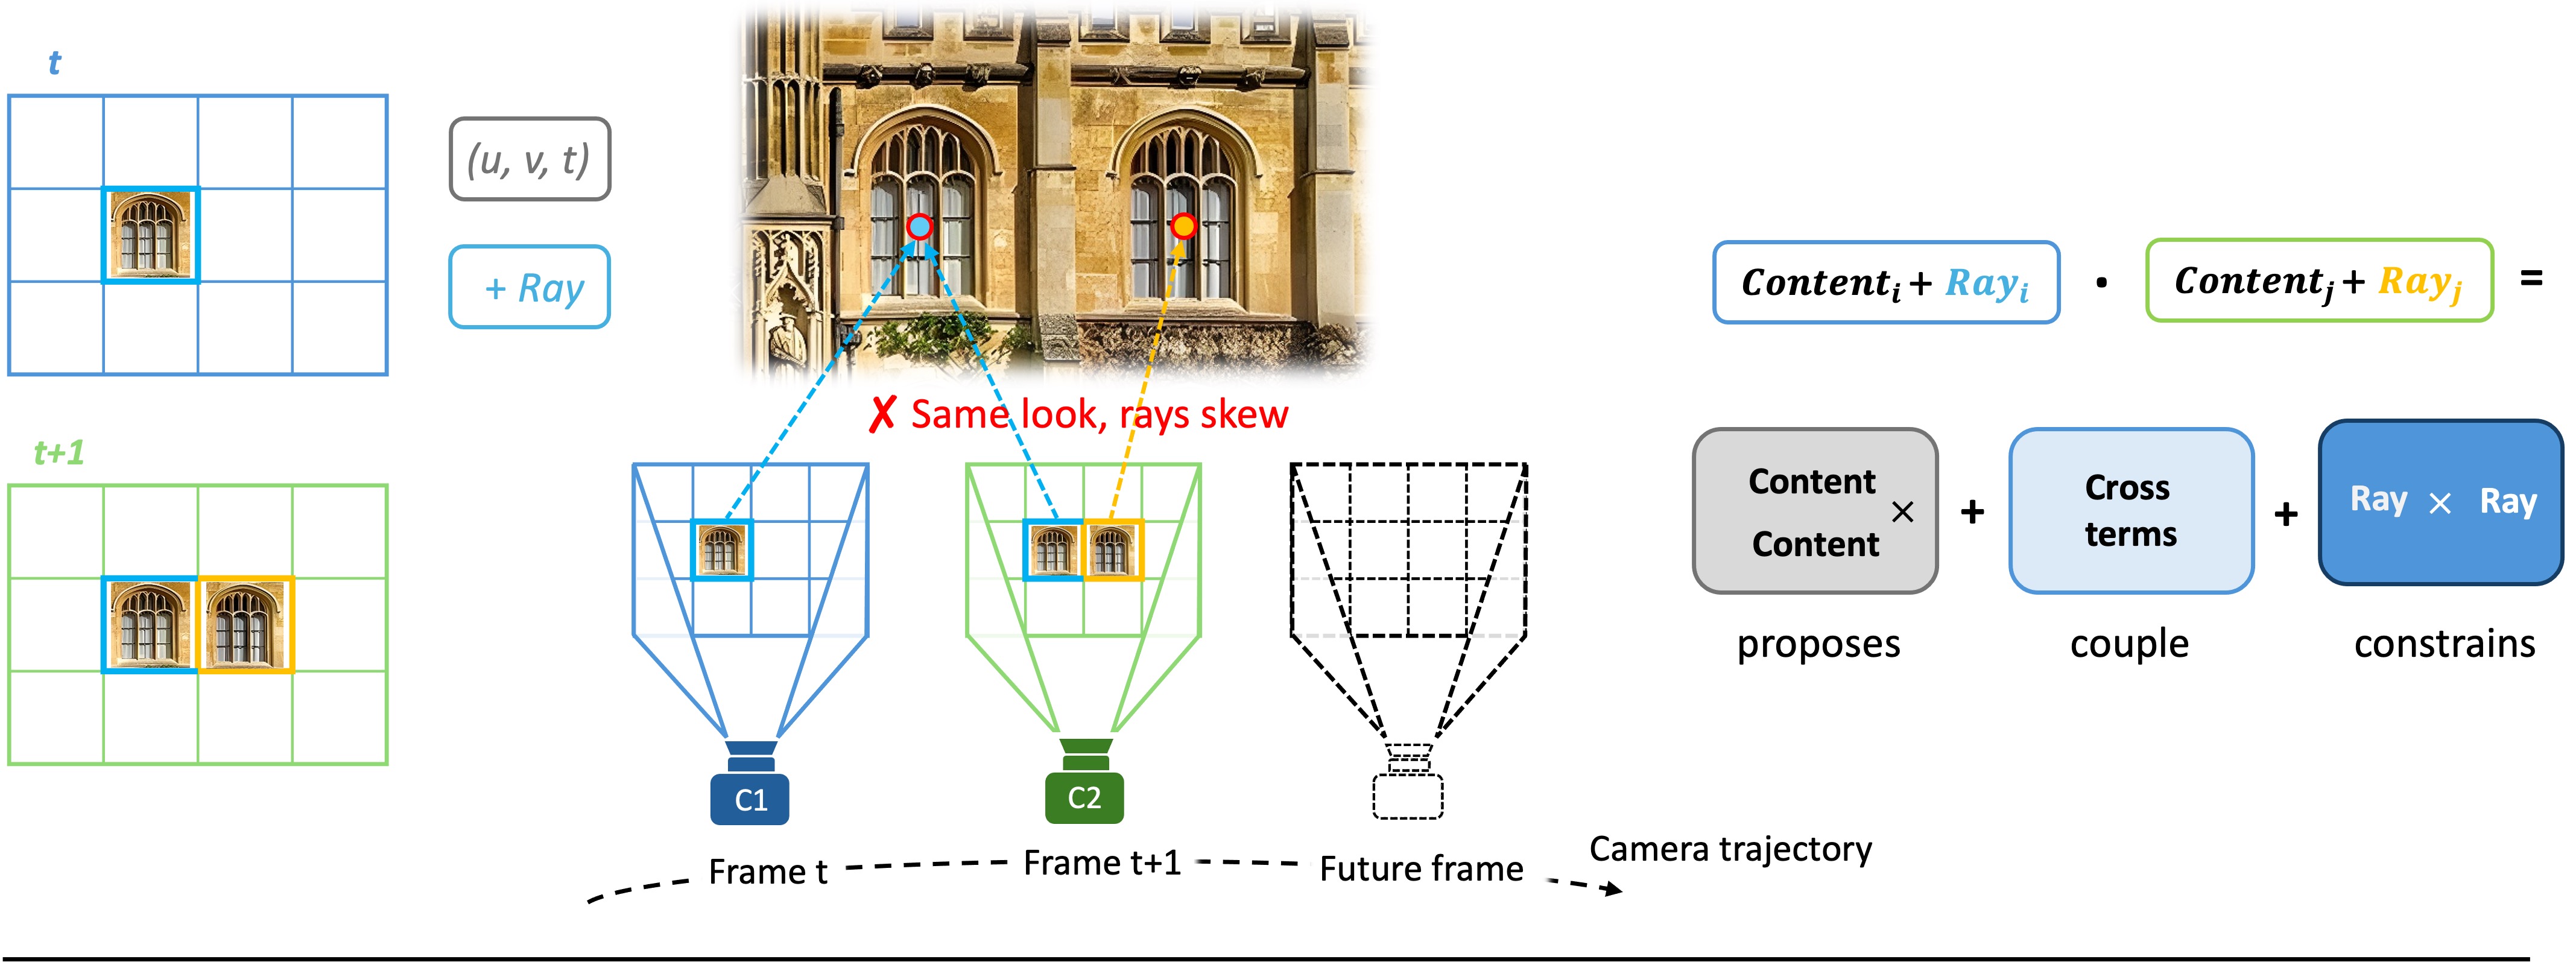
Video diffusion transformers address their tokens by position on the pixel-time grid: an address
in the tensor, not in the world. The world point a token depicts lies on a surface that has not
been generated yet, but its camera ray is fixed the moment the user specifies a trajectory. SCoPE
therefore treats the ray as a second positional coordinate, so camera control becomes a
property of the coordinate system rather than an added module.
The ray is added to the pretrained attention's queries and keys, and the score gains a term that
reads the two rays alone; its canonical form — the reciprocal product of line geometry — measures
how nearly two lines of sight meet. A Normalize-Gate-Inject scheme makes a single encoding
trainable across both metric and up-to-scale pose sources. The retrofit keeps RoPE bit-exact,
starts from the unchanged pretrained DiT, and adds under 0.1% new parameters.
In practice this means:
- Camera motion as coordinates. Each video token is tied to its camera ray via Plücker
coordinates; no separate control branch is trained.
- Robust to heterogeneous pose sources. The per-clip near-depth normalization plus the learned
scale gate let SCoPE consume poses from different reconstruction pipelines and scene scales.
- Self-contained Wan2.2-I2V-A14B release. The model repository contains everything required for
inference; users do not need to download a second Wan2.2 checkpoint.
Repository structure
| Path |
Description |
inference.py |
Inference entry: manifest, case + external pose, custom, or all-trajectory generation. |
train.py |
Training entry for the RDPO high-only recipe. |
scope/encoding.py |
Sightline-Coordinate positional encoding (Normalize-Gate-Inject). |
scope/geometry.py |
Camera-ray and Plücker-coordinate utilities. |
scope/camera.py |
Converts camera trajectories into SCoPE coordinates. |
scope/modeling.py |
Wan self-attention augmented with the SCoPE encoding. |
scope/patch.py |
Installs SCoPE attention into both Wan2.2-A14B experts. |
scope/pipeline.py |
Wan2.2-A14B inference pipeline with camera conditioning. |
scope/weights.py |
Loads the complete SCoPE model from sharded weights. |
scope/config.py |
Inference defaults matching the released checkpoint. |
scope/training.py |
Config-driven RDPO high-only training loop. |
scope/data/ |
Four native dataset loaders + the shared pose convention. |
configs/ |
Training YAML and the default negative prompt. |
scripts/ |
overlay_camera.py, estimate_near_depth.py, build_omniworld_index.py, train.sh, inference.sh. |
examples/ |
manifest.json, example first frames, and camera trajectories. |
assets/ |
Teaser image and demo GIFs. |
diffsynth/ |
Vendored DiffSynth code required by inference. |
tests/ |
Unit tests. |
Installation
SCoPE requires Python 3.11 and a CUDA-capable GPU. The released weights were trained and
evaluated with PyTorch 2.9.1 (CUDA 12.8); because changing the PyTorch version can change the
numerical output, we recommend reproducing this exact environment.
Recommended — uv (resolves the pinned CUDA 12.8 torch build):
git clone https://github.com/TencentARC/SCoPE.git
cd SCoPE
uv sync
source .venv/bin/activate
Alternative — pip with the PyTorch CUDA 12.8 wheel index:
conda create -n scope python=3.11 -y
conda activate scope
pip install -e . --extra-index-url https://download.pytorch.org/whl/cu128
Optional extras:
pip install -e .[viz] installs matplotlib, needed by the camera-control overlay tool
scripts/overlay_camera.py.- FlashAttention is optional; the code falls back to PyTorch SDPA when it is not available.
Model download
Download the SCoPE model from Hugging Face:
pip install -U huggingface_hub
hf download TencentARC/SCoPE --local-dir checkpoints/SCoPE
The checkpoint is approximately 67 GB. Keep both the checkpoint and the Hugging Face cache on
local storage.
Inference
All inference is driven by inference.py. The repository ships example first frames, prompts, and
camera trajectories under examples/, so every command below runs out of the box. See
Inference options for the full flag list.
Quick start — choose a trajectory
Input: one bundled case.
Output: one 81-frame video using the camera trajectory selected in the terminal
(480 × 832, seed 42).
Pass a case without --trajectory to see its available camera poses and choose one by number or
trajectory id:
python inference.py \
  --model_path checkpoints/SCoPE \
  --case omni-misty-forest \
  --output_path outputs/omni-misty-forest__truck_right.mp4
The terminal will prompt before loading the model:
Available trajectories for 'omni-misty-forest':
  [1] real_split0_000041  (poses/omni-misty-forest/real_split0_000041.npy)
  [2] real_split0_000081  (poses/omni-misty-forest/real_split0_000081.npy)
  [3] real_split0_000161  (poses/omni-misty-forest/real_split0_000161.npy)
  [4] snake_fwd  (poses/omni-misty-forest/snake_fwd.npy)
  [5] truck_right  (poses/omni-misty-forest/truck_right.npy)
Select a trajectory [1-5] or enter its id: 5
| Input first frame |
Output (truck_right) |
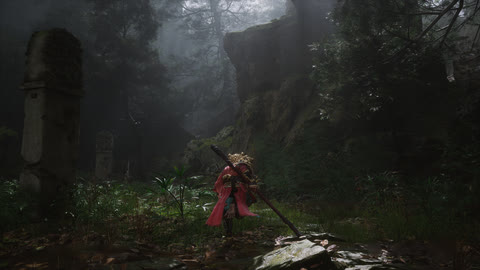 |
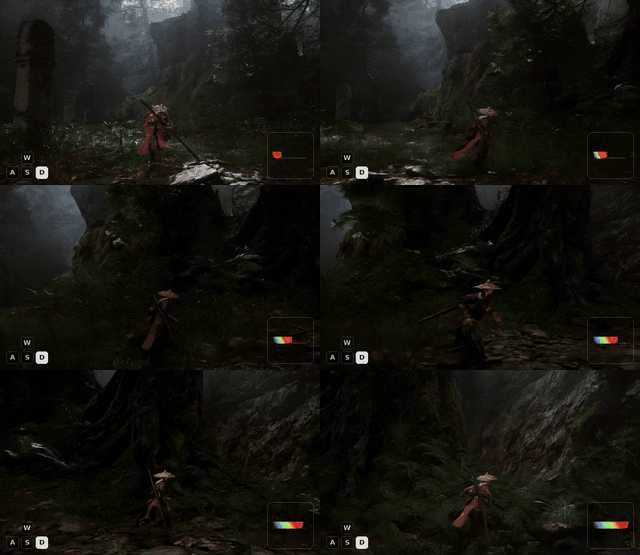 |
The output is shown with the camera-control HUD overlay (see
Visualizing camera control); the bottom-right inset traces the
driving camera path.
Specify a trajectory directly
This is the non-interactive form of the same bundled-case inference. Pass the trajectory id
directly for scripts, cluster jobs, and exactly reproducible commands:
python inference.py \
  --model_path checkpoints/SCoPE \
  --case omni-misty-forest \
  --trajectory truck_right \
  --output_path outputs/omni-misty-forest__truck_right.mp4
bash scripts/inference.sh wraps this explicit form. It generates the same result as choosing
truck_right in the Quick Start selector.
All trajectories for one scene
Input: one first frame + every trajectory bundled for that scene.
Output: a series of videos (one per trajectory), generated with a single model load.
python inference.py \
  --model_path checkpoints/SCoPE \
  --case omni-misty-forest \
  --all_trajectories \
  --output_dir outputs/omni-misty-forest
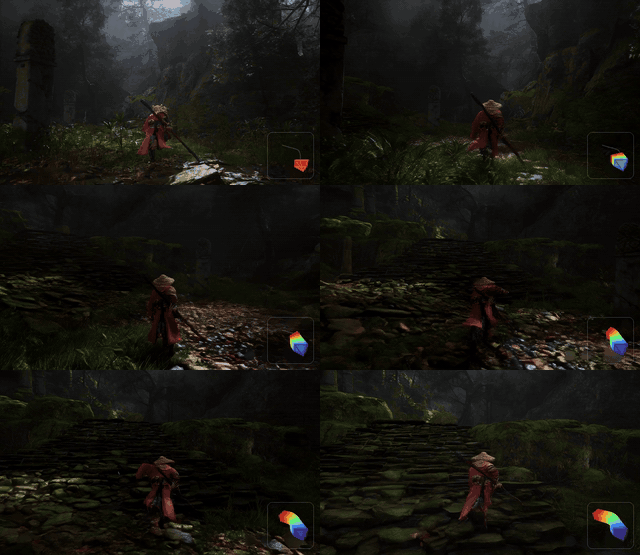
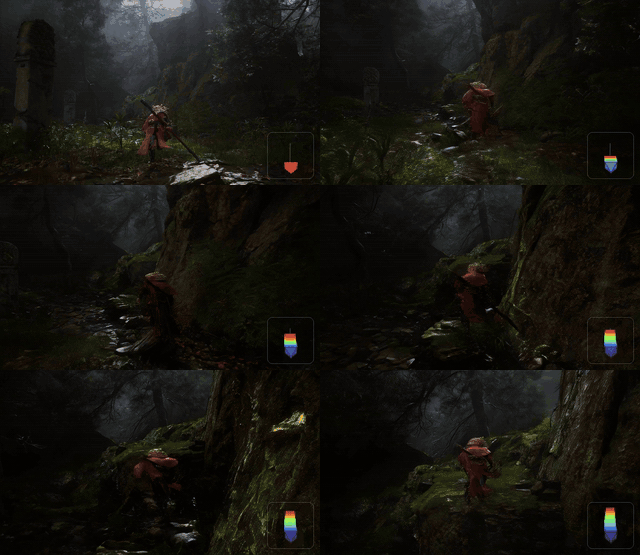
The same first frame driven by all five bundled trajectories. truck_right and snake_fwd are
synthetic camera paths; GT 1–3 are the scene's own recorded OmniWorld camera paths (use their
--trajectory ids to reproduce them).
|
|
|
| Input first frame |
truck_right |
snake_fwd |
|
|
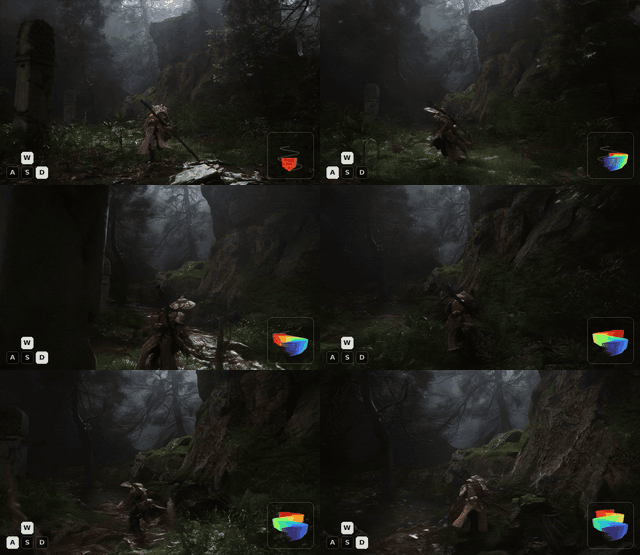 |
GT 1 · real_split0_000041 |
GT 2 · real_split0_000081 |
GT 3 · real_split0_000161 |
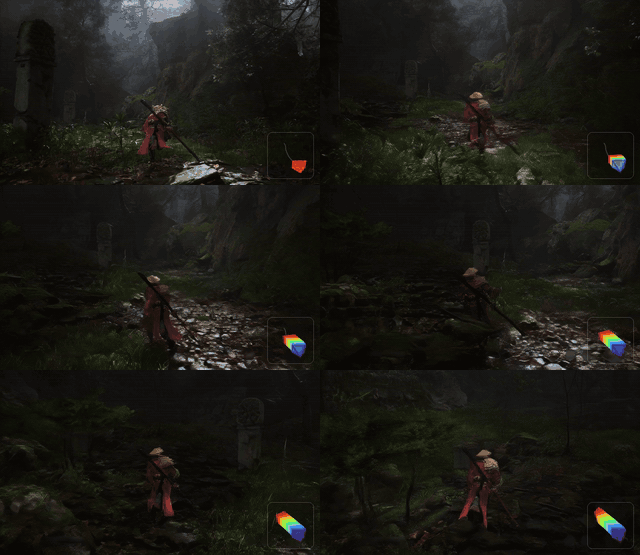 |
 |
 |
Existing MP4 files are skipped, so interrupted runs can be resumed with the same command.
Existing case with an external trajectory
Use a bundled case's first frame, prompt, x_fov, and xi, but drive it with any compatible
local pose file. This avoids copying case metadata or searching for a matching pose directory.
python inference.py \
  --model_path checkpoints/SCoPE \
  --case omni-misty-forest \
  --camera_path path/to/external_camera_poses.npy \
  --output_path outputs/omni-misty-forest__external.mp4
The pose must still use the same [81,3,4] or [81,4,4] OpenCV camera-to-world convention.
SCoPE validates its shape and finite values before loading model weights. Use --x_fov or --xi
only when the external camera requires values different from the selected case. --trajectory
and --camera_path are alternative pose sources and cannot be used together.
Custom image and trajectory
Input: your own first frame, prompt, OpenCV camera-to-world poses, and horizontal FOV.
Output: one video following your trajectory.
python inference.py \
  --model_path checkpoints/SCoPE \
  --input_image path/to/first_frame.png \
  --prompt "A person walks along a misty forest trail." \
  --camera_path path/to/camera_poses.npy \
  --x_fov 1.11847 \
  --output_path outputs/custom.mp4
camera_poses.npy must have shape [81, 3, 4] or [81, 4, 4] and use OpenCV camera-to-world
coordinates. x_fov is the horizontal field of view in radians. Pinhole cameras use the default
xi=0; unified camera models can set --xi explicitly.
Visualizing camera control
Input: a generated video + the camera trajectory used to produce it.
Output: the same video with a camera-frustum HUD (and optional WASD keys) composited in.
scripts/overlay_camera.py derives the overlay from the pose: it renders the accumulated camera
frustum in the bottom-right corner and, for keyboard-style trajectories, the active WASD keys in
the bottom-left corner. At runtime it also prints a lightweight WASD assessment; when horizontal
motion is too small or too few frames map to an active key, it recommends --hide_wasd. The
assessment is advisory and does not change the output automatically. Every demo video in this
README was produced with this tool.
# Camera-frustum HUD only (recommended for scenic / dolly / orbit motions):
python scripts/overlay_camera.py outputs/omni-misty-forest__truck_right.mp4 \
  --pose examples/poses/omni-misty-forest/truck_right.npy \
  --out_dir outputs/overlay --hide_wasd

# Add the WASD key indicator (for keyboard-style / drone trajectories):
python scripts/overlay_camera.py outputs/clip.mp4 --pose path/to/pose.npy --out_dir outputs/overlay
Requires the viz extra (pip install -e .[viz]) and ffmpeg on PATH.
Inference options
| Option |
Default |
Description |
--model_path |
TencentARC/SCoPE |
Local path or Hugging Face id of the SCoPE model. |
--manifest |
examples/manifest.json |
Example manifest for --case / --trajectory. |
--case |
first case |
Example case id; when supplied alone, choose its trajectory interactively. |
--trajectory |
– |
Optional bundled trajectory id; bypasses the interactive selector and is required for non-interactive jobs using --case. |
--all_trajectories |
off |
Generate every trajectory of --case (uses --output_dir). |
--input_image |
– |
Custom first frame (with --prompt, --camera_path, --x_fov). |
--prompt |
– |
Custom text prompt. |
--camera_path |
– |
External pose .npy; use with --case or all custom-input flags. |
--x_fov |
case value / required for custom |
Horizontal field of view in radians. |
--xi |
case value / 0.0 for custom |
Unified-camera distortion parameter. |
--output_path |
outputs/sample.mp4 |
Output file for a single generation. |
--output_dir |
outputs |
Output directory for --all_trajectories. |
--overwrite |
off |
Regenerate existing outputs (--all_trajectories). |
--negative_prompt |
configs/negative_prompt.txt |
Negative prompt file. |
--seed |
42 |
Random seed. |
--cache_dir |
– |
Hugging Face cache directory. |
--vram_limit_gb |
– |
VRAM budget for offloading (enables VRAM management). |
Training
The public training entry reproduces the RDPO high-noise recipe used for SCoPE: only the
high-noise expert is optimized, and training timesteps are sampled from [0.9, 1.0). The released
mixture concatenates four datasets — RealEstate10K, DL3DV, PanShot, and OmniWorld — each read by
its own native loader in scope/data/.
A run is described by a single YAML config:
python train.py --config configs/train_rdpo_high_only.yaml --num_gpus 8
scripts/train.sh wraps this command. Multi-GPU training uses FSDP automatically; the model is
large, so multi-GPU training is strongly recommended.
Training options
| Option |
Default |
Description |
--config |
configs/train_rdpo_high_only.yaml |
Training YAML (data mixture, trainer, optimizer). |
--model_path |
from config |
Override the config model_path. |
--output_dir |
from config |
Override the checkpoint/output directory. |
--num_gpus |
from config (8) |
Override GPU count; >1 enables FSDP full-shard. |
--max_steps |
from config (10000) |
Override the number of training steps. |
--resume_from_checkpoint |
– |
Resume from an existing checkpoint. |
Camera convention
Every dataset is normalized with the same convention as RealEstate10K:
- Poses are OpenCV camera-to-world matrices, expressed relative to the first camera (the
first frame becomes the identity pose).
- Translation is preprocessed by
trajectory_scale / near_depth, where near_depth is a
per-clip near-distance depth estimate. This normalization only makes the translation magnitude
comparable across datasets — absolute scale is handled inside the model by the learned scale
gate, so trajectory_scale stays 1.0 for all datasets.
Data preparation
Point the config at your local dataset roots, then precompute the per-clip near_depth for each
dataset with the shared estimator (RAFT optical flow + two-view triangulation):
# OmniWorld first needs a validity index over its training windows:
python scripts/build_omniworld_index.py --data_root /path/to/OmniWorld \
  --output /path/to/OmniWorld/valid_entries.json

# Estimate per-clip near-depth for each dataset (repeat per dataset):
python scripts/estimate_near_depth.py --dataset realestate10k \
  --data_root /path/to/RealEstate10K --split train \
  --output /path/to/RealEstate10K/near_depth_train.json
The same estimate_near_depth.py handles all four datasets via --dataset {realestate10k,dl3dv, panshot,omniworld}. See configs/train_rdpo_high_only.yaml for the full list of per-dataset
paths and options (sample_stride is random ≤4 for RealEstate10K and 1 for the others).
Citation
@article{yin2026scope,
  title={SCoPE: Sightline-Coordinate Positional Encoding for Video Diffusion Transformers},
  author={Yin, Minghao and Lu, Jiahao and Hu, Wenbo and Zhao, Wang and Shan, Ying and Han, Kai},
  year={2026}
}
Acknowledgements
SCoPE is built on Wan2.2 and
DiffSynth-Studio. We thank the authors and
contributors of these projects.
License
SCoPE is released under the Apache-2.0 License.






 SCoPE 是一个研究发布项目,为预训练的视频扩散 transformer(Wan2.2-I2V-A14B)加入了相机控制能力:给定第一帧画面、一段文字描述和一条相机轨迹,它会生成一段按所要求相机运动方式呈现的视频。