



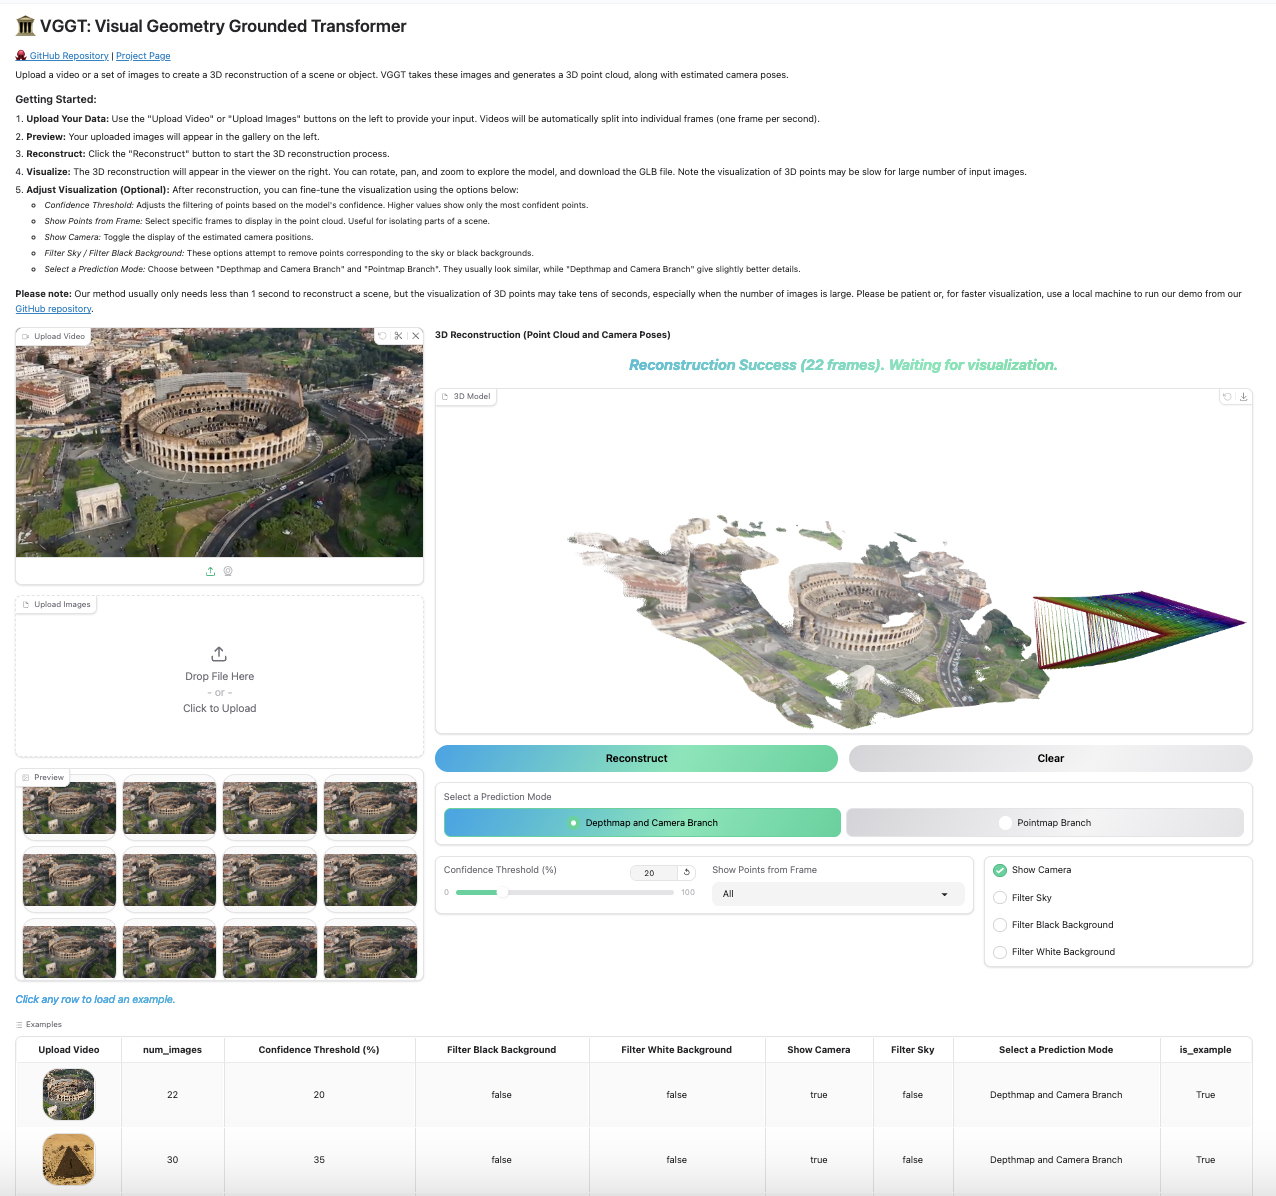
Что это такое?
 VGGT (Visual Geometry Grounded Transformer) — это нейронная сеть прямого распространения, которая напрямую выводит 3D-характеристики сцены: внутренние и внешние параметры камеры, карты глубины, карты точек и треки 3D-точек. Работает по одному, нескольким или сотням изображений и выдаёт результат за считанные секунды. Она получила награду «Лучшая статья» на CVPR 2025.
VGGT (Visual Geometry Grounded Transformer) — это нейронная сеть прямого распространения, которая напрямую выводит 3D-характеристики сцены: внутренние и внешние параметры камеры, карты глубины, карты точек и треки 3D-точек. Работает по одному, нескольким или сотням изображений и выдаёт результат за считанные секунды. Она получила награду «Лучшая статья» на CVPR 2025.Это готовое приложение или модель, которую я вызываю из кода на Python?Это модель и библиотека на Python, которую вы загружаете и запускаете несколькими строками кода; веса автоматически загружаются с Hugging Face. Также в комплекте есть необязательное веб-демо на Gradio и 3D-просмотрщик Viser для интерактивного изучения, но это дополнения, а не основной интерфейс.
Это модель и библиотека на Python, которую вы загружаете и запускаете несколькими строками кода; веса автоматически загружаются с Hugging Face. Также в комплекте есть необязательное веб-демо на Gradio и 3D-просмотрщик Viser для интерактивного изучения, но это дополнения, а не основной интерфейс.Как запустить VGGT?Клонируйте репозиторий и установите зависимости (torch, torchvision, numpy, Pillow, huggingface_hub) или установите VGGT напрямую как пакет pip. Веса модели затем автоматически загружаются с Hugging Face при первом запуске.
Клонируйте репозиторий и установите зависимости (torch, torchvision, numpy, Pillow, huggingface_hub) или установите VGGT напрямую как пакет pip. Веса модели затем автоматически загружаются с Hugging Face при первом запуске.Какие библиотеки нужны перед запуском?Для запуска инференса обязательны torch, torchvision, numpy, Pillow и huggingface_hub. Дополнительные пакеты нужны только для демо с визуализацией (Gradio, Viser) или для экспорта в COLMAP и gsplat.
Для запуска инференса обязательны torch, torchvision, numpy, Pillow и huggingface_hub. Дополнительные пакеты нужны только для демо с визуализацией (Gradio, Viser) или для экспорта в COLMAP и gsplat.Можно ли использовать VGGT в коммерческих проектах?Коммерческое использование разрешено только для отдельно выпущенной контрольной точки VGGT-1B-Commercial (кроме военных применений), и для доступа нужно подать заявку через процесс одобрения, похожий на процесс для LLaMA. Исходная контрольная точка остаётся только для некоммерческого использования и исследований.
Коммерческое использование разрешено только для отдельно выпущенной контрольной точки VGGT-1B-Commercial (кроме военных применений), и для доступа нужно подать заявку через процесс одобрения, похожий на процесс для LLaMA. Исходная контрольная точка остаётся только для некоммерческого использования и исследований.Что с лицензией?По состоянию на июль 2025 года лицензия на код репозитория была обновлена и разрешает коммерческое использование (кроме военных применений). Однако коммерческие права на сами веса модели действуют только для отдельной контрольной точки VGGT-1B-Commercial, которую можно получить через процедуру заявки.
По состоянию на июль 2025 года лицензия на код репозитория была обновлена и разрешает коммерческое использование (кроме военных применений). Однако коммерческие права на сами веса модели действуют только для отдельной контрольной точки VGGT-1B-Commercial, которую можно получить через процедуру заявки.Что такое VGGT-Omega?Это преемник VGGT следующего поколения, анонсированный в мае 2026 года. Он устраняет неэффективность использования памяти, благодаря чему тот же бюджет GPU теперь поддерживает примерно в 2–3 раза больше входных кадров.
Это преемник VGGT следующего поколения, анонсированный в мае 2026 года. Он устраняет неэффективность использования памяти, благодаря чему тот же бюджет GPU теперь поддерживает примерно в 2–3 раза больше входных кадров.Насколько быстро выполняется сама 3D-реконструкция?VGGT обычно восстанавливает сцену менее чем за секунду. Более долгое ожидание в демо связано с отрисовкой облака точек сторонними инструментами, а не с инференсом модели.
VGGT обычно восстанавливает сцену менее чем за секунду. Более долгое ожидание в демо связано с отрисовкой облака точек сторонними инструментами, а не с инференсом модели.Может ли она восстановить 3D по одному изображению?Да. Хотя VGGT никогда не обучали на одиночных видах, по качеству она сопоставима со специализированными методами монокулярной оценки глубины, такими как DepthAnything v2 или MoGe, а в ряде случаев и превосходит их.
Да. Хотя VGGT никогда не обучали на одиночных видах, по качеству она сопоставима со специализированными методами монокулярной оценки глубины, такими как DepthAnything v2 или MoGe, а в ряде случаев и превосходит их.Можно ли передать результат в инструменты Gaussian Splatting?Да. VGGT может напрямую экспортировать предсказания камеры и точек в формат COLMAP, который напрямую подключается к gsplat для обучения Gaussian Splatting.
Да. VGGT может напрямую экспортировать предсказания камеры и точек в формат COLMAP, который напрямую подключается к gsplat для обучения Gaussian Splatting.What are similar projects?vggt-omega, pointdit, ml-sharp, lingbot-map, TRELLIS, nerfstudio, Depth-Anything-3, WorldSculpt
vggt-omega, pointdit, ml-sharp, lingbot-map, TRELLIS, nerfstudio, Depth-Anything-3, WorldSculptWhich topics is it in?point-cloud, meta, gaussian-splatting, 3d-reconstruction, computer-graphics, gradio, pretrained-models, paper, neural-network, 3d, academic-research, transformer
point-cloud, meta, gaussian-splatting, 3d-reconstruction, computer-graphics, gradio, pretrained-models, paper, neural-network, 3d, academic-research, transformer