
nerf README

The project's README from github.com/bmild/nerf. As one markdown file: README.md.

NeRF: Neural Radiance Fields

Project Page | Video | Paper | Data

Open Tiny-NeRF in Colab
Tensorflow implementation of optimizing a neural representation for a single scene and rendering new views.

NeRF: Representing Scenes as Neural Radiance Fields for View Synthesis
Ben Mildenhall*1, Pratul P. Srinivasan*1, Matthew Tancik*1, Jonathan T. Barron2, Ravi Ramamoorthi3, Ren Ng1
1UC Berkeley, 2Google Research, 3UC San Diego
*denotes equal contribution
in ECCV 2020 (Oral Presentation, Best Paper Honorable Mention)

TL;DR quickstart

To setup a conda environment, download example training data, begin the training process, and launch Tensorboard:

conda env create -f environment.yml
conda activate nerf
bash download_example_data.sh
python run_nerf.py --config config_fern.txt
tensorboard --logdir=logs/summaries --port=6006

If everything works without errors, you can now go to localhost:6006 in your browser and watch the "Fern" scene train.

Setup

Python 3 dependencies:

The LLFF data loader requires ImageMagick.

We provide a conda environment setup file including all of the above dependencies. Create the conda environment nerf by running:

conda env create -f environment.yml

You will also need the LLFF code (and COLMAP) set up to compute poses if you want to run on your own real data.

What is a NeRF?

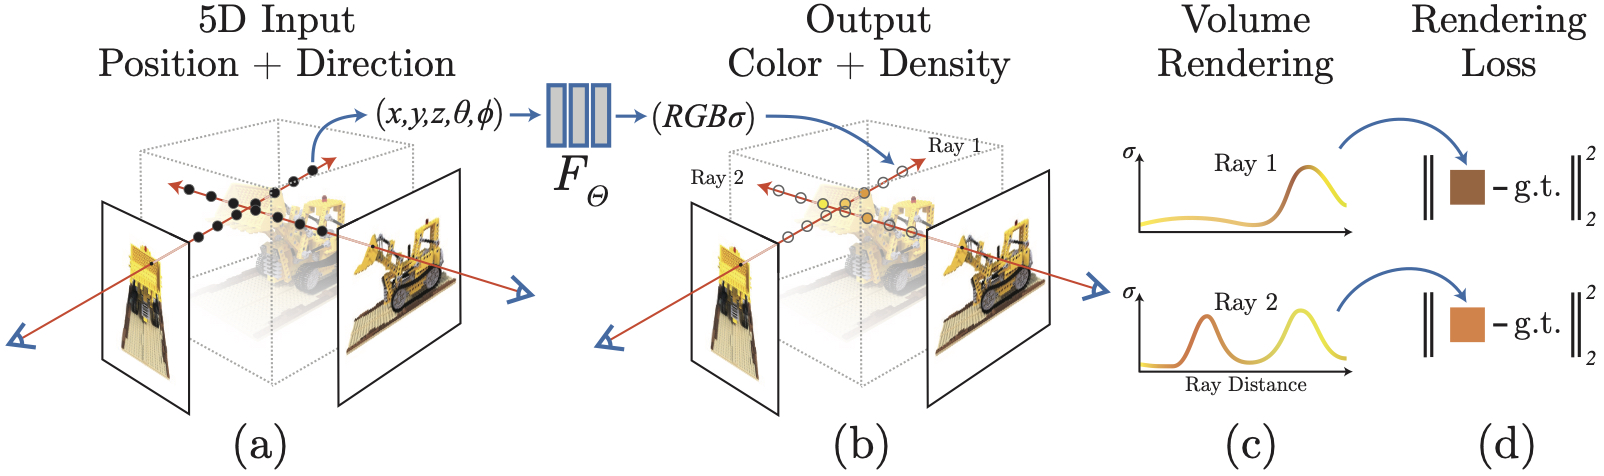
A neural radiance field is a simple fully connected network (weights are ~5MB) trained to reproduce input views of a single scene using a rendering loss. The network directly maps from spatial location and viewing direction (5D input) to color and opacity (4D output), acting as the "volume" so we can use volume rendering to differentiably render new views.

Optimizing a NeRF takes between a few hours and a day or two (depending on resolution) and only requires a single GPU. Rendering an image from an optimized NeRF takes somewhere between less than a second and ~30 seconds, again depending on resolution.

Running code

Here we show how to run our code on two example scenes. You can download the rest of the synthetic and real data used in the paper here.

Optimizing a NeRF

Run

bash download_example_data.sh

to get the our synthetic Lego dataset and the LLFF Fern dataset.

To optimize a low-res Fern NeRF:

python run_nerf.py --config config_fern.txt

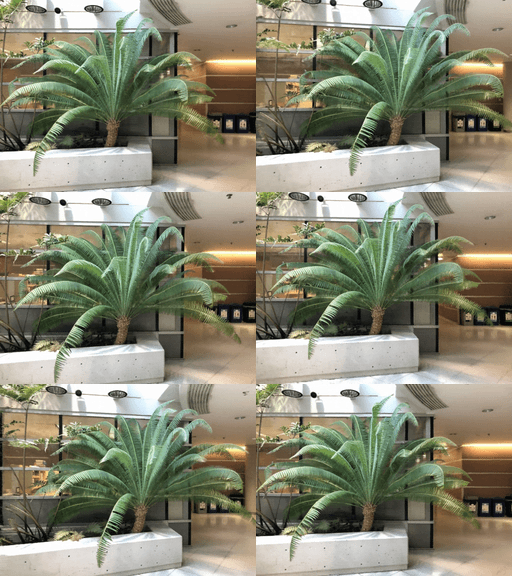
After 200k iterations (about 15 hours), you should get a video like this at logs/fern_test/fern_test_spiral_200000_rgb.mp4:

ferngif

To optimize a low-res Lego NeRF:

python run_nerf.py --config config_lego.txt

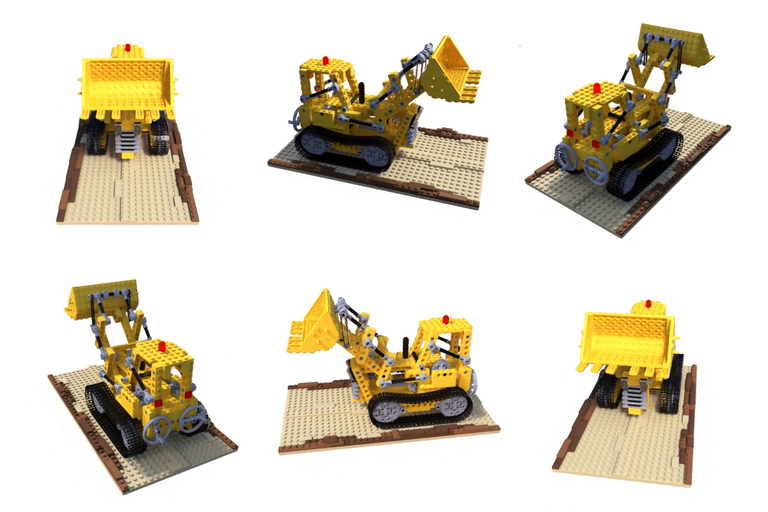
After 200k iterations, you should get a video like this:

legogif

Rendering a NeRF

Run

bash download_example_weights.sh

to get a pretrained high-res NeRF for the Fern dataset. Now you can use render_demo.ipynb to render new views.

Replicating the paper results

The example config files run at lower resolutions than the quantitative/qualitative results in the paper and video. To replicate the results from the paper, start with the config files in paper_configs/. Our synthetic Blender data and LLFF scenes are hosted here and the DeepVoxels data is hosted by Vincent Sitzmann here.

Extracting geometry from a NeRF

Check out extract_mesh.ipynb for an example of running marching cubes to extract a triangle mesh from a trained NeRF network. You'll need the install the PyMCubes package for marching cubes plus the trimesh and pyrender packages if you want to render the mesh inside the notebook:

pip install trimesh pyrender PyMCubes

Generating poses for your own scenes

Don't have poses?

We recommend using the imgs2poses.py script from the LLFF code. Then you can pass the base scene directory into our code using --datadir <myscene> along with -dataset_type llff. You can take a look at the config_fern.txt config file for example settings to use for a forward facing scene. For a spherically captured 360 scene, we recomment adding the --no_ndc --spherify --lindisp flags.

Already have poses!

In run_nerf.py and all other code, we use the same pose coordinate system as in OpenGL: the local camera coordinate system of an image is defined in a way that the X axis points to the right, the Y axis upwards, and the Z axis backwards as seen from the image.

Poses are stored as 3x4 numpy arrays that represent camera-to-world transformation matrices. The other data you will need is simple pinhole camera intrinsics (hwf = [height, width, focal length]) and near/far scene bounds. Take a look at our data loading code to see more.

Citation

@inproceedings{mildenhall2020nerf,
  title={NeRF: Representing Scenes as Neural Radiance Fields for View Synthesis},
  author={Ben Mildenhall and Pratul P. Srinivasan and Matthew Tancik and Jonathan T. Barron and Ravi Ramamoorthi and Ren Ng},
  year={2020},
  booktitle={ECCV},
}

nerf (bmild/nerf)

Searching Database…

11K ·GitHub
这是干什么的?NeRF 的官方 TensorFlow 实现。NeRF 是 ECCV 2020 的一项系统(最佳论文荣誉提名),它能学习单个场景的神经表示,并渲染出该场景的新视角。
这是可以导入的库,还是需要自己运行的研究代码?研究代码:Python 脚本(run_nerf.py),外加用于演示和网格提取的 Jupyter notebook。你需要克隆仓库、搭建它的 conda 环境,然后从命令行启动训练——没有 pip 包。
我怎么把它跑起来?用随附的配置文件创建 nerf conda 环境,运行提供的脚本下载示例训练数据,启动训练,然后在 localhost:6006 的 Tensorboard 里看着 Fern 场景训练。
开始之前需要装好哪些东西?Python 3 和 TensorFlow 1.15、matplotlib、numpy、imageio、configargparse——conda 文件里都包含了。LLFF 数据加载器还需要 ImageMagick;如果想在自己拍摄的真实场景上训练,还需要 LLFF 代码以及用来估计相机位姿的 COLMAP。
要等多久才能真正看到一个训练好的场景?要预留大量时间:示例运行需要 20 万次迭代,低分辨率下大约 15 小时。而且一个 NeRF 只绑定一个场景,每换一个新场景就得重新完整训练一次。
这东西需要很强的 GPU 吗?只要一块——README 说优化一个 NeRF 只需要单块 GPU。相比之下,用训练好的模型渲染新视角要快得多:每张图片不到一秒到 30 秒左右。
神经辐射场到底是什么?一个小型全连接网络(权重约 5MB),把 5 维输入——空间位置加上观察方向——映射为颜色和不透明度。把它当作一个体积,就能做可微渲染,从而复现并合成同一场景的新视角。
可以用我自己的照片来训练吗?可以。先用 LLFF 代码里的 imgs2poses.py 脚本(它调用 COLMAP)算出相机位姿,然后通过 --datadir 和 --datasettype llff 把训练器指向你的文件夹;如果是 360 度环拍的素材,再加上 --nondc --spherify --lindisp 这几个参数。
训练好的 NeRF 能导出真正的三维网格吗?可以——extractmesh.ipynb 会用 marching cubes 从训练好的网络中提取三角网格。它需要 PyMCubes 包;如果想在 notebook 里渲染网格,还需要 trimesh 和 pyrender。
一定要从头训练才能看到效果吗?不用——仓库里提供了 Fern 场景的高分辨率预训练 NeRF 链接,renderdemo.ipynb 可以用它渲染新视角。想要论文级别的完整效果,可以从 paperconfigs/ 里的配置入手。
Creator
bmild
Size
2.9 MB
Stars
11K
Updated
CommitApr 12
Age
6y
Commits · 90 Days