Design · Develop · Deploy · Iterate
Join 40K+ developers in learning how to responsibly deliver value with ML.
Lessons
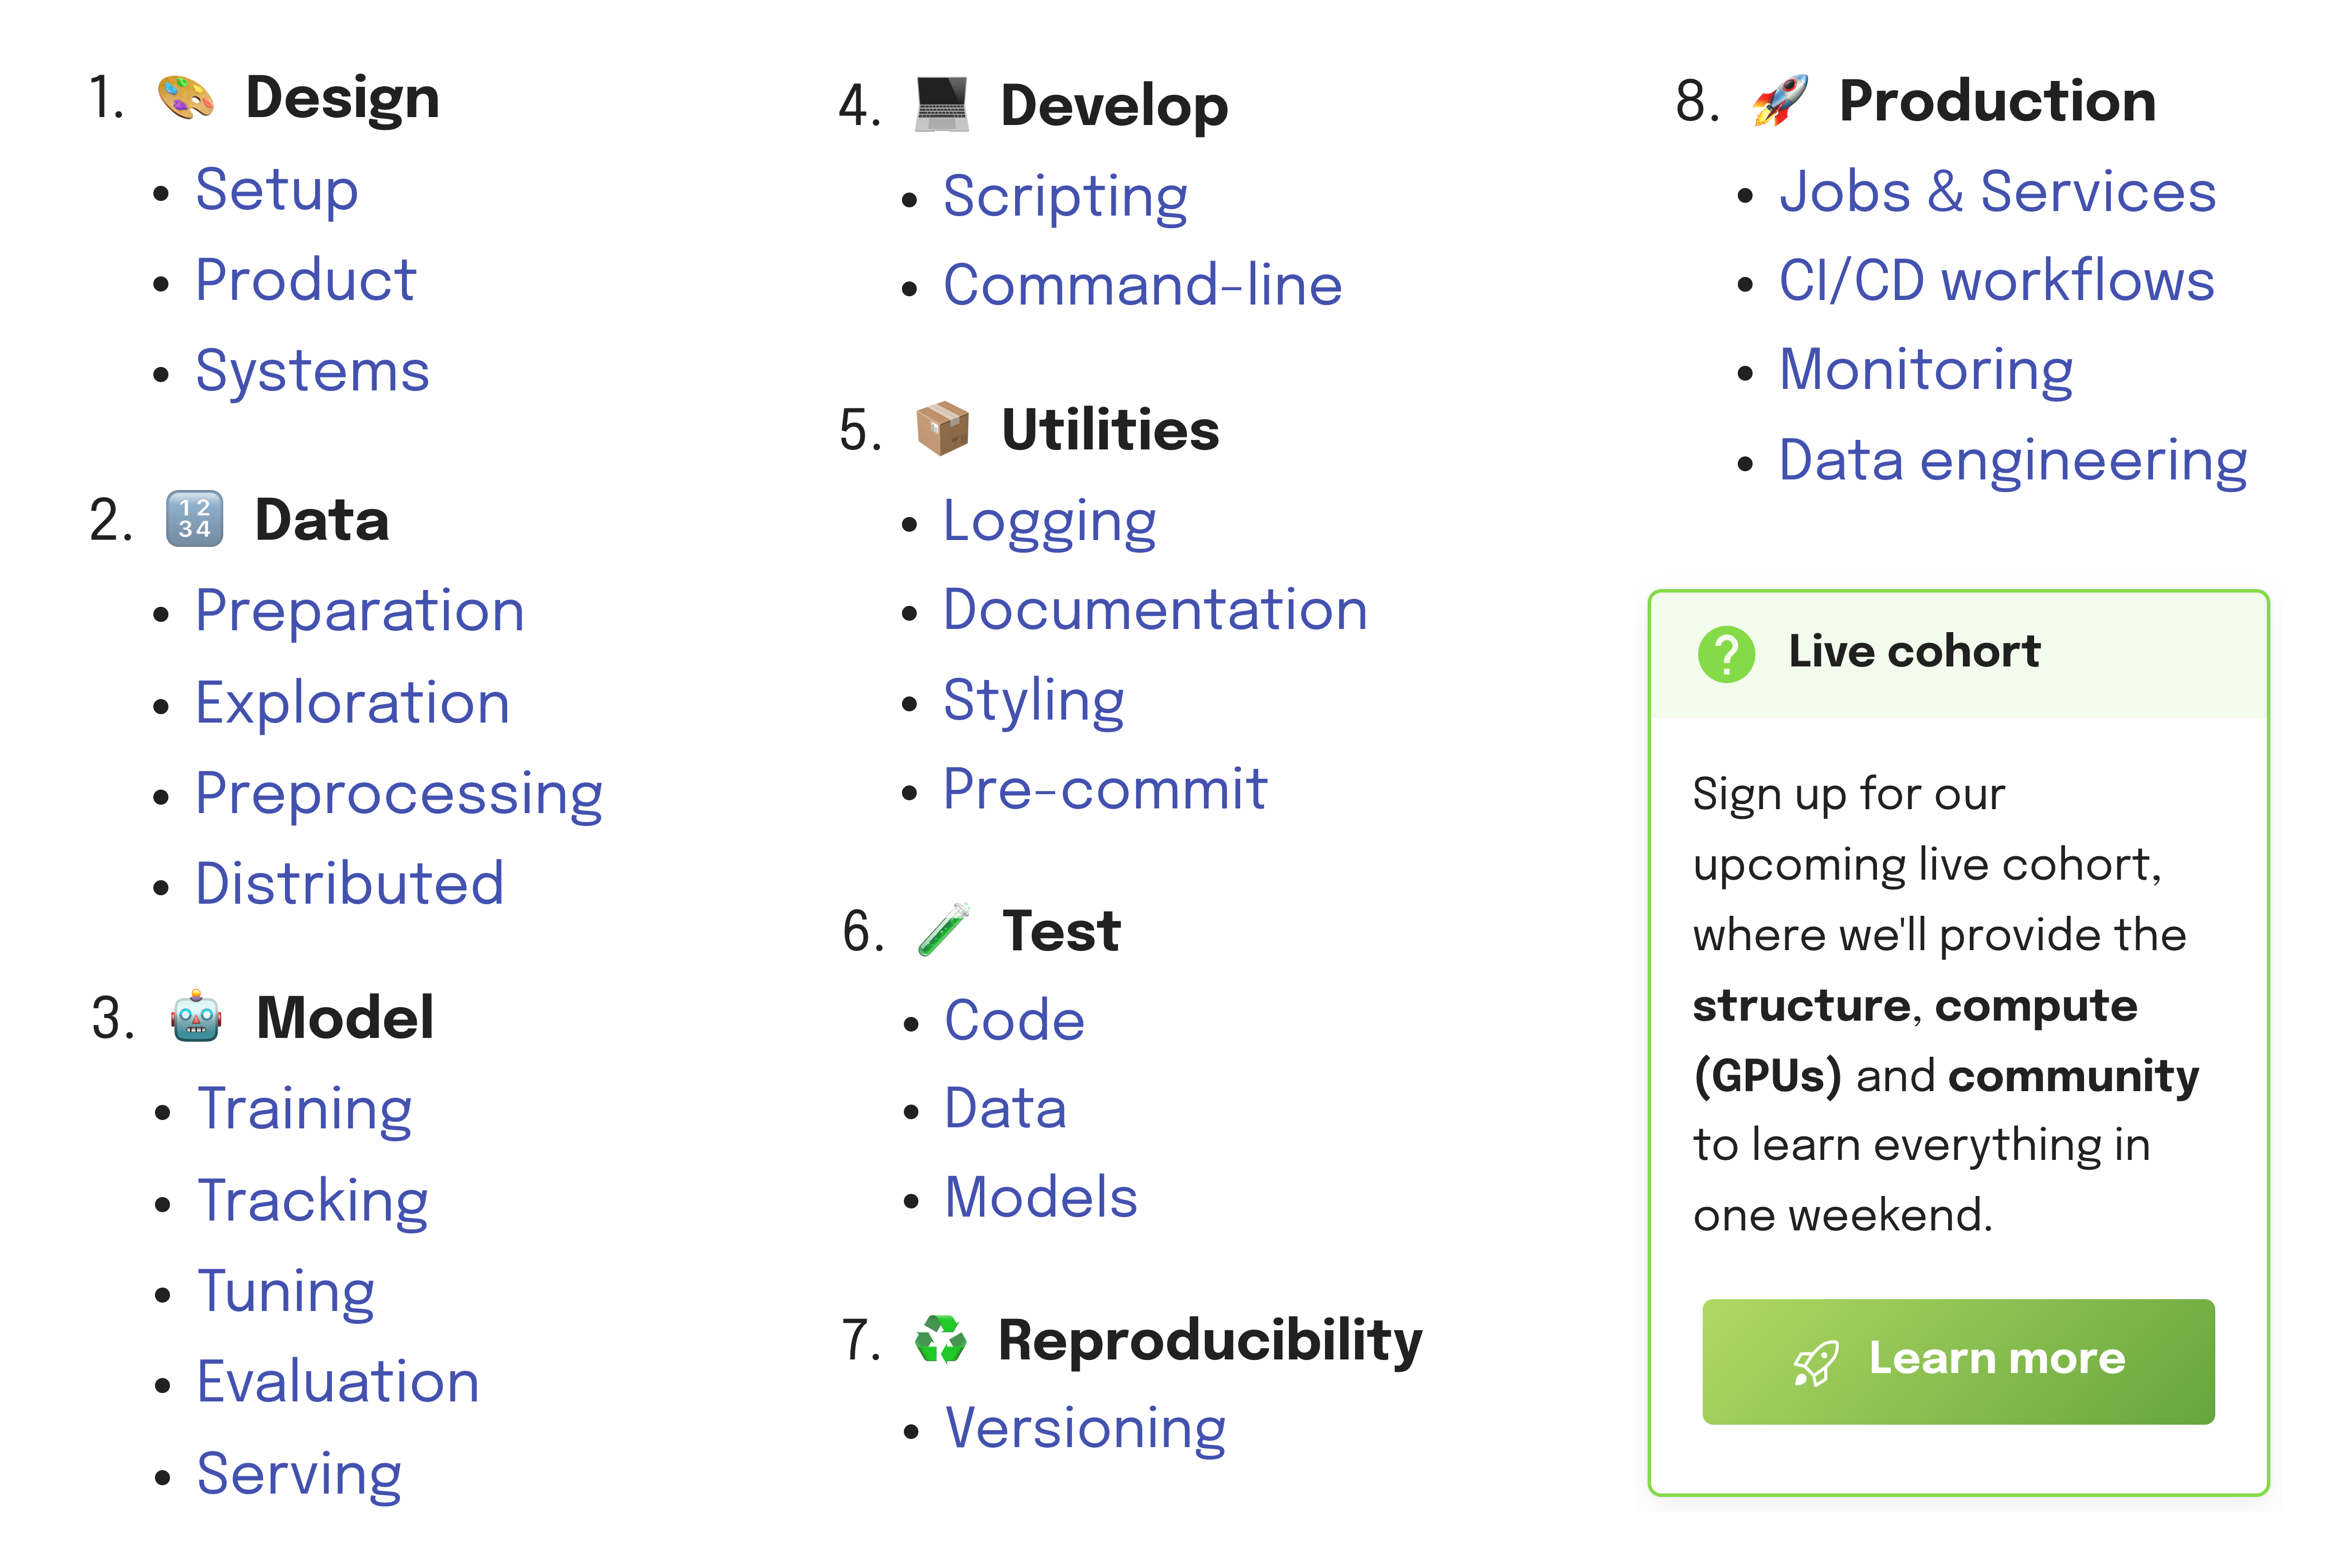
Learn how to combine machine learning with software engineering to design, develop, deploy and iterate on production-grade ML applications.
Overview
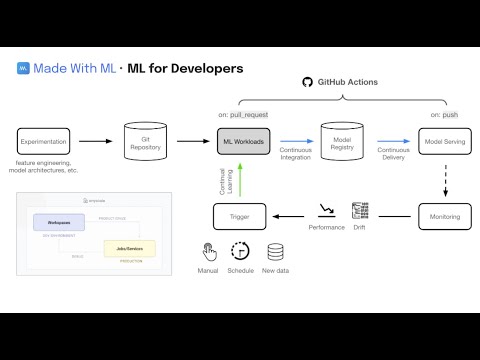
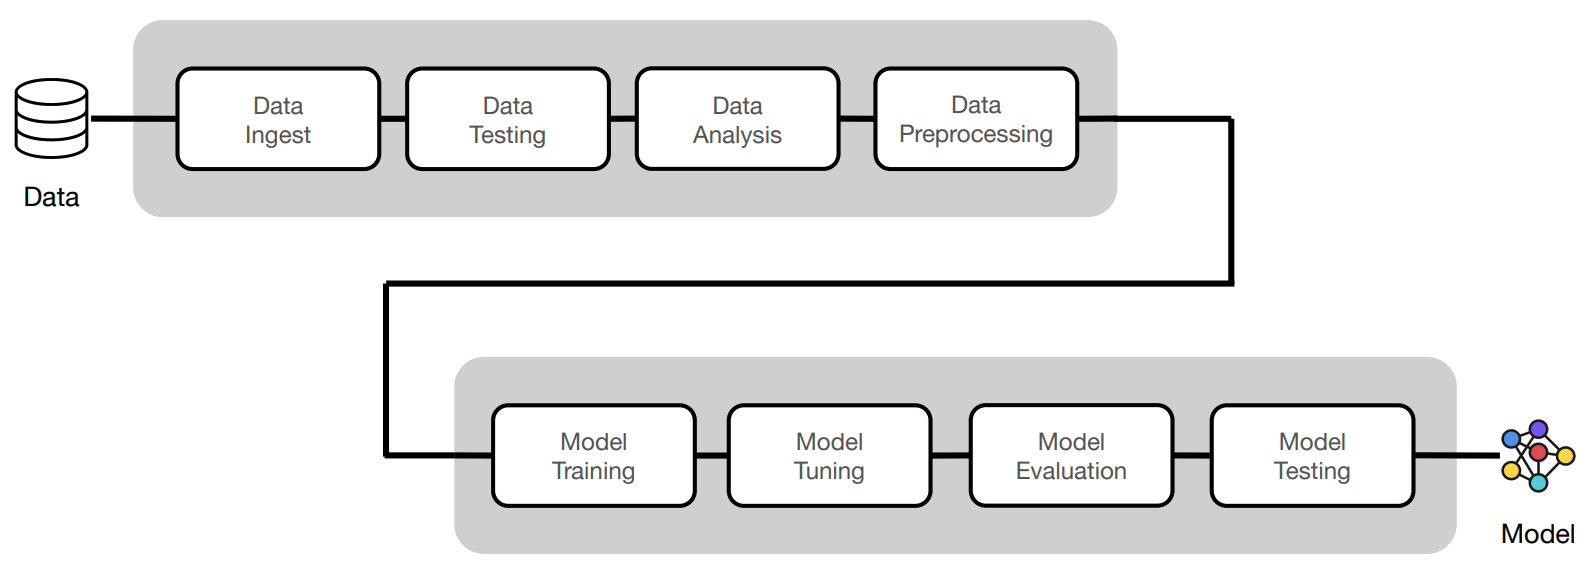
In this course, we'll go from experimentation (design + development) to production (deployment + iteration). We'll do this iteratively by motivating the components that will enable us to build a reliable production system.
 Be sure to watch the video below for a quick overview of what we'll be building.
- 💡 First principles: before we jump straight into the code, we develop a first principles understanding for every machine learning concept.
- 💻 Best practices: implement software engineering best practices as we develop and deploy our machine learning models.
- 📈 Scale: easily scale ML workloads (data, train, tune, serve) in Python without having to learn completely new languages.
- ⚙️ MLOps: connect MLOps components (tracking, testing, serving, orchestration, etc.) as we build an end-to-end machine learning system.
- 🚀 Dev to Prod: learn how to quickly and reliably go from development to production without any changes to our code or infra management.
- 🐙 CI/CD: learn how to create mature CI/CD workflows to continuously train and deploy better models in a modular way that integrates with any stack.
Audience
Machine learning is not a separate industry, instead, it's a powerful way of thinking about data that's not reserved for any one type of person.
- 👩💻 All developers: whether software/infra engineer or data scientist, ML is increasingly becoming a key part of the products that you'll be developing.
- 👩🎓 College graduates: learn the practical skills required for industry and bridge gap between the university curriculum and what industry expects.
- 👩💼 Product/Leadership: who want to develop a technical foundation so that they can build amazing (and reliable) products powered by machine learning.
Set up
Be sure to go through the course for a much more detailed walkthrough of the content on this repository. We will have instructions for both local laptop and Anyscale clusters for the sections below, so be sure to toggle the ► dropdown based on what you're using (Anyscale instructions will be toggled on by default). If you do want to run this course with Anyscale, where we'll provide the structure, compute (GPUs) and community to learn everything in one day, join our next upcoming live cohort → sign up here!
Cluster
We'll start by setting up our cluster with the environment and compute configurations.
Local
Your personal laptop (single machine) will act as the cluster, where one CPU will be the head node and some of the remaining CPU will be the worker nodes. All of the code in this course will work in any personal laptop though it will be slower than executing the same workloads on a larger cluster.
Anyscale
We can create an Anyscale Workspace using the webpage UI.
- Workspace name: `madewithml`
- Project: `madewithml`
- Cluster environment name: `madewithml-cluster-env`
# Toggle `Select from saved configurations`
- Compute config: `madewithml-cluster-compute-g5.4xlarge`
Alternatively, we can use the CLI to create the workspace via anyscale workspace create ...
Other (cloud platforms, K8s, on-prem)
If you don't want to do this course locally or via Anyscale, you have the following options:
Git setup
Create a repository by following these instructions: Create a new repository → name it Made-With-ML → Toggle Add a README file (very important as this creates a main branch) → Click Create repository (scroll down)
Now we're ready to clone the repository that has all of our code:
git clone https://github.com/GokuMohandas/Made-With-ML.git .
Credentials
touch .env
# Inside .env
GITHUB_USERNAME="CHANGE_THIS_TO_YOUR_USERNAME"  # ← CHANGE THIS
source .env
Virtual environment
Local
export PYTHONPATH=$PYTHONPATH:$PWD
python3 -m venv venv  # recommend using Python 3.10
source venv/bin/activate  # on Windows: venv\Scripts\activate
python3 -m pip install --upgrade pip setuptools wheel
python3 -m pip install -r requirements.txt
pre-commit install
pre-commit autoupdate
Highly recommend using Python 3.10 and using pyenv (mac) or pyenv-win (windows).
Anyscale
Our environment with the appropriate Python version and libraries is already all set for us through the cluster environment we used when setting up our Anyscale Workspace. So we just need to run these commands:
export PYTHONPATH=$PYTHONPATH:$PWD
pre-commit install
pre-commit autoupdate
Notebook
Start by exploring the jupyter notebook to interactively walkthrough the core machine learning workloads.
Local
# Start notebook
jupyter lab notebooks/madewithml.ipynb
Anyscale
Click on the Jupyter icon  at the top right corner of our Anyscale Workspace page and this will open up our JupyterLab instance in a new tab. Then navigate to the
 notebooks directory and open up the madewithml.ipynb notebook.
Scripts
Now we'll execute the same workloads using the clean Python scripts following software engineering best practices (testing, documentation, logging, serving, versioning, etc.) The code we've implemented in our notebook will be refactored into the following scripts:
madewithml
├── config.py
├── data.py
├── evaluate.py
├── models.py
├── predict.py
├── serve.py
├── train.py
├── tune.py
└── utils.py
Note: Change the --num-workers, --cpu-per-worker, and --gpu-per-worker input argument values below based on your system's resources. For example, if you're on a local laptop, a reasonable configuration would be --num-workers 6 --cpu-per-worker 1 --gpu-per-worker 0.
Training
export EXPERIMENT_NAME="llm"
export DATASET_LOC="https://raw.githubusercontent.com/GokuMohandas/Made-With-ML/main/datasets/dataset.csv"
export TRAIN_LOOP_CONFIG='{"dropout_p": 0.5, "lr": 1e-4, "lr_factor": 0.8, "lr_patience": 3}'
python madewithml/train.py \
    --experiment-name "$EXPERIMENT_NAME" \
    --dataset-loc "$DATASET_LOC" \
    --train-loop-config "$TRAIN_LOOP_CONFIG" \
    --num-workers 1 \
    --cpu-per-worker 3 \
    --gpu-per-worker 1 \
    --num-epochs 10 \
    --batch-size 256 \
    --results-fp results/training_results.json
Tuning
export EXPERIMENT_NAME="llm"
export DATASET_LOC="https://raw.githubusercontent.com/GokuMohandas/Made-With-ML/main/datasets/dataset.csv"
export TRAIN_LOOP_CONFIG='{"dropout_p": 0.5, "lr": 1e-4, "lr_factor": 0.8, "lr_patience": 3}'
export INITIAL_PARAMS="[{\"train_loop_config\": $TRAIN_LOOP_CONFIG}]"
python madewithml/tune.py \
    --experiment-name "$EXPERIMENT_NAME" \
    --dataset-loc "$DATASET_LOC" \
    --initial-params "$INITIAL_PARAMS" \
    --num-runs 2 \
    --num-workers 1 \
    --cpu-per-worker 3 \
    --gpu-per-worker 1 \
    --num-epochs 10 \
    --batch-size 256 \
    --results-fp results/tuning_results.json
Experiment tracking
We'll use MLflow to track our experiments and store our models and the MLflow Tracking UI to view our experiments. We have been saving our experiments to a local directory but note that in an actual production setting, we would have a central location to store all of our experiments. It's easy/inexpensive to spin up your own MLflow server for all of your team members to track their experiments on or use a managed solution like Weights & Biases, Comet, etc.
export MODEL_REGISTRY=$(python -c "from madewithml import config; print(config.MODEL_REGISTRY)")
mlflow server -h 0.0.0.0 -p 8080 --backend-store-uri $MODEL_REGISTRY
Local
If you're running this notebook on your local laptop then head on over to http://localhost:8080/ to view your MLflow dashboard.
Anyscale
If you're on Anyscale Workspaces, then we need to first expose the port of the MLflow server. Run the following command on your Anyscale Workspace terminal to generate the public URL to your MLflow server.
APP_PORT=8080
echo https://$APP_PORT-port-$ANYSCALE_SESSION_DOMAIN
Evaluation
export EXPERIMENT_NAME="llm"
export RUN_ID=$(python madewithml/predict.py get-best-run-id --experiment-name $EXPERIMENT_NAME --metric val_loss --mode ASC)
export HOLDOUT_LOC="https://raw.githubusercontent.com/GokuMohandas/Made-With-ML/main/datasets/holdout.csv"
python madewithml/evaluate.py \
    --run-id $RUN_ID \
    --dataset-loc $HOLDOUT_LOC \
    --results-fp results/evaluation_results.json
{
  "timestamp": "June 09, 2023 09:26:18 AM",
  "run_id": "6149e3fec8d24f1492d4a4cabd5c06f6",
  "overall": {
    "precision": 0.9076136428670714,
    "recall": 0.9057591623036649,
    "f1": 0.9046792827719773,
    "num_samples": 191.0
  },
...
Inference
export EXPERIMENT_NAME="llm"
export RUN_ID=$(python madewithml/predict.py get-best-run-id --experiment-name $EXPERIMENT_NAME --metric val_loss --mode ASC)
python madewithml/predict.py predict \
    --run-id $RUN_ID \
    --title "Transfer learning with transformers" \
    --description "Using transformers for transfer learning on text classification tasks."
[{
  "prediction": [
    "natural-language-processing"
  ],
  "probabilities": {
    "computer-vision": 0.0009767753,
    "mlops": 0.0008223939,
    "natural-language-processing": 0.99762577,
    "other": 0.000575123
  }
}]
Serving
Local
# Start
ray start --head
# Set up
export EXPERIMENT_NAME="llm"
export RUN_ID=$(python madewithml/predict.py get-best-run-id --experiment-name $EXPERIMENT_NAME --metric val_loss --mode ASC)
python madewithml/serve.py --run_id $RUN_ID
Once the application is running, we can use it via cURL, Python, etc.:
# via Python
import json
import requests
title = "Transfer learning with transformers"
description = "Using transformers for transfer learning on text classification tasks."
json_data = json.dumps({"title": title, "description": description})
requests.post("http://127.0.0.1:8000/predict", data=json_data).json()
ray stop # shutdown
Anyscale
In Anyscale Workspaces, Ray is already running so we don't have to manually start/shutdown like we have to do locally.
# Set up
export EXPERIMENT_NAME="llm"
export RUN_ID=$(python madewithml/predict.py get-best-run-id --experiment-name $EXPERIMENT_NAME --metric val_loss --mode ASC)
python madewithml/serve.py --run_id $RUN_ID
Once the application is running, we can use it via cURL, Python, etc.:
# via Python
import json
import requests
title = "Transfer learning with transformers"
description = "Using transformers for transfer learning on text classification tasks."
json_data = json.dumps({"title": title, "description": description})
requests.post("http://127.0.0.1:8000/predict", data=json_data).json()
Testing
# Code
python3 -m pytest tests/code --verbose --disable-warnings

# Data
export DATASET_LOC="https://raw.githubusercontent.com/GokuMohandas/Made-With-ML/main/datasets/dataset.csv"
pytest --dataset-loc=$DATASET_LOC tests/data --verbose --disable-warnings

# Model
export EXPERIMENT_NAME="llm"
export RUN_ID=$(python madewithml/predict.py get-best-run-id --experiment-name $EXPERIMENT_NAME --metric val_loss --mode ASC)
pytest --run-id=$RUN_ID tests/model --verbose --disable-warnings

# Coverage
python3 -m pytest tests/code --cov madewithml --cov-report html --disable-warnings  # html report
python3 -m pytest tests/code --cov madewithml --cov-report term --disable-warnings  # terminal report
Production
From this point onwards, in order to deploy our application into production, we'll need to either be on Anyscale or on a cloud VM / on-prem cluster you manage yourself (w/ Ray). If not on Anyscale, the commands will be slightly different but the concepts will be the same.
If you don't want to set up all of this yourself, we highly recommend joining our upcoming live cohort{:target="_blank"} where we'll provide an environment with all of this infrastructure already set up for you so that you just focused on the machine learning.
Authentication
These credentials below are automatically set for us if we're using Anyscale Workspaces. We do not need to set these credentials explicitly on Workspaces but we do if we're running this locally or on a cluster outside of where our Anyscale Jobs and Services are configured to run.
export ANYSCALE_HOST=https://console.anyscale.com
export ANYSCALE_CLI_TOKEN=$YOUR_CLI_TOKEN  # retrieved from Anyscale credentials page
Cluster environment
The cluster environment determines where our workloads will be executed (OS, dependencies, etc.) We've already created this cluster environment for us but this is how we can create/update one ourselves.
export CLUSTER_ENV_NAME="madewithml-cluster-env"
anyscale cluster-env build deploy/cluster_env.yaml --name $CLUSTER_ENV_NAME
Compute configuration
The compute configuration determines what resources our workloads will be executes on. We've already created this compute configuration for us but this is how we can create it ourselves.
export CLUSTER_COMPUTE_NAME="madewithml-cluster-compute-g5.4xlarge"
anyscale cluster-compute create deploy/cluster_compute.yaml --name $CLUSTER_COMPUTE_NAME
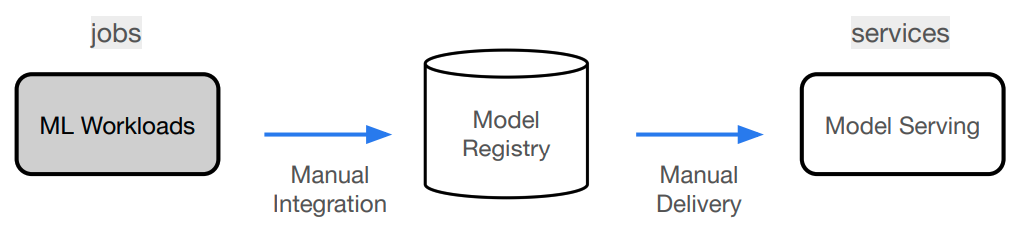
Anyscale jobs
Now we're ready to execute our ML workloads. We've decided to combine them all together into one job but we could have also created separate jobs for each workload (train, evaluate, etc.) We'll start by editing the $GITHUB_USERNAME slots inside our workloads.yaml file:
runtime_env:
  working_dir: .
  upload_path: s3://madewithml/$GITHUB_USERNAME/jobs  # <--- CHANGE USERNAME (case-sensitive)
  env_vars:
    GITHUB_USERNAME: $GITHUB_USERNAME  # <--- CHANGE USERNAME (case-sensitive)
The runtime_env here specifies that we should upload our current working_dir to an S3 bucket so that all of our workers when we execute an Anyscale Job have access to the code to use. The GITHUB_USERNAME is used later to save results from our workloads to S3 so that we can retrieve them later (ex. for serving).
Now we're ready to submit our job to execute our ML workloads:
anyscale job submit deploy/jobs/workloads.yaml
Anyscale Services
And after our ML workloads have been executed, we're ready to launch our serve our model to production. Similar to our Anyscale Jobs configs, be sure to change the $GITHUB_USERNAME in serve_model.yaml.
ray_serve_config:
  import_path: deploy.services.serve_model:entrypoint
  runtime_env:
    working_dir: .
    upload_path: s3://madewithml/$GITHUB_USERNAME/services  # <--- CHANGE USERNAME (case-sensitive)
    env_vars:
      GITHUB_USERNAME: $GITHUB_USERNAME  # <--- CHANGE USERNAME (case-sensitive)
Now we're ready to launch our service:
# Rollout service
anyscale service rollout -f deploy/services/serve_model.yaml

# Query
curl -X POST -H "Content-Type: application/json" -H "Authorization: Bearer $SECRET_TOKEN" -d '{
  "title": "Transfer learning with transformers",
  "description": "Using transformers for transfer learning on text classification tasks."
}' $SERVICE_ENDPOINT/predict/

# Rollback (to previous version of the Service)
anyscale service rollback -f $SER




 Made-With-ML 是一门免费的动手实践课程,教你如何设计、开发、部署和迭代面向生产环境的机器学习应用,并将机器学习与软件工程最佳实践结合起来。