workflow_templates
This repo hosts the official ComfyUI workflow templates and subgraph blueprints.
Overview
| Content |
Description |
Location |
| Workflow Templates |
Full standalone workflows for the template picker |
templates/, packages/ |
| Subgraph Blueprints |
Reusable node components that appear in the node palette |
blueprints/, packages/blueprints/ |
| Template Site |
Astro SSG that showcases templates at comfy.org/workflows |
site/ |
The repository uses a package-per-media structure for Python distribution:
packages/core – manifest + loader helpers shipped as comfyui-workflow-templates-corepackages/media_* – workflow template JSON + preview assets for each media typepackages/blueprints – subgraph blueprint JSON + preview assets as comfyui-subgraph-blueprintspackages/meta and the root pyproject.toml – the comfyui-workflow-templates meta package
Template Site (site/)
The site/ directory contains an independent Astro static site that provides a browsable, searchable interface for all workflow templates. It includes AI-generated descriptions, i18n support (11 languages), SEO optimization, and automated content pipelines. See site/AGENTS.md for full documentation.
cd site
pnpm install
pnpm run dev       # Start dev server at localhost:4321
pnpm run build     # Production build (runs prebuild pipeline automatically)
Deployment Environments
The template site is deployed to four environments via GitHub Actions:
main merge (version bump)
  └─ PyPI publish ─► deploy-site.yml ─► Production (approved only)

Once per day (00:00 UTC)
  └─ cron-rebuild-site.yml         ─► Production         (prod API, approved only)

Once per day (00:00 UTC)
  └─ preview-cron.yml
       ├─ main (prod API)          ─► Preview Prod        (prod API, all workflows)
       └─ main (test API)          ─► Preview Test        (test API, all workflows)

PR opened/updated
  ├─ preview-site.yml              ─► PR Preview (one-off)
  └─ preview-cron.yml (label)      ─► PR Preview (daily, requires "preview-cron" label)
| Environment |
Workflow |
API |
Status Filter |
Vercel Flag |
Alias Secret |
Trigger |
| Production |
deploy-site.yml |
Production |
approved only |
--prod |
— |
PyPI publish / manual |
| Production |
cron-rebuild-site.yml |
Production |
approved only |
--prod |
— |
Once per day (00:00 UTC) |
| Preview Prod |
preview-cron.yml (main, prod) |
Production |
None (all) |
preview |
VERCEL_PREVIEW_ALIAS |
Once per day (00:00 UTC) |
| Preview Test |
preview-cron.yml (main, test) |
Test |
None (all) |
preview |
VERCEL_PREVIEW_TEST_ALIAS |
Once per day (00:00 UTC) |
| PR Preview |
preview-site.yml |
Configurable |
None (all) |
preview |
— |
PR changes |
| PR Preview |
preview-cron.yml (PR) |
Test |
None (all) |
preview |
— |
Once per day (00:00 UTC) |
Status filtering is controlled by the PUBLIC_APPROVED_ONLY environment variable at build time. When set to 'true', only workflows with status: 'approved' from the hub API index endpoint are included in the build. Preview environments omit this flag to show all workflows (pending, approved, rejected, deprecated) for internal review.
Quick Start
| Task |
Commands |
| Add a workflow template |
Edit templates/, bundles.json, then python scripts/sync/sync_bundles.py |
| Add a subgraph blueprint |
Edit blueprints/, blueprints_bundles.json, then python scripts/sync/sync_blueprints.py |
| Import external blueprints |
Copy JSONs to blueprints/, then python scripts/blueprints/import_blueprints.py |
| Check node compatibility |
npm run validate:comfyui-nodes (local ComfyUI) or see scripts/README.md |
Adding New Templates
I will demonstrate how to add a new template by walking through the process of adding the Wan text to video template.
1 — Find Templates Folder
Set up ComfyUI_frontend dev environment. In the ComfyUI_frontend/.env file, add the line DISABLE_TEMPLATES_PROXY=true then start the dev server with npm run dev.
Copy the templates folder from this repository to the ComfyUI_frontend/public folder.
2 — Obtain Workflow
Either
I will get my workflow from the ComfyUI_examples Wan 2.1 page. To get the workflow from the video on that page, I'll drag the video into comfyui-embedded-workflow-editor. Then I'll copy and paste it into a new json file on my computer.
[!IMPORTANT]
Make sure you start ComfyUI with --disable-all-custom-nodes when creating the workflow file (to prevent custom extensions adding metadata into the saved workflow file)
3 — Obtain Thumbnails
Ideally, the thumbnail is simply the output produced by the workflow on first execution. As an example, see the output of the Mixing ControlNets template:
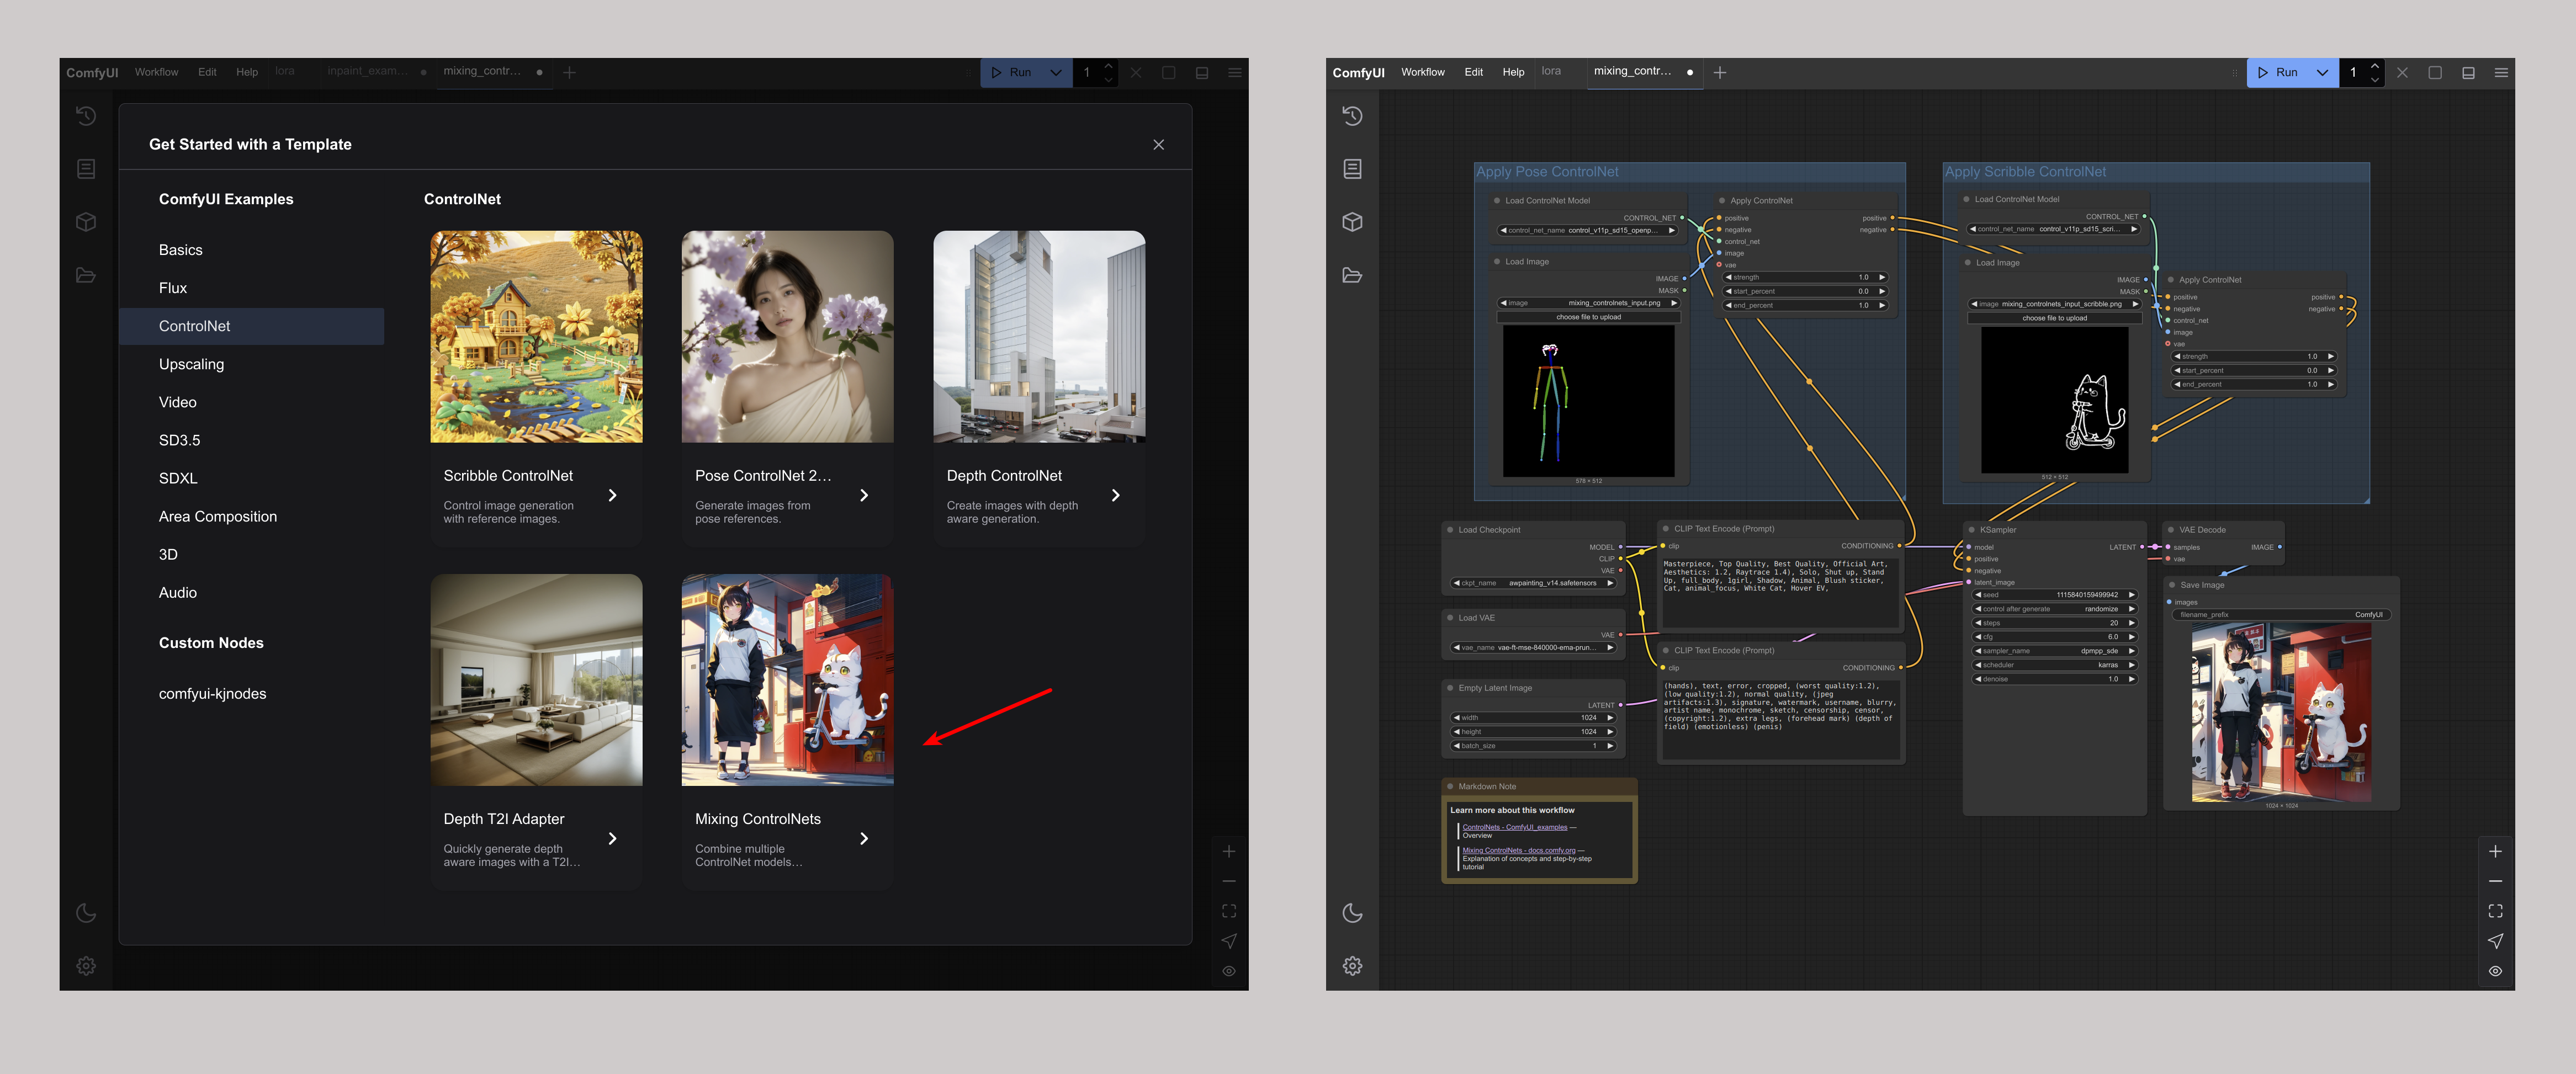
For my Wan 2.1 template, I'll just use the webp video I got the workflow from.
4 — Choose Thumbnail Type
Choose the content type and hover effect (optional) for your thumbnail:
| Content Types |
Hover Effects |

Image: Default image with no extra effect |
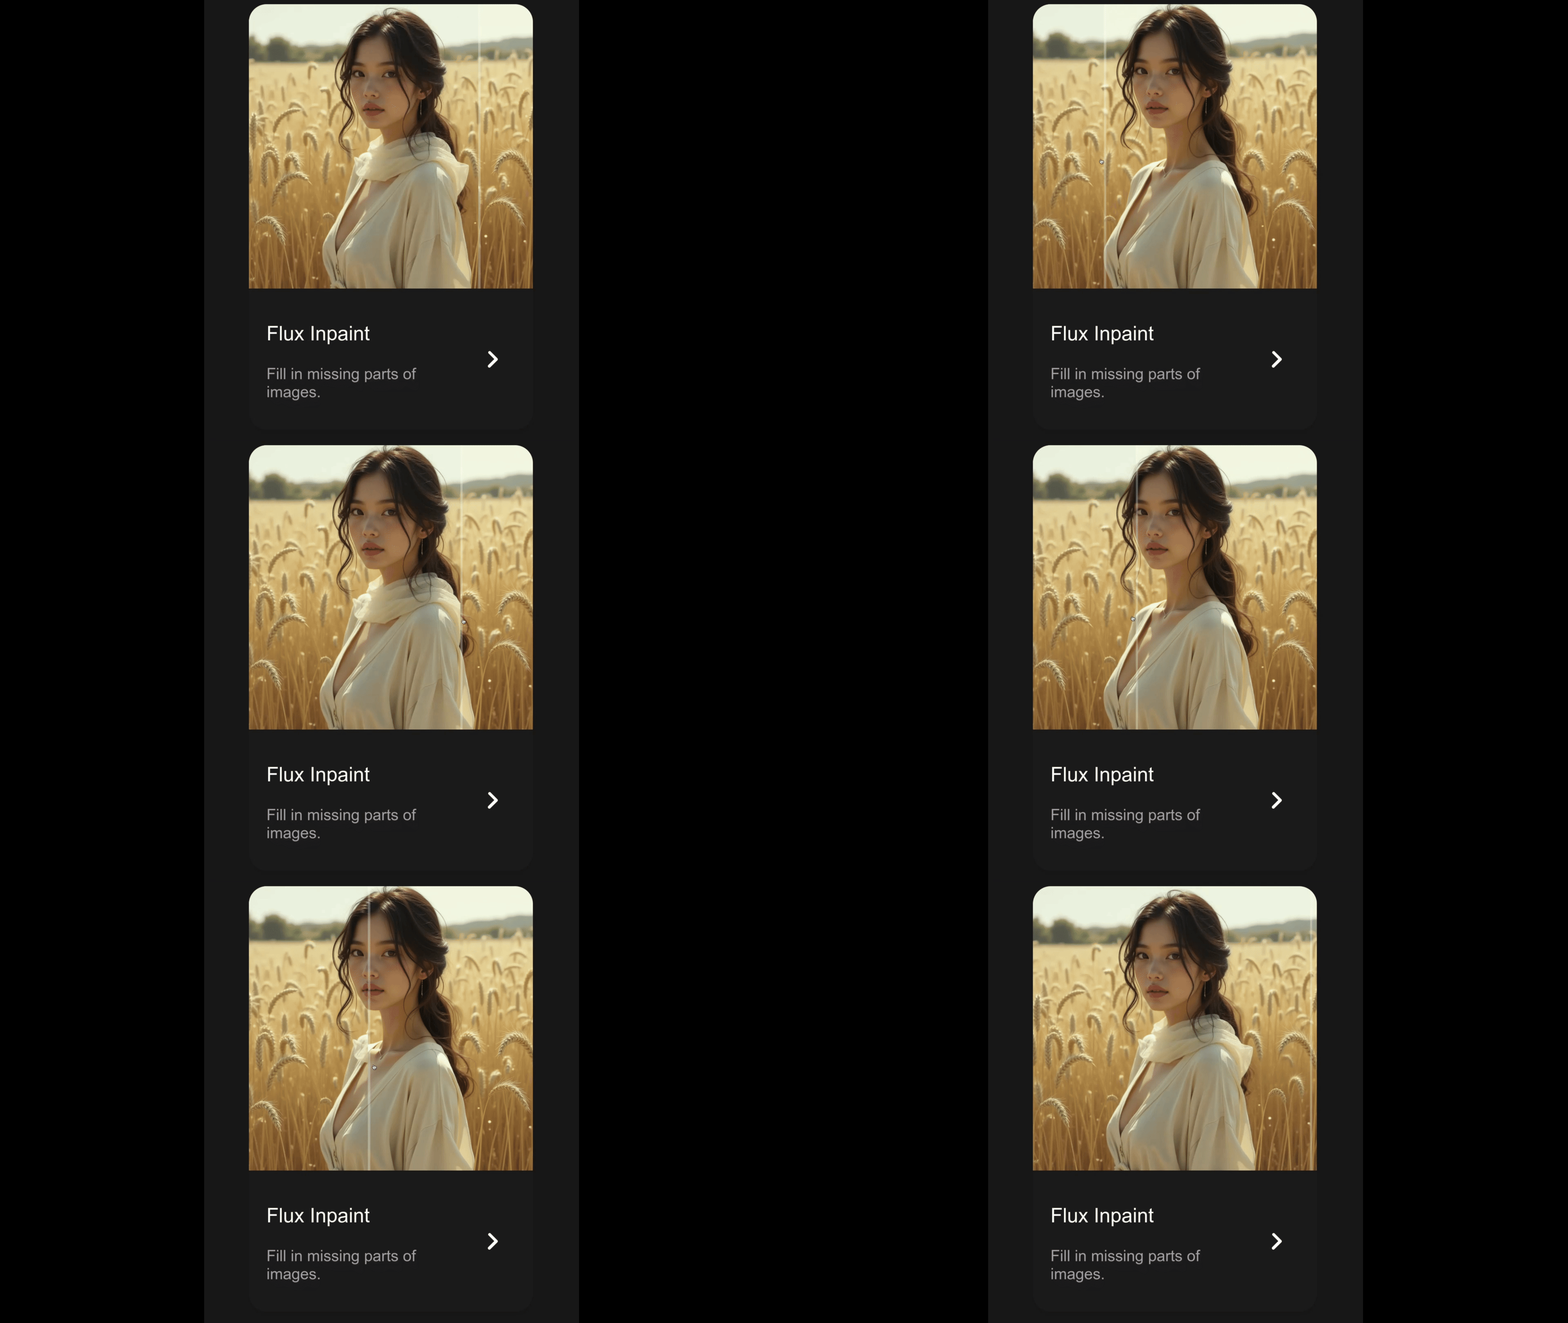
Compare Slider: Before/after comparison tool |

Video: Webp animation |
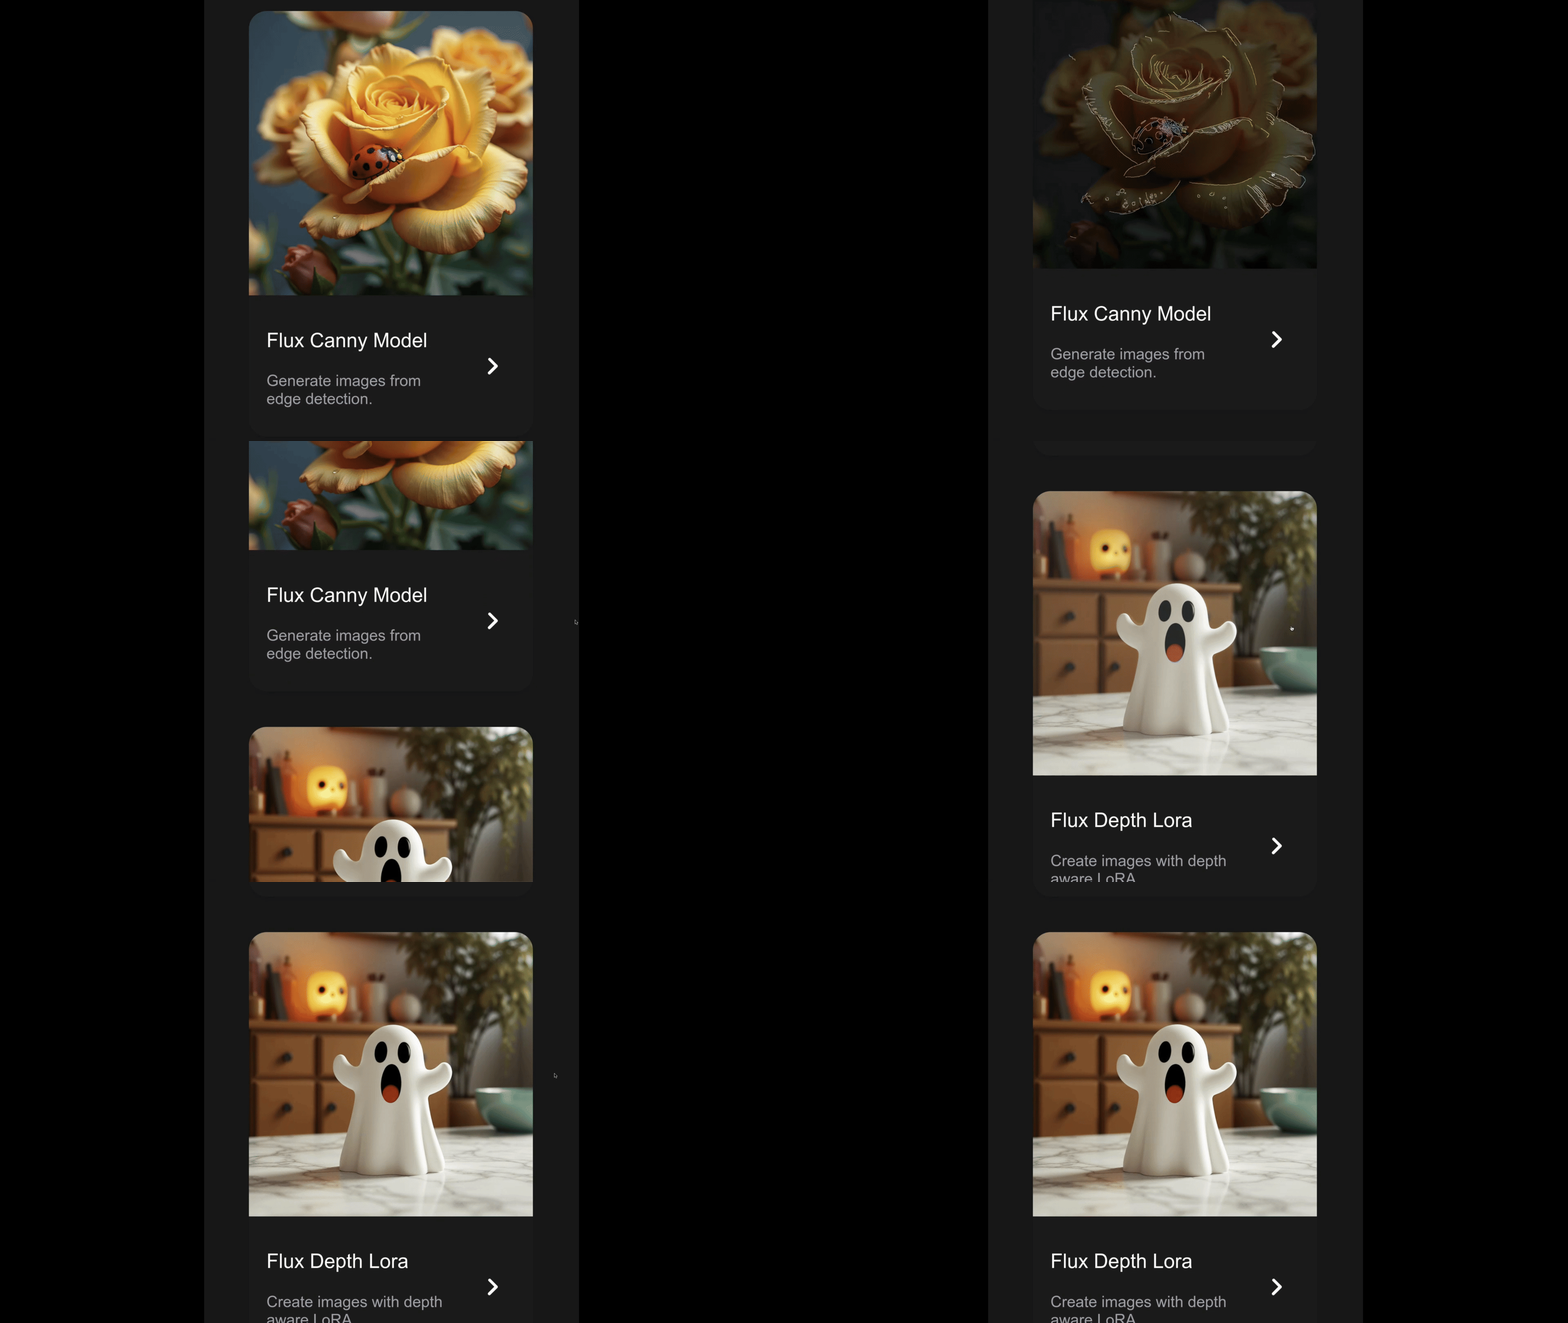
Hover Dissolve: Dissolves to 2nd image on hover |
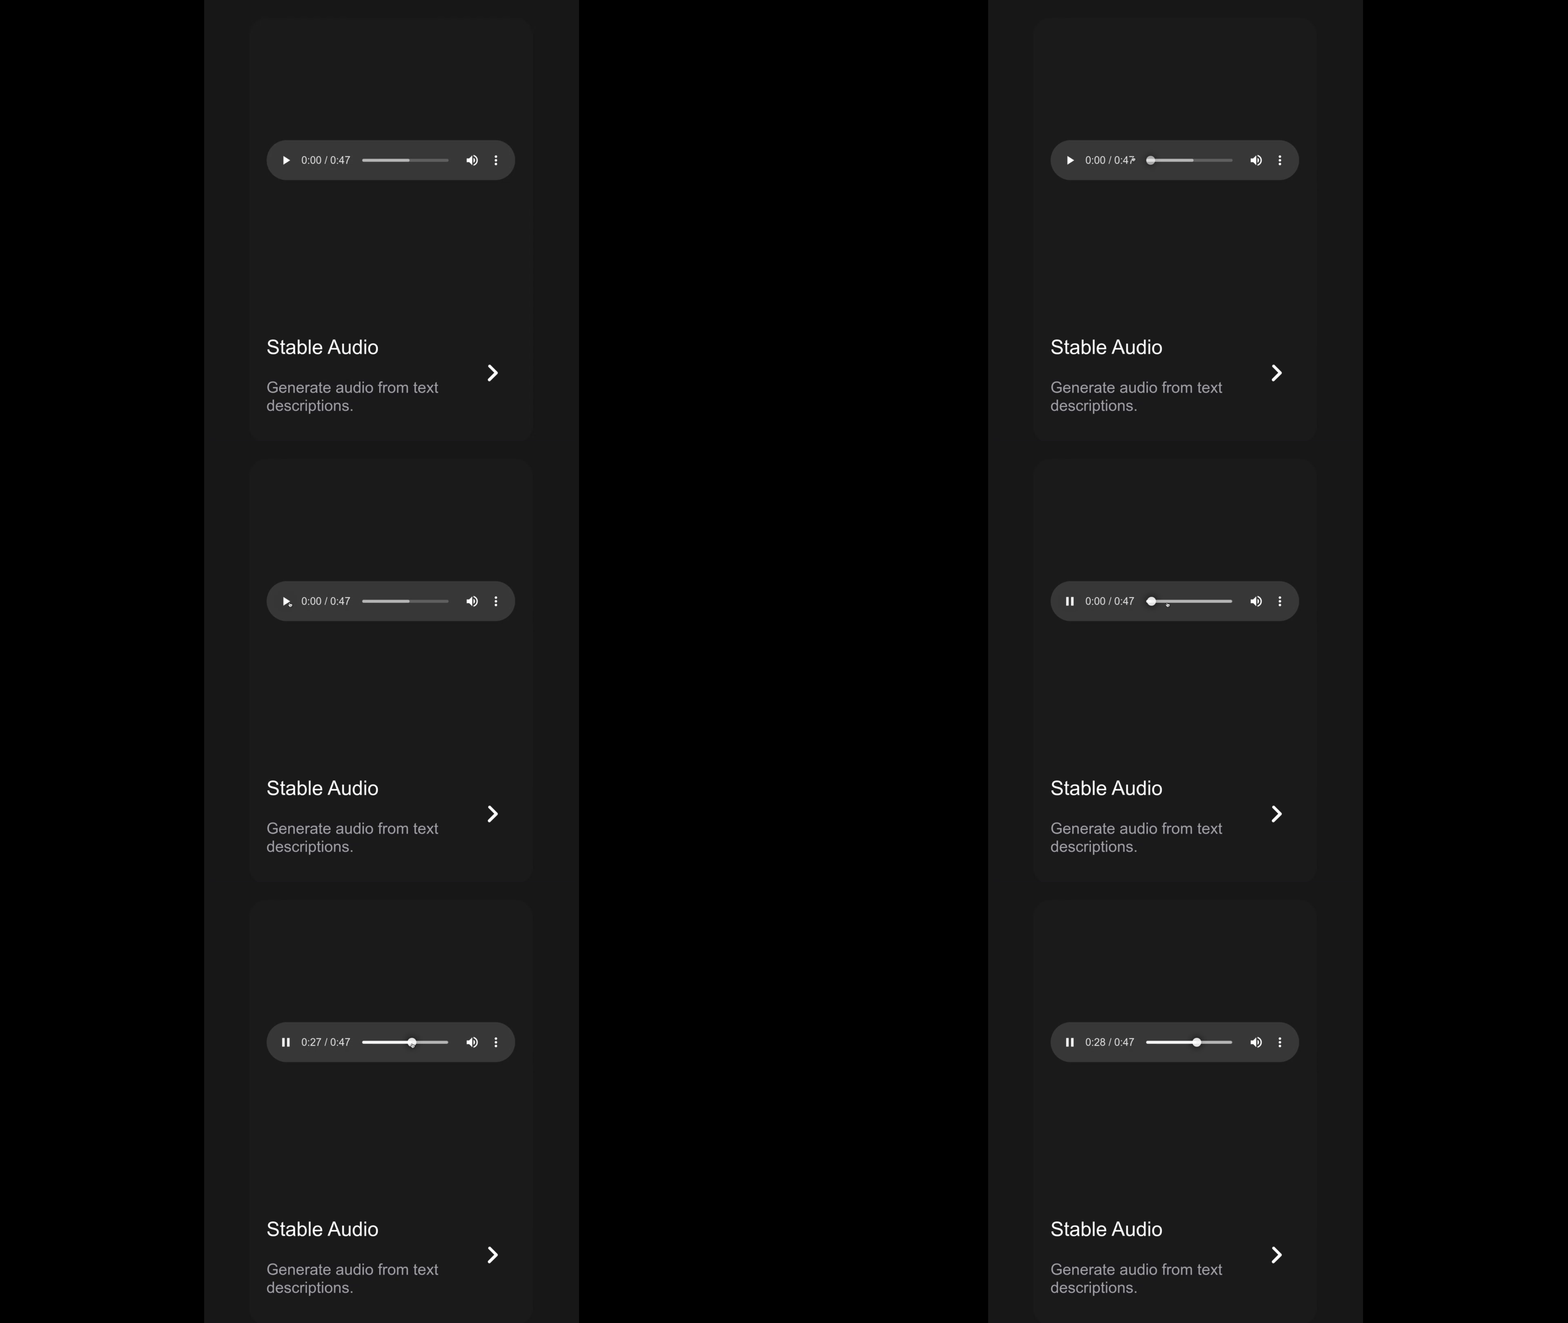
Audio: Audio playback |
Hover Zoom: Same as default but zooms more |
[!WARNING]
For video thumbnails, thumbnails need to be converted to webp format first
Since my Wan 2.1 thumbnail is already an animated video, I'll use a video thumbnail but choose not to add an effect.
5 — Compress Assets
Attempt to compress the assets. Since the thumbnails will never be taking up a large portion of the screen, it is acceptable to lower their size. It's also good to convert them to a space-efficient file format like webp or jpeg, applying a lossy compression algorithm (e.g., convert at 65% quality).
EzGif has free tools for changing resolution, compressing, and converting file types. Use whatever tool you are comfortable with.
[!TIP]
Convert to webp first, then resize to a smaller resolution. You can maintain high quality and still get near 95% reduction if e.g., converting from png.
6 — Rename and Move Files
Give the workflow a filename that has no spaces, dots, or special characters. Then rename the thumbnail file(s) to match, but with a counter suffix.
your_template_name.json
your_template_name-1.png
your_template_name-2.png
I'll name the Wan 2.1 template as text_to_video_wan.json. So my files will be:
text_to_video_wan.json
text_to_video_wan-1.webp
Then move the renamed files to your templates folder.
7 — Assign Bundle & Sync Assets
Each template lives in one bundle (media-image, media-video, etc.). Update
bundles.json with the template ID so the correct media package ships it.
After editing templates/ or bundles.json, regenerate the manifest and copy assets into
the package directories:
python scripts/sync/sync_bundles.py
# or via Nx
npm run sync
This step must be run before committing, and the regenerated
packages/core/src/comfyui_workflow_templates_core/manifest.json must be committed with your
change. Two workflows enforce it against the committed manifest — the Validate Manifests
job (.github/workflows/validate-manifests.yml) and the pre-sync check in
.github/workflows/build-test.yml — both of which fail with a SHA256 mismatch if you skip it.
Neither runs the sync first, so a stale manifest cannot pass by being silently regenerated.
8 — Add Entry to index.json
There's an index.json file in the templates folder which is where template configurations are set. You will need to add your template to this file, using the fields outlined below:
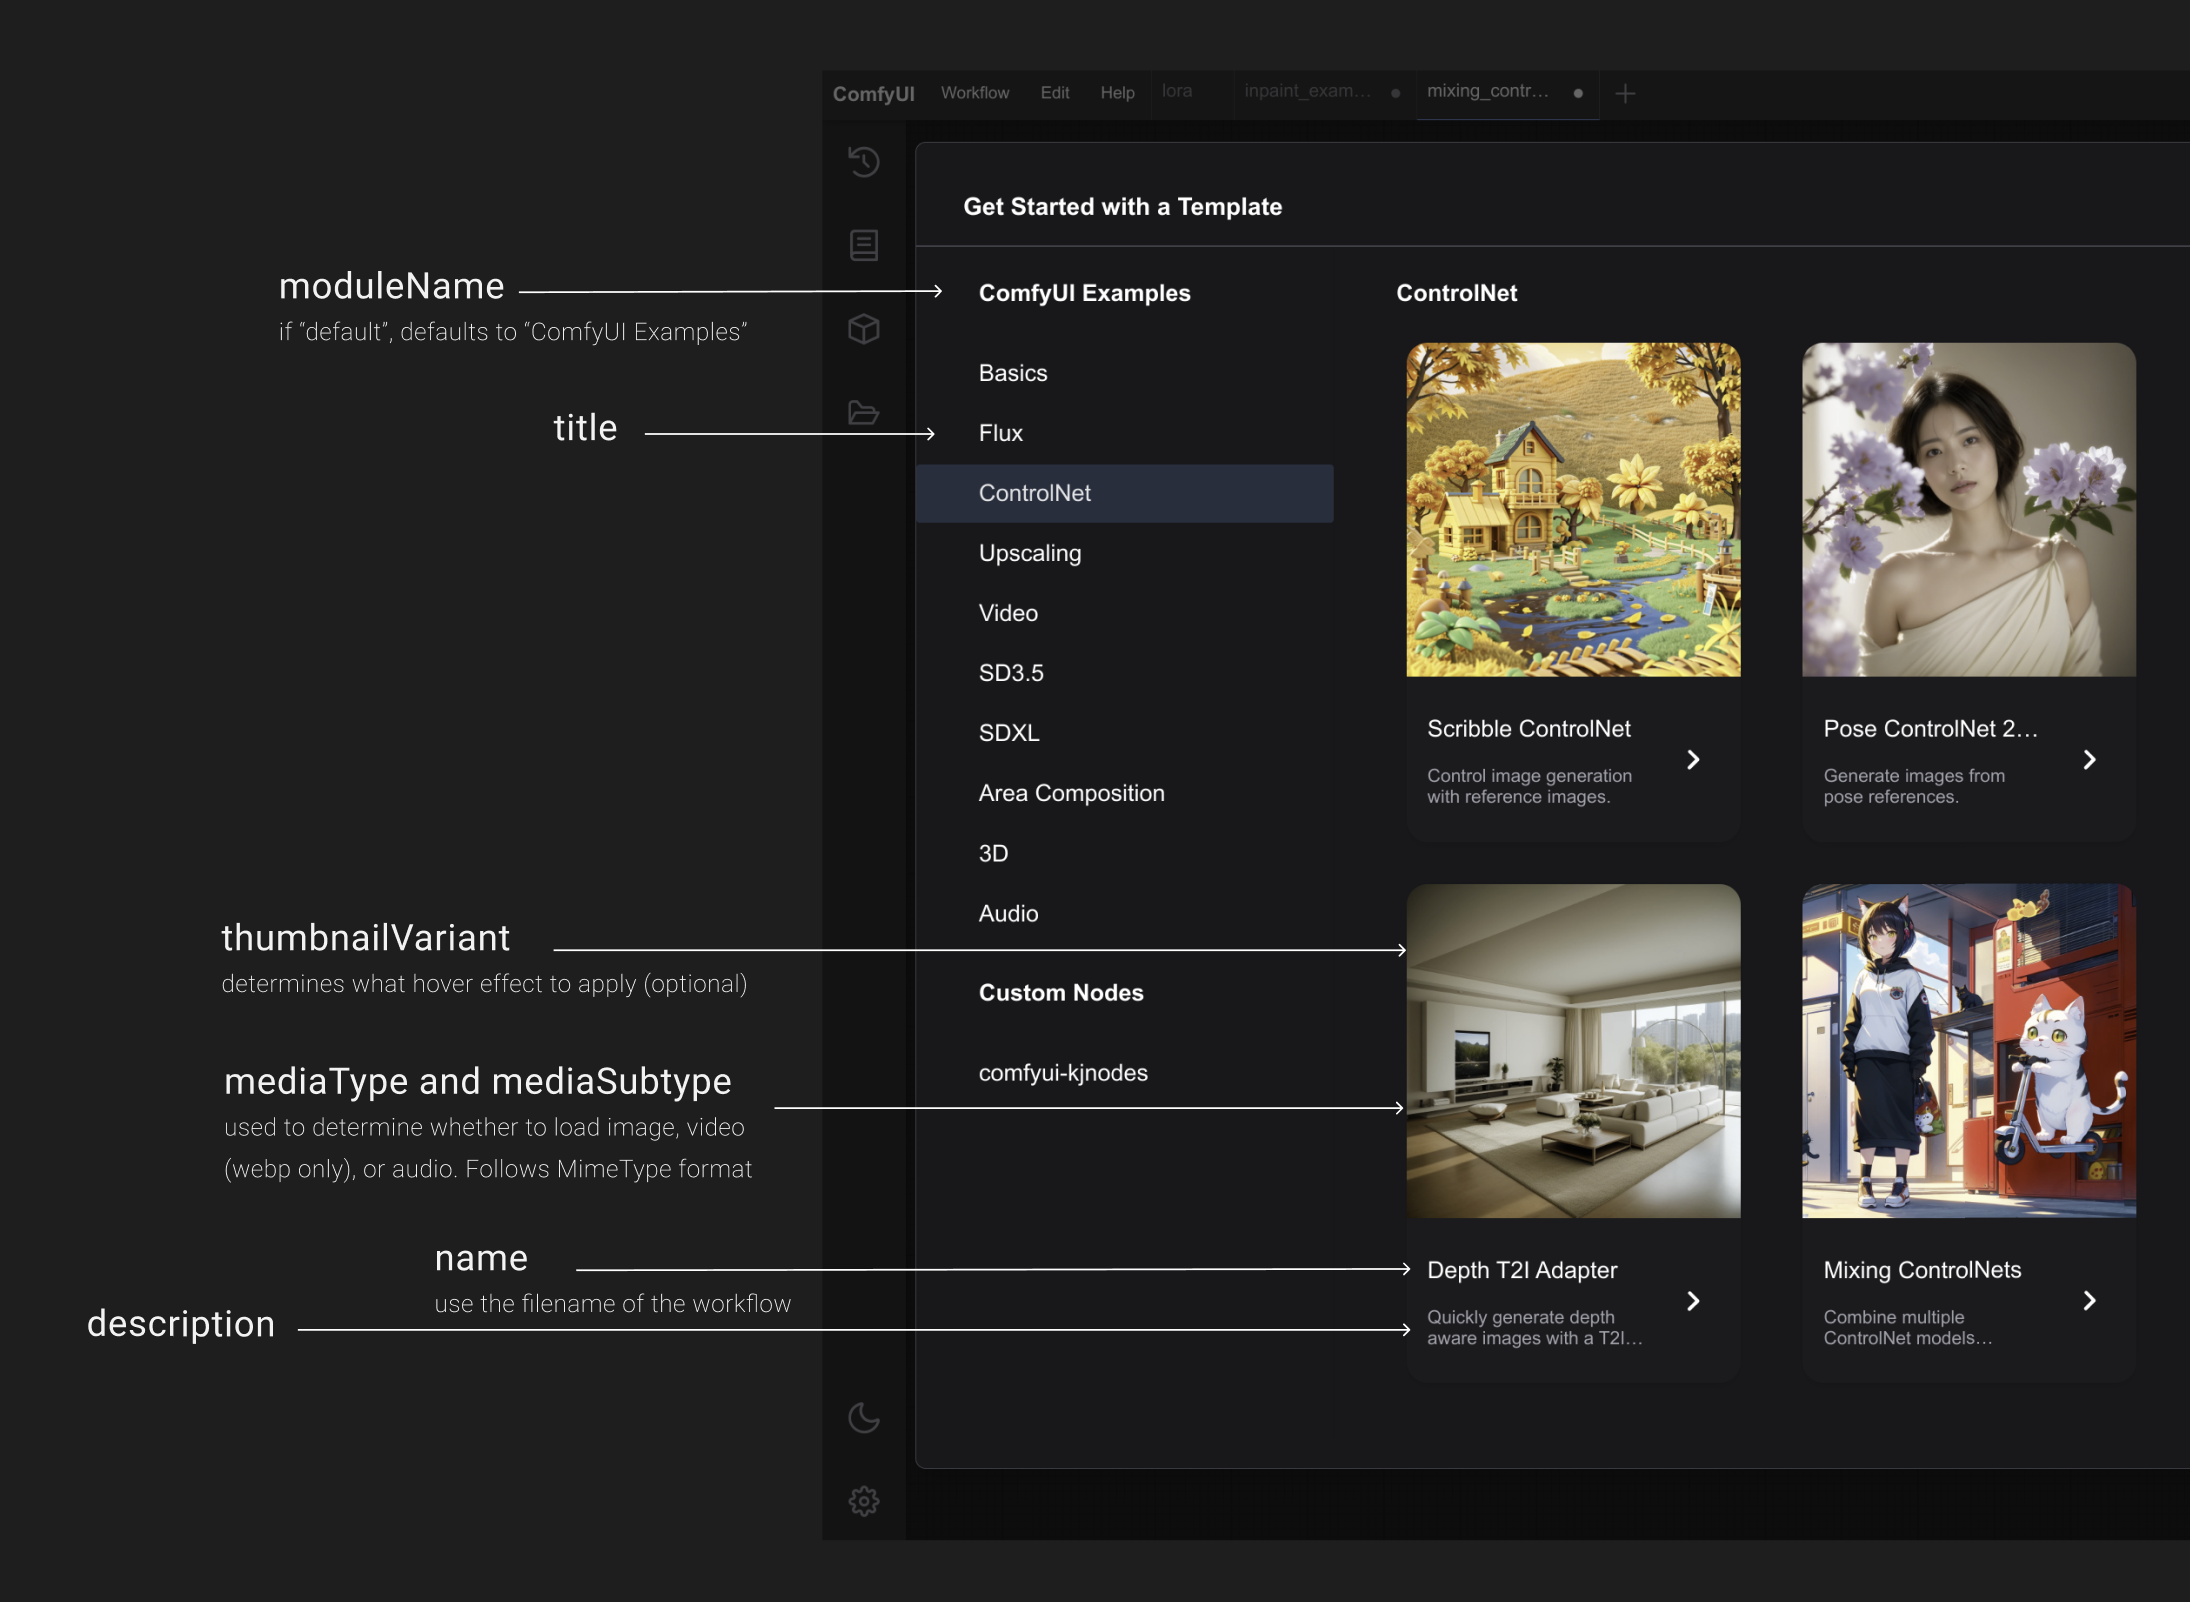
If your template doesn't fit into an existing category, you can add a new one:
  {
    "moduleName": "default",
    "title": "Basics",
    "type": "image",
    "templates": [
      {
        "name": "default",
        "mediaType": "image",
        "mediaSubtype": "webp",
        "description": "Generate images from text descriptions."
      },
    ]
  },
+ {
+   "moduleName": "default",
+   "title": "Your New Category"s Name",
+   "type": "video",
+   "templates": [
+     {
+       "name": "your_template_name",
+       "description": "A description of your template workflow",
+       "mediaType": "image",
+       "mediaSubtype": "webp",
+       "description": "Your template"s description.",
+       "tutorialUrl": "https://link-to-some-helpful-docs-if-they-exist.como"
+       "thumbnailVariant": "zoomHover",
+     },
+   ]
+ }
The Wan 2.1 template I'm adding already fits into the "Video" category, so I'll just add it there:
  {
    moduleName: "default",
    title: "Video",
    type: "video",
    templates: [
      {
        name: "ltxv_text_to_video",
        mediaType: "image",
        mediaSubtype: "webp",
        tutorialUrl: "https://comfyanonymous.github.io/ComfyUI_examples/ltxv/"
      },
+     {
+       "name": "text_to_video_wan",
+       "description": "Quickly Generate videos from text descriptions.",
+       "mediaType": "image",
+       "mediaSubtype": "webp",
+       "tutorialUrl": "https://comfyanonymous.github.io/ComfyUI_examples/wan/"
+     },
    ]
  },
The thumbnailVariant field is where you add the choice of thumbnail variant.
Now you can start ComfyUI (or refresh browser if already running) and test that your template works.
[!WARNING]
Make sure to use double-quotes " instead of single-quotes ' when adding things to json files
9 — Embed Models
Now we need to embed metadata for any models the template workflow uses. This way, the user can download and run the workflow without ever leaving ComfyUI.
For instance, my Wan 2.1 template requires 3 models:
- umt5_xxl_fp8_e4m3fn_scaled text encoder
- wan_2.1_vae VAE
- wan2.1_t2v_1.3B_bf16 model
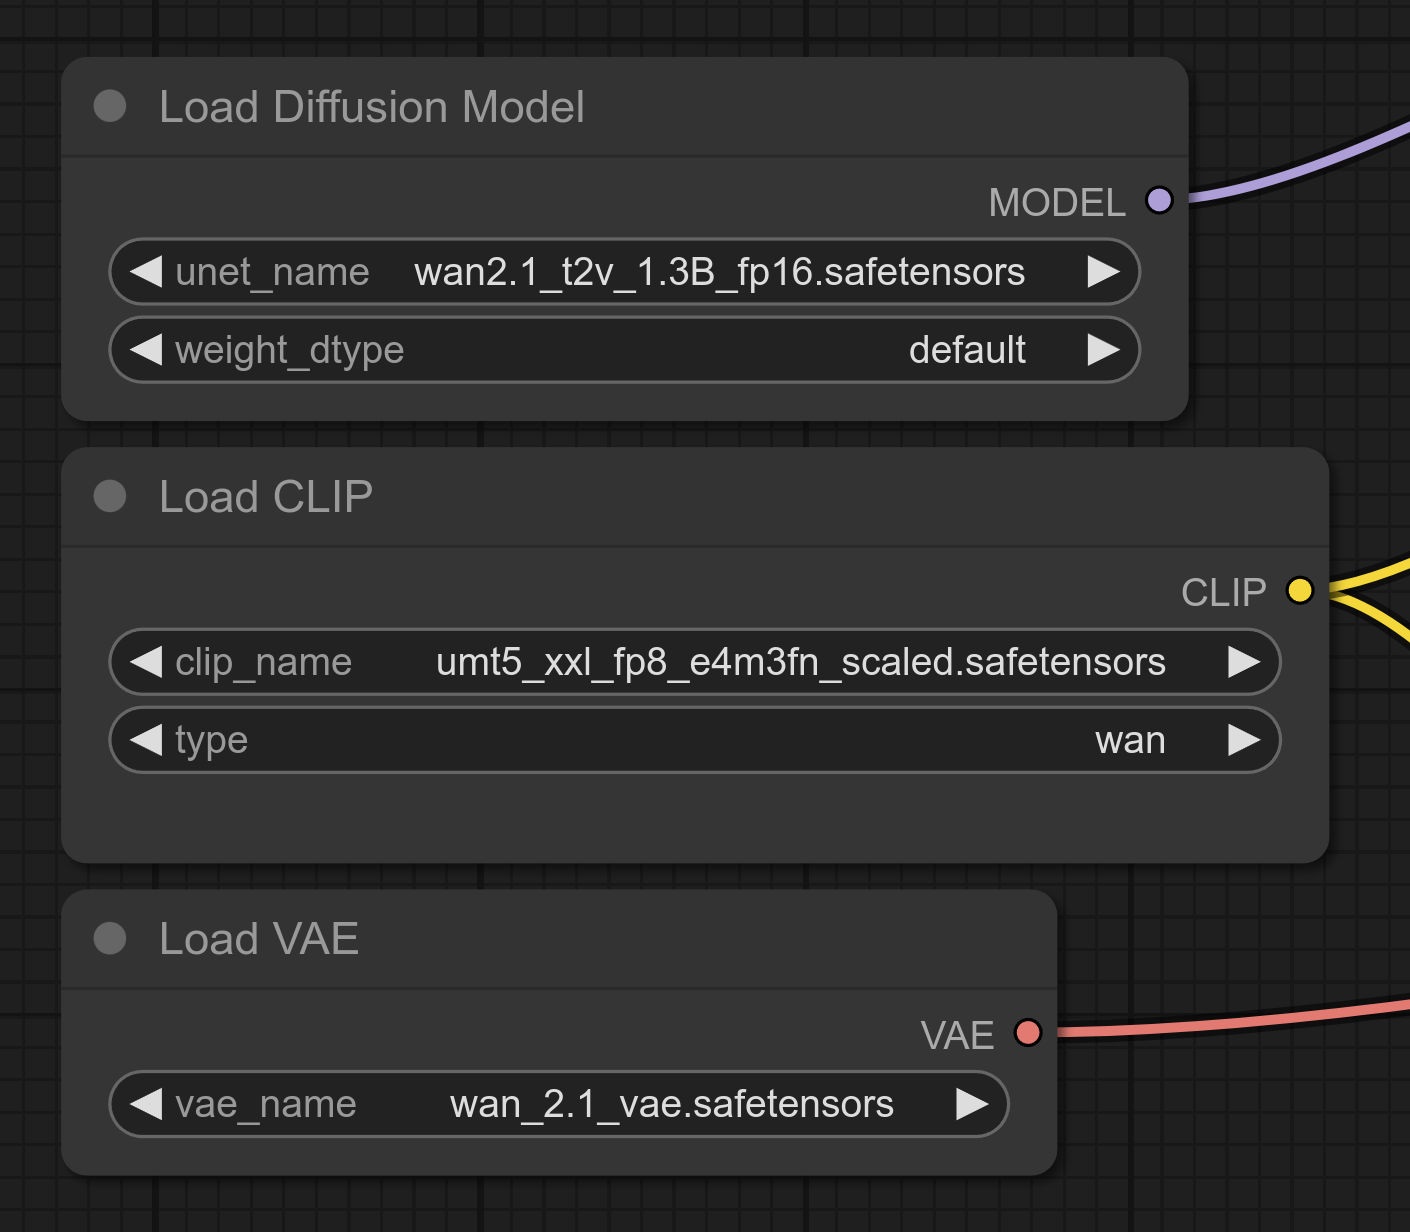
To add them to the workflow json, find each associated node and add the metadata to their properties:
    {
      "id": 39,
      "type": "VAELoader",
      "pos": [866.3932495117188, 499.18597412109375],
      "size": [306.36004638671875, 58],
      "flags": {},
      "order": 0,
      "mode": 0,
      "inputs": [],
      "outputs": [
        {
          "name": "VAE",
          "type": "VAE",
          "links": [76],
          "slot_index": 0
        }
      ],
      "properties": {
        "Node name for S&R": "VAELoader",
+       "models": [
+         {
+           "name": "wan_2.1_vae.safetensors",
+           "url": "https://huggingface.co/Comfy-Org/Wan_2.1_ComfyUI_repackaged/resolve/main/split_files/vae/wan_2.1_vae.safetensors?download=true",
+           "hash": "2fc39d31359a4b0a64f55876d8ff7fa8d780956ae2cb13463b0223e15148976b"
+           "hash_type": "SHA256",
+           "directory": "vae"
+         }
+       ]
      },
      "widgets_values": ["wan_2.1_vae.safetensors"]
    },
    {
      "id": 38,
      "type": "CLIPLoader",
      "pos": [12.94982624053955, 184.6981658935547],
      "size": [390, 82],
      "flags": {},
      "order": 1,
      "mode": 0,
      "inputs": [],
      "outputs": [
        {
          "name": "CLIP",
          "type": "CLIP",
          "links": [74, 75],
          "slot_index": 0
        }
      ],
      "properties": {
        "Node name for S&R": "CLIPLoader",
+       "models": [
+         {
+           "name": "umt5_xxl_fp8_e4m3fn_scaled.safetensors",
+           "url": "https://huggingface.co/Comfy-Org/Wan_2.1_ComfyUI_repackaged/resolve/main/split_files/text_encoders/umt5_xxl_fp8_e4m3fn_scaled.safetensors?download=true",
+           "hash": "c3355d30191f1f066b26d93fba017ae9809dce6c627dda5f6a66eaa651204f68",
+           "hash_type": "SHA256",
+           "directory": "text_encoders"
+         }
+       ]
      },
      "widgets_values": [
        "umt5_xxl_fp8_e4m3fn_scaled.safetensors",
        "wan",
        "default"
      ]
    },
    {
      "id": 37,
      "type": "UNETLoader",
      "pos": [485.1220397949219, 57.094566345214844],
      "size": [346.7470703125, 82],
      "flags": {},
      "order": 3,
      "mode": 0,
      "inputs": [],
      "outputs": [
        {
          "name": "MODEL",
          "type": "MODEL",
          "links": [92],
          "slot_index": 0
        }
      ],
      "properties": {
        "Node name for S&R": "UNETLoader",
+       "models": [
+         {
+           "name": "wan2.1_t2v_1.3B_bf16.safetensors",
+           "url": "https://huggingface.co/Comfy-Org/Wan_2.1_ComfyUI_repackaged/resolve/main/split_files/diffusion_models/wan2.1_t2v_1.3B_bf16.safetensors?download=true",
+           "hash": "6f999b0d6cb9a72b3d98ac386ed96f57f8cecae13994a69232514ea4974ad5fd",
+           "hash_type": "SHA256",
+           "directory": "diffusion_models"
+         }
+       ]
      },
      "widgets_values": ["wan2.1_t2v_1.3B_bf16.safetensors", "default"]
    },
You can find the hash and hash_type for a model on huggingface (see below)or by calculating it yourself with a script or online tool.
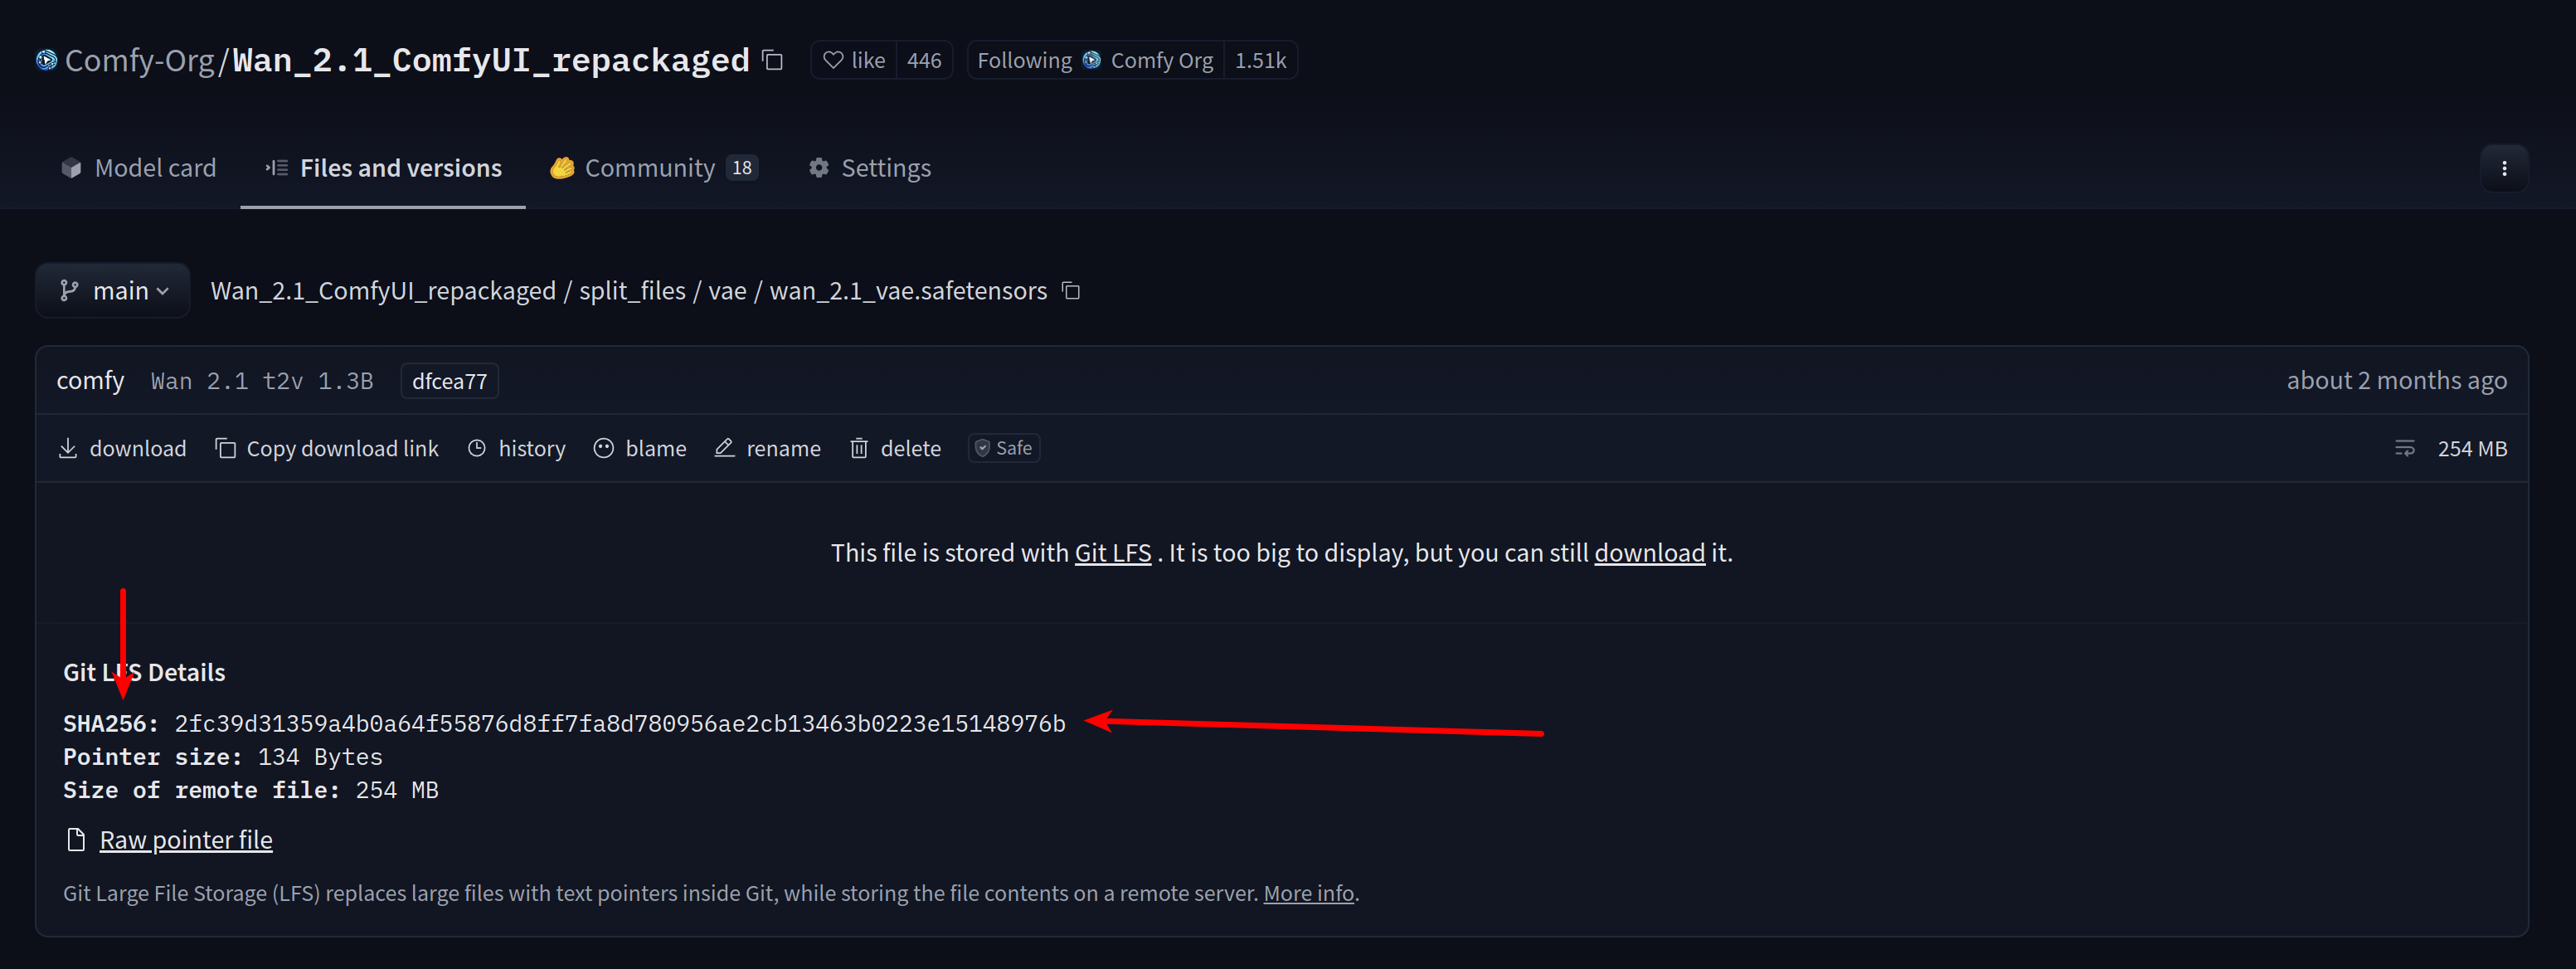
Workflow spec and ModelFile Zod schema for more details.
[!CAUTION]
Ensure that the filename being downloaded from the links matches the filenames in the widgets_values exactly.
10 — Embed Node Versions (optional)
If your template requires a specific version of Comfy or a custom node, you can specify that using the same process as with models.
The Wan 2.1 workflow requires the SaveWEBM node which wasn't fully supported until ComfyUI v0.3.26. I can add this information into the SaveWEBM node:
    {
      "id": 47,
      "type": "SaveWEBM",
      "pos": [2367.213134765625, 193.6114959716797],
      "size": [315, 130],
      "flags": {},
      "order": 9,
      "mode": 4,
      "inputs": [
        {
          "name": "images",
          "type": "IMAGE",
          "link": 93
        }
      ],
      "outputs": [],
      "properties": {
        "Node name for S&R": "SaveWEBM",
+       "cnr_id": "comfy-core",
+       "ver": "0.3.26"
      },
      "widgets_values": ["ComfyUI", "vp9", 24, 32]
    },
This can help diagnose issues when others run the workflow and ensure the workflow is more reproducible.
11 — Add Documentation Nodes (optional)
If your template corresponds with a page on https://github.com/comfyanonymous/ComfyUI_examples, https://docs.comfy.org/custom-nodes/workflow_templates, etc., you can add a MarkdownNote node with links:
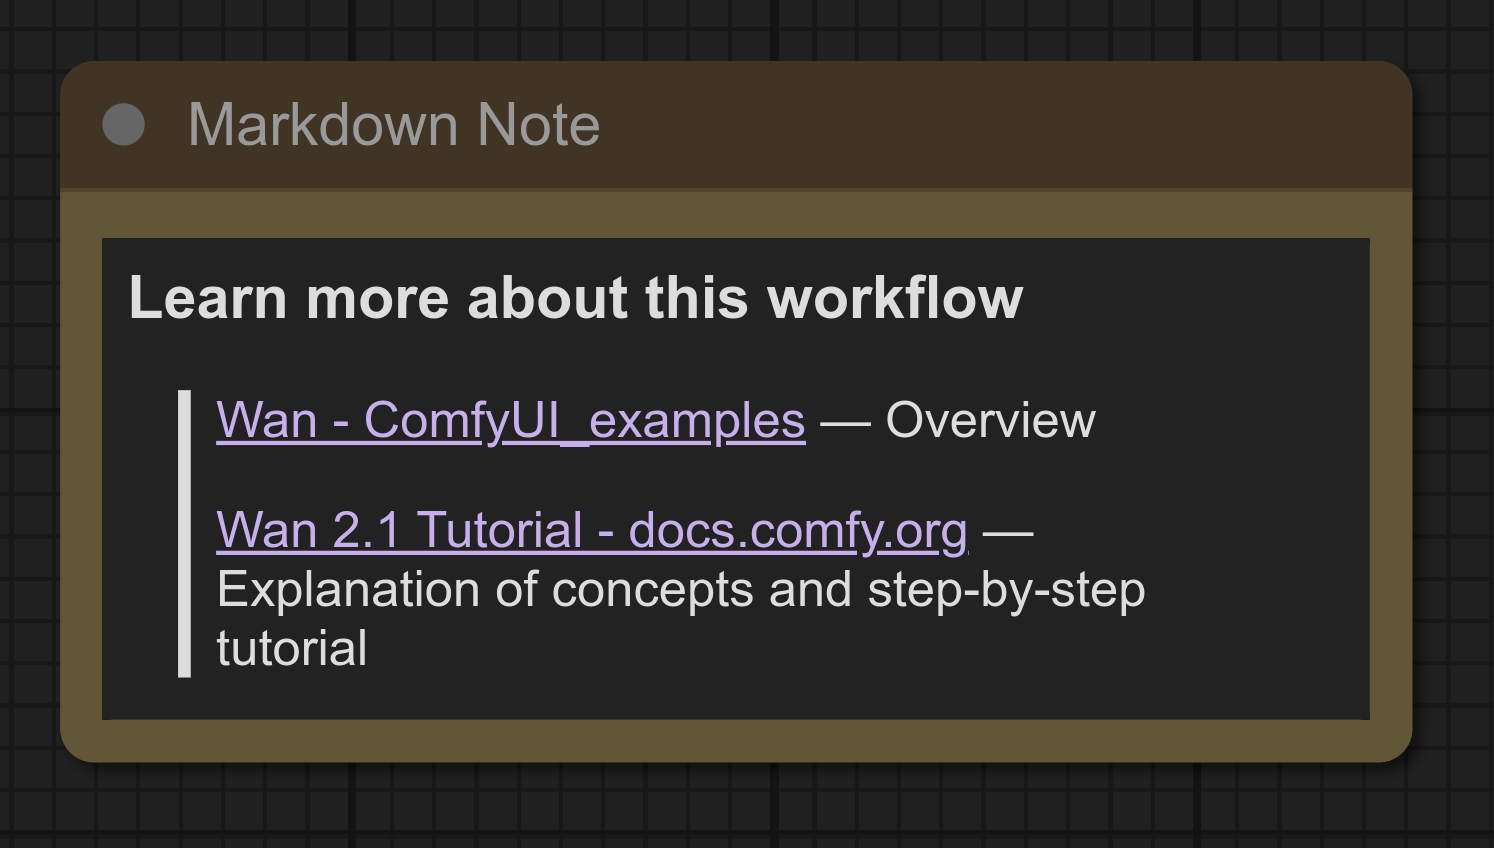
Raw markdown used:
### Learn more about this workflow

> [Wan - ComfyUI_examples](https://comfyanonymous.github.io/ComfyUI_examples/wan/#text-to-video) — Overview
>
> [Wan 2.1 Tutorial - docs.comfy.org](https://docs.comfy.org/tutorials/video/wan/wan-video) — Explanation of concepts and step-by-step tutorial
12 — Sync Translations
Before creating your PR, sync your template to all language versions using the translation management script.
Run the translation sync script:
python3 scripts/sync/sync_data.py --templates-dir templates
The script will:
- Auto-sync technical fields (models, date, size, etc.) to all language files
- Detect untranslated title/description fields
- Add your template to
scripts/data/i18n.json for translation tracking
- Generate language-specific template files (index.zh.json, index.ja.json, etc.)
(Optional) Add translations in scripts/data/i18n.json:
{
  "templates": {
    "your_template_name": {
      "title": {
        "en": "Your Template Title",
        "zh": "您的模板标题"
      },
      "description": {
        "en": "Your template description",
        "zh": "您的模板描述"
      }
    }
  }
}
Run sync again to apply your translations
For detailed instructions, see scripts/I18N_GUIDE.md.
13 — Create PR
- Fully test the workflow: delete the models, input images, etc. and try it as a new user would. Ensure the process has no hiccups and you can generate the thumbnail image on the first execution (if applicable).
- Verify all language files (index.zh.json, index.ja.json, etc.) are synced and committed
- Create a fork of https://github.com/Comfy-Org/workflow_templates (or just checkout a new branch if you are a Comfy-Org collaborator)
- Clone the fork to your system (if not a collaborator)
- Copy your new workflow and thumbnail(s) into the
templates folder
- Add your changes to the
templates/index.json file
- Bump the version in the root
pyproject.toml (example)
- Commit and push changes
- Create a PR on https://github.com/Comfy-Org/workflow_templates
Version bumping and package building are automated via CI/CD. Bumping the root pyproject.toml version automatically:
- Detects which subpackages have changed since their last release
- Bumps versions only for affected packages
- Updates all dependency references
- Builds and publishes packages to PyPI
Here is the PR I made for the Wan template: https://github.com/Comfy-Org/workflow_templates/pull/16
Once the PR is merged, if you followed step 6 correctly, a new version will be published to the comfyui-workflow-templates PyPi package.
Adding New Blueprints
Subgraph Blueprints are reusable workflow components that appear as single nodes in ComfyUI. They use the native ComfyUI subgraph format.
For detailed documentation, see docs/BLUEPRINTS.md.
Quick Guide
Option 1: Import from External Source
Copy blueprint JSON files to blueprints/ directory
Run the import script to normalize names and generate metadata:
python scripts/blueprints/import_blueprints.py
Sync to packages:
python scripts/sync/sync_blueprints.py
Option 2: Create in ComfyUI
- Build your workflow in ComfyUI
- Select nodes → Right-click → "Create Subgraph"
- Export the workflow JSON
- Copy to
blueprints/ with a snake_case filename (e.g., text_to_image_flux.json)
- Run import and sync scripts
Blueprint File Structure
blueprints/
├── index.json                        # Generated metadata for UI
├── index.schema.json                 # Validation schema
├── text_to_image_flux_1_dev.json     # Blueprint (native ComfyUI subgraph format)
├── text_to_image_flux_1_dev-1.webp   # Thumbnail (optional)
└── ...
Blueprints use the native ComfyUI subgraph format with definitions.subgraphs:
{
  "id": "workflow-uuid",
  "nodes": [{"id": -1, "type": "subgraph-uuid", ...}],
  "definitions": {
    "subgraphs": [{
      "id": "subgraph-uuid",
      "name": "Text to Image (Flux.1 Dev)",
      "inputs": [
        {"name": "text", "type": "STRING"},
        {"name": "width", "type": "INT"}
      ],
      "outputs": [
        {"name": "IMAGE", "type": "IMAGE"}
      ],
      "nodes": [...],
      "links": [...]
    }]
  }
}
Sync Commands
# Import and normalize external blueprints
python scripts/blueprints/import_blueprints.py

# Generate manifest and sync to packages
python scripts/sync/sync_blueprints.py
Create PR
- Test the blueprint in ComfyUI
- Ensure
python scripts/sync/sync_blueprints.py produces no changes
- Bump version in root
pyproject.toml
- Create PR
Validation
CI automatically validates:
| Check |
Templates |
Blueprints |
| JSON syntax |
✅ |
✅ |
| Schema validation |
✅ |
✅ |
| Bundle consistency |
✅ |
✅ |
| Manifest sync |
✅ |
✅ |
| Thumbnails |
✅ |
❌ (optional) |
| ComfyUI node compatibility |
✅ (informational PR comment) |
❌ |
Run locally before committing:
python scripts/sync/sync_bundles.py      # Templates
python scripts/sync/sync_blueprints.py   # Blueprints
npm run validate:comfyui-nodes           # Optional: node baseline vs templates (needs running ComfyUI)
See scripts/README.md for local vs static scan modes and log output.

 The official collection of ComfyUI workflow templates: ready-made image, video and audio generation workflows that appear in ComfyUI's template picker and on comfy.org/workflows, plus reusable subgraph blueprints.