







Features
• Guides
• Installation
• Usage
• Miscellaneous
• Contributing
🌎 README is available in other languages: 🇪🇸 . 🇨🇳 . 🇧🇷 . 🇰🇷 . 🇫🇷 . 🇩🇪
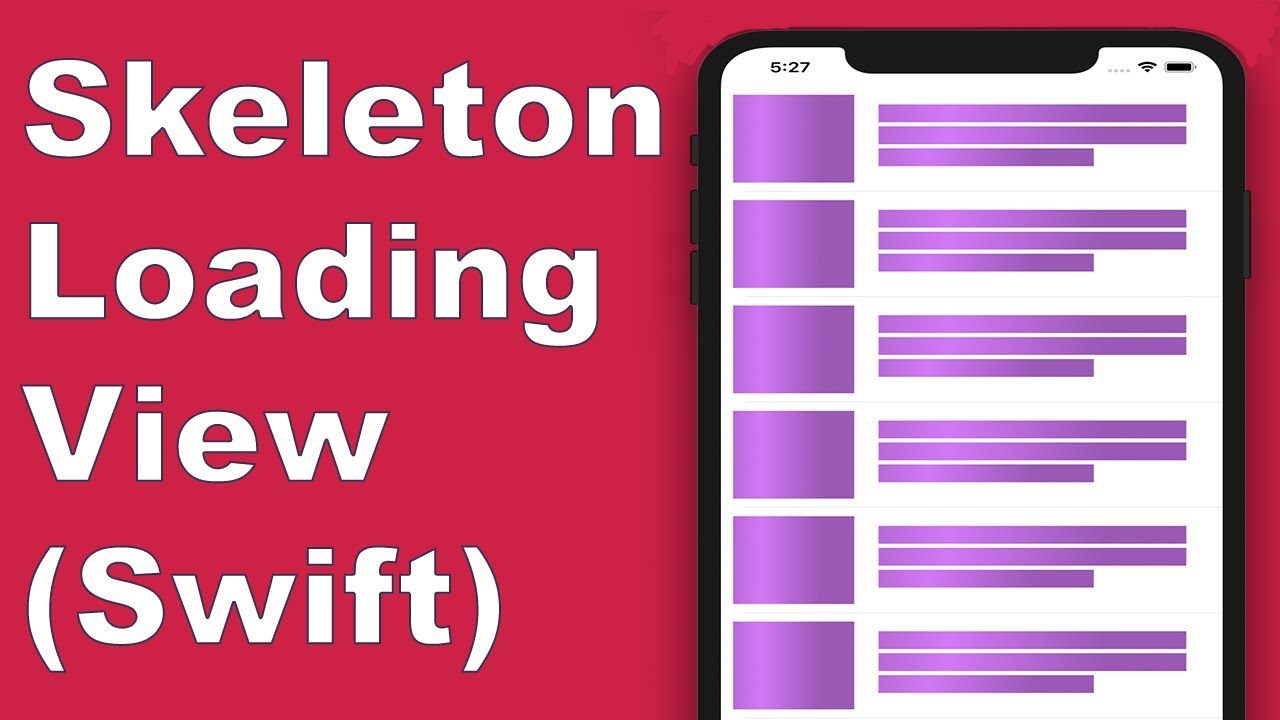
Today almost all apps have async processes, such as API requests, long running processes, etc. While the processes are working, usually developers place a loading view to show users that something is going on.
SkeletonView has been conceived to address this need, an elegant way to show users that something is happening and also prepare them for which contents are waiting.
Enjoy it! 🙂
🌟 Features
- Easy to use
- All UIViews are skeletonables
- Fully customizable
- Universal (iPhone & iPad)
- Interface Builder friendly
- Simple Swift syntax
- Lightweight readable codebase
🎬 Guides
📲 Installation
pod 'SkeletonView'
github "Juanpe/SkeletonView"
dependencies: [
  .package(url: "https://github.com/Juanpe/SkeletonView.git", from: "1.7.0")
]
📣 IMPORTANT!
Since version 1.30.0, SkeletonView supports XCFrameworks, so if you want to install it as a XCFramework, please use this repo instead.
🐒 Usage
Only 3 steps needed to use SkeletonView:
1️⃣ Import SkeletonView in proper place.
import SkeletonView
2️⃣ Now, set which views will be skeletonables. You achieve this in two ways:
Using code:
avatarImageView.isSkeletonable = true
Using IB/Storyboards:
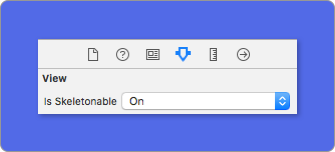
3️⃣ Once you've set the views, you can show the skeleton. To do so, you have 4 choices:
(1) view.showSkeleton()                 // Solid
(2) view.showGradientSkeleton()         // Gradient
(3) view.showAnimatedSkeleton()         // Solid animated
(4) view.showAnimatedGradientSkeleton() // Gradient animated
Preview
|
Solid
|
Gradient
|
Solid Animated
|
Gradient Animated
|

|

|

|

|
📣 IMPORTANT!
SkeletonView is recursive, so if you want show the skeleton in all skeletonable views, you only need to call the show method in the main container view. For example, with UIViewControllers.
🌿 Collections
SkeletonView is compatible with UITableView and UICollectionView.
UITableView
If you want to show the skeleton in a UITableView, you need to conform to SkeletonTableViewDataSource protocol.
public protocol SkeletonTableViewDataSource: UITableViewDataSource {
    func numSections(in collectionSkeletonView: UITableView) -> Int // Default: 1
    func collectionSkeletonView(_ skeletonView: UITableView, numberOfRowsInSection section: Int) -> Int
    func collectionSkeletonView(_ skeletonView: UITableView, cellIdentifierForRowAt indexPath: IndexPath) -> ReusableCellIdentifier
    func collectionSkeletonView(_ skeletonView: UITableView, skeletonCellForRowAt indexPath: IndexPath) -> UITableViewCell? // Default: nil
    func collectionSkeletonView(_ skeletonView: UITableView, prepareCellForSkeleton cell: UITableViewCell, at indexPath: IndexPath)
}
As you can see, this protocol inherits from UITableViewDataSource, so you can replace this protocol with the skeleton protocol.
This protocol has a default implementation for some methods. For example, the number of rows for each section is calculated in runtime:
func collectionSkeletonView(_ skeletonView: UITableView, numberOfRowsInSection section: Int) -> Int
// Default:
// It calculates how many cells need to populate whole tableview
📣 IMPORTANT!
If you return UITableView.automaticNumberOfSkeletonRows in the above method, it acts like the default behavior (i.e. it calculates how many cells needed to populate the whole tableview).
There is only one method you need to implement to let Skeleton know the cell identifier. This method doesn't have default implementation:
func collectionSkeletonView(_ skeletonView: UITableView, cellIdentifierForRowAt indexPath: IndexPath) -> ReusableCellIdentifier {
   return "CellIdentifier"
}
By default, the library dequeues the cells from each indexPath, but you can also do this if you want to make some changes before the skeleton appears:
func collectionSkeletonView(_ skeletonView: UITableView, skeletonCellForRowAt indexPath: IndexPath) -> UITableViewCell? {
    let cell = skeletonView.dequeueReusableCell(withIdentifier: "CellIdentifier", for: indexPath) as? Cell
    cell?.textField.isHidden = indexPath.row == 0
    return cell
}
If you prefer to leave the deque part to the library you can configure the cell using this method:
func collectionSkeletonView(_ skeletonView: UITableView, prepareCellForSkeleton cell: UITableViewCell, at indexPath: IndexPath) {
    let cell = cell as? Cell
    cell?.textField.isHidden = indexPath.row == 0
}
Besides, you can skeletonize both the headers and footers. You need to conform to SkeletonTableViewDelegate protocol.
public protocol SkeletonTableViewDelegate: UITableViewDelegate {
    func collectionSkeletonView(_ skeletonView: UITableView, identifierForHeaderInSection section: Int) -> ReusableHeaderFooterIdentifier? // default: nil
    func collectionSkeletonView(_ skeletonView: UITableView, identifierForFooterInSection section: Int) -> ReusableHeaderFooterIdentifier? // default: nil
}
📣 IMPORTANT!
1️⃣ If you are using resizable cells (tableView.rowHeight = UITableViewAutomaticDimension), it's mandatory define the estimatedRowHeight.
2️⃣ When you add elements in a UITableViewCell you should add it to contentView and not to the cell directly.
self.contentView.addSubview(titleLabel) ✅
self.addSubview(titleLabel) ❌
UICollectionView
For UICollectionView, you need to conform to SkeletonCollectionViewDataSource protocol.
public protocol SkeletonCollectionViewDataSource: UICollectionViewDataSource {
    func numSections(in collectionSkeletonView: UICollectionView) -> Int  // default: 1
    func collectionSkeletonView(_ skeletonView: UICollectionView, numberOfItemsInSection section: Int) -> Int
    func collectionSkeletonView(_ skeletonView: UICollectionView, cellIdentifierForItemAt indexPath: IndexPath) -> ReusableCellIdentifier
    func collectionSkeletonView(_ skeletonView: UICollectionView, supplementaryViewIdentifierOfKind: String, at indexPath: IndexPath) -> ReusableCellIdentifier? // default: nil
    func collectionSkeletonView(_ skeletonView: UICollectionView, skeletonCellForItemAt indexPath: IndexPath) -> UICollectionViewCell?  // default: nil
    func collectionSkeletonView(_ skeletonView: UICollectionView, prepareCellForSkeleton cell: UICollectionViewCell, at indexPath: IndexPath)
    func collectionSkeletonView(_ skeletonView: UICollectionView, prepareViewForSkeleton view: UICollectionReusableView, at indexPath: IndexPath)
}
The rest of the process is the same as UITableView
🔠 Texts
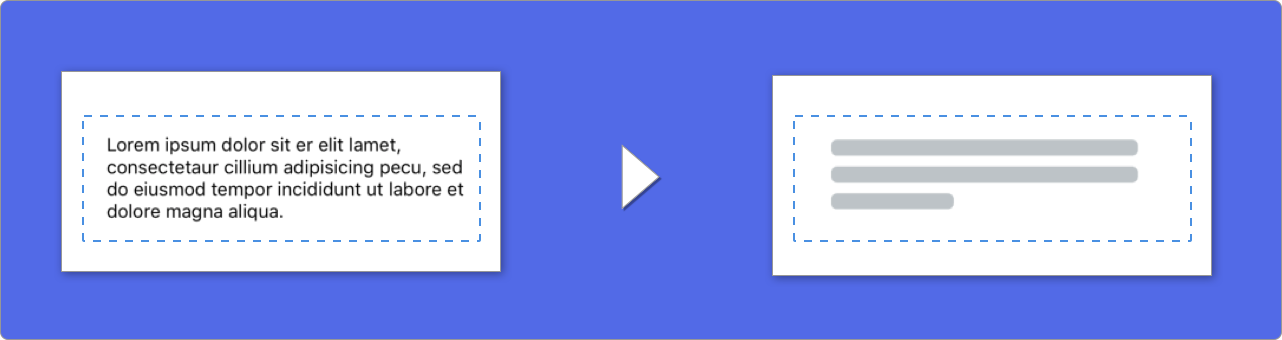
When using elements with text, SkeletonView draws lines to simulate text.
You can set some properties for multilines elements.
| Property |
Type |
Default |
Preview |
| lastLineFillPercent |
CGFloat |
70 |
 |
| linesCornerRadius |
Int |
0 |
 |
| skeletonLineSpacing |
CGFloat |
10 |
 |
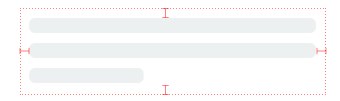
| skeletonPaddingInsets |
UIEdgeInsets |
.zero |
 |
| skeletonTextLineHeight |
SkeletonTextLineHeight |
.fixed(15) |
 |
| skeletonTextNumberOfLines |
SkeletonTextNumberOfLines |
.inherited |
|
To modify the percent or radius using code, set the properties:
descriptionTextView.lastLineFillPercent = 50
descriptionTextView.linesCornerRadius = 5
Or, if you prefer use IB/Storyboard:
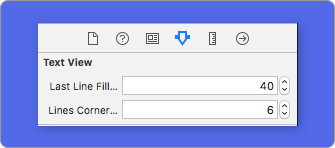
How to define the number of lines?
By default, the number of lines is the same as the value of the numberOfLines property. And, if it's set to zero, it'll calculate how many lines are needed to populate the whole skeleton and draw it.
However, if you want to set a specific number of skeleton lines you can do it by setting the skeletonTextNumberOfLines property. This property has two possible values, inherited which returns numberOfLines value and custom(Int) which returns the specific number of lines specified as the associated value.
For example:
label.skeletonTextNumberOfLines = 3 // .custom(3)
⚠️ DEPRECATED!
useFontLineHeight has been deprecated. You can use skeletonTextLineHeight instead:
descriptionTextView.skeletonTextLineHeight = .relativeToFont
📣 IMPORTANT!
Please note that for views without multiple lines, the single line will be considered
as the last line.
🦋 Appearance
The skeletons have a default appearance. So, when you don't specify the color, gradient or multilines properties, SkeletonView uses the default values.
Default values:
- tintColor:
UIColor
- default:
.skeletonDefault (same as .clouds but adaptive to dark mode)
- gradient: SkeletonGradient
- default:
SkeletonGradient(baseColor: .skeletonDefault)
- multilineHeight:
CGFloat
- multilineSpacing:
CGFloat
- multilineLastLineFillPercent:
Int
- multilineCornerRadius:
Int
- skeletonCornerRadius:
CGFloat (IBInspectable) (Make your skeleton view with corner)
To get these default values you can use SkeletonAppearance.default. Using this property you can set the values as well:
SkeletonAppearance.default.multilineHeight = 20
SkeletonAppearance.default.tintColor = .green
⚠️ DEPRECATED!
useFontLineHeight has been deprecated. You can use textLineHeight instead:
SkeletonAppearance.default.textLineHeight = .relativeToFont
🎨 Custom colors
You can decide which color the skeleton is tinted with. You only need to pass as a parameter the color or gradient you want.
Using solid colors
view.showSkeleton(usingColor: UIColor.gray) // Solid
// or
view.showSkeleton(usingColor: UIColor(red: 25.0, green: 30.0, blue: 255.0, alpha: 1.0))
Using gradients
let gradient = SkeletonGradient(baseColor: UIColor.midnightBlue)
view.showGradientSkeleton(usingGradient: gradient) // Gradient
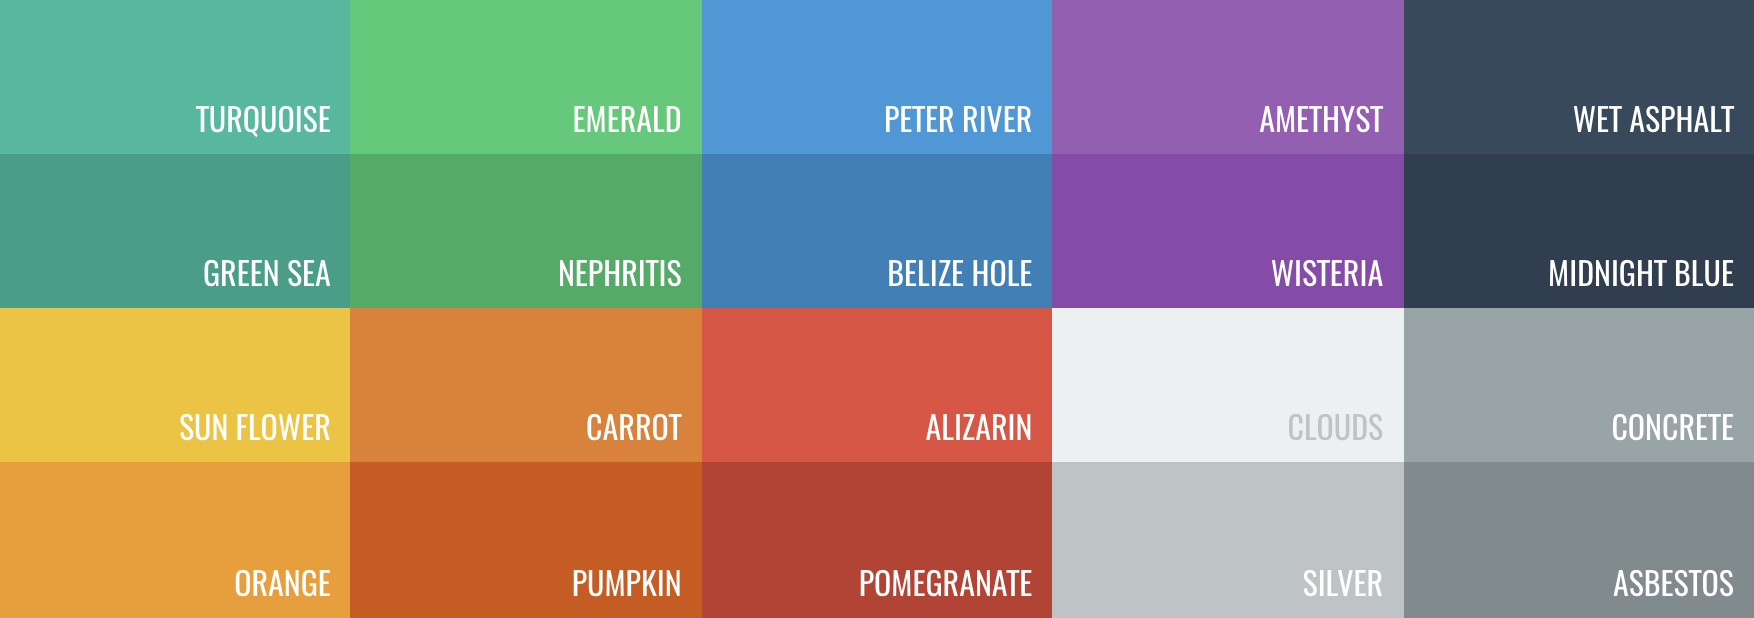
Besides, SkeletonView features 20 flat colors 🤙🏼
UIColor.turquoise, UIColor.greenSea, UIColor.sunFlower, UIColor.flatOrange ...
🏃♀️ Animations
SkeletonView has two built-in animations, pulse for solid skeletons and sliding for gradients.
Besides, if you want to do your own skeleton animation, it's really easy.
Skeleton provides the showAnimatedSkeleton function which has a SkeletonLayerAnimation closure where you can define your custom animation.
public typealias SkeletonLayerAnimation = (CALayer) -> CAAnimation
You can call the function like this:
view.showAnimatedSkeleton { (layer) -> CAAnimation in
  let animation = CAAnimation()
  // Customize here your animation

  return animation
}
It's available SkeletonAnimationBuilder. It's a builder to make SkeletonLayerAnimation.
Today, you can create sliding animations for gradients, deciding the direction and setting the duration of the animation (default = 1.5s).
// func makeSlidingAnimation(withDirection direction: GradientDirection, duration: CFTimeInterval = 1.5) -> SkeletonLayerAnimation

let animation = SkeletonAnimationBuilder().makeSlidingAnimation(withDirection: .leftToRight)
view.showAnimatedGradientSkeleton(usingGradient: gradient, animation: animation)
GradientDirection is an enum, with theses cases:
| Direction |
Preview |
| .leftRight |
 |
| .rightLeft |
 |
| .topBottom |
 |
| .bottomTop |
 |
| .topLeftBottomRight |
 |
| .bottomRightTopLeft |
 |
😉 TRICK!
Exist another way to create sliding animations, just using this shortcut:
let animation = GradientDirection.leftToRight.slidingAnimation()
🏄 Transitions
SkeletonView has built-in transitions to show or hide the skeletons in a smoother way 🤙
To use the transition, simply add the transition parameter to your showSkeleton() or hideSkeleton() function with the transition time, like this:
view.showSkeleton(transition: .crossDissolve(0.25))     //Show skeleton cross dissolve transition with 0.25 seconds fade time
view.hideSkeleton(transition: .crossDissolve(0.25))     //Hide skeleton cross dissolve transition with 0.25 seconds fade time
The default value is crossDissolve(0.25)
Preview
|
None
|
Cross dissolve
|

|

|
✨ Miscellaneous
Hierarchy
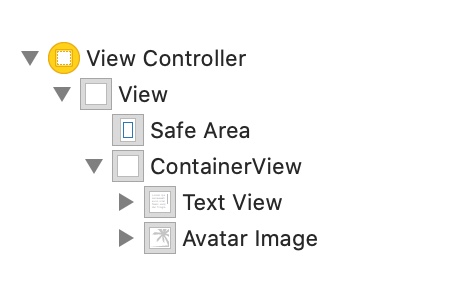
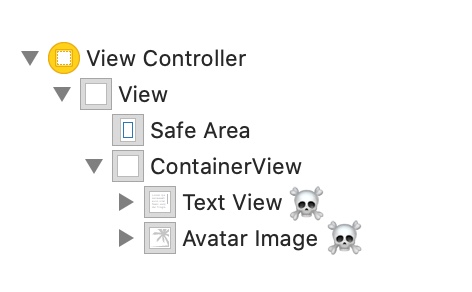
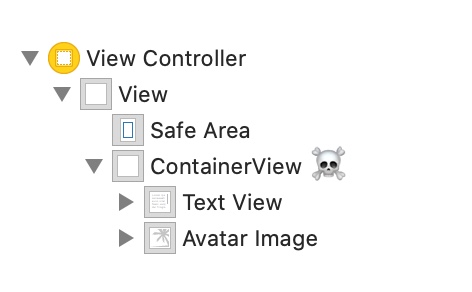
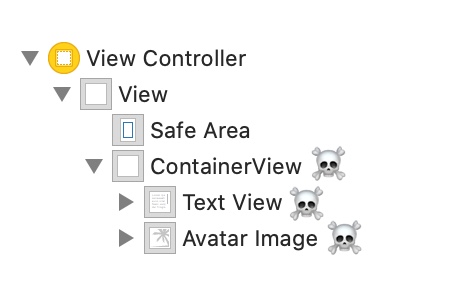
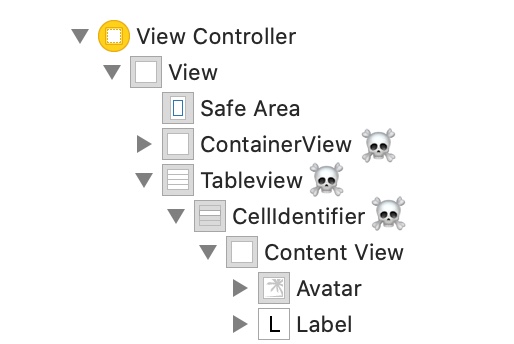
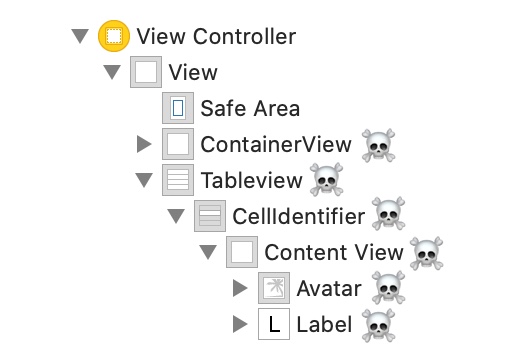
Since SkeletonView is recursive, and we want skeleton to be very efficient, we want to stop recursion as soon as possible. For this reason, you must set the container view as Skeletonable, because Skeleton will stop looking for skeletonable subviews as soon as a view is not Skeletonable, breaking then the recursion.
Because an image is worth a thousand words:
In this example we have a UIViewController with a ContainerView and a UITableView. When the view is ready, we show the skeleton using this method:
view.showSkeleton()
isSkeletonable= ☠️
Skeleton views layout
Sometimes skeleton layout may not fit your layout because the parent view bounds have changed. For example, rotating the device.
You can relayout the skeleton views like so:
override func viewDidLayoutSubviews() {
    view.layoutSkeletonIfNeeded()
}
📣 IMPORTANT!
You shouldn't call this method. From version 1.8.1 you don't need to call this method, the library does automatically. So, you can use this method ONLY in the cases when you need to update the layout of the skeleton manually.
Update skeleton
You can change the skeleton configuration at any time like its colour, animation, etc. with the following methods:
(1) view.updateSkeleton()                 // Solid
(2) view.updateGradientSkeleton()         // Gradient
(3) view.updateAnimatedSkeleton()         // Solid animated
(4) view.updateAnimatedGradientSkeleton() // Gradient animated
*Hiding views when the animation starts









 SkeletonView is a Swift library for iOS that turns your existing views into animated skeleton (placeholder) loading screens while data loads, so users see what content is coming.