
boneyard
Pixel-perfect skeleton loading screens, extracted from your real UI. No manual measurement, no hand-tuned placeholders.
Works with React, Preact, Vue, Svelte 5, Angular, and React Native.
Quick start
npm install boneyard-js
React
import { Skeleton } from 'boneyard-js/react'

function BlogPage() {
  const { data, isLoading } = useFetch('/api/post')
  return (
    <Skeleton name="blog-card" loading={isLoading}>
      {data && <BlogCard data={data} />}
    </Skeleton>
  )
}
With <Suspense> / useSuspenseQuery
Drop in <BoneSuspense> anywhere you'd use a <Suspense> boundary. The skeleton renders as the fallback at runtime, and the CLI captures bones from the resolved children at build time.
import { BoneSuspense } from 'boneyard-js/react'

function Page() {
  return (
    <BoneSuspense name="user-card">
      <UserCard />  {/* uses useSuspenseQuery */}
    </BoneSuspense>
  )
}
No initialData or placeholderData required — the build-time --wait window lets the query resolve naturally. Pass a fixture if the query can't finish in time.
Vue
<script setup>
import Skeleton from 'boneyard-js/vue'
import './bones/registry'
const loading = ref(true)
</script>

<template>
  <Skeleton name="card" :loading="loading">
    <Card />
  </Skeleton>
</template>
Svelte 5
<script>
  import Skeleton from 'boneyard-js/svelte'
  import '$lib/bones/registry'
  let loading = true
</script>

<Skeleton name="card" {loading}>
  <Card />
</Skeleton>
Preact
import { Skeleton } from 'boneyard-js/preact'

function BlogPage() {
  const { data, isLoading } = useFetch('/api/post')
  return (
    <Skeleton name="blog-card" loading={isLoading}>
      {data && <BlogCard data={data} />}
    </Skeleton>
  )
}
Angular
import { SkeletonComponent } from 'boneyard-js/angular'

@Component({
  imports: [SkeletonComponent],
  template: `
    <boneyard-skeleton name="card" [loading]="isLoading">
      <app-card />
    </boneyard-skeleton>
  `
})
React Native
import { Skeleton } from 'boneyard-js/native'

<Skeleton name="profile-card" loading={isLoading}>
  <ProfileCard />
</Skeleton>
npx boneyard-js build --native --out ./bones
# Open your app on device — bones capture automatically
Dynamic Type: Generate bones at default font scale. Boneyard automatically scales bone positions at runtime to match the user's text size setting.
Generate bones
# CLI — works with any framework
npx boneyard-js build

# Watch mode — re-captures on HMR changes
npx boneyard-js build --watch

# React Native — scans from device
npx boneyard-js build --native
Then import the registry once in your app entry:
import './bones/registry'
Vite plugin
For Vite-based projects (React, Preact, Vue, Svelte), use the plugin instead of the CLI — no second terminal needed:
// vite.config.ts
import { boneyardPlugin } from 'boneyard-js/vite'

export default defineConfig({
  plugins: [boneyardPlugin()]
})
Bones are captured automatically when the dev server starts and re-captured on every HMR update.
How it works
Web: The CLI (or Vite plugin) opens a headless browser, visits your app, finds every <Skeleton name="...">, and snapshots their layout at multiple breakpoints.
React Native: The <Skeleton> component auto-scans in dev mode when the CLI is running. It walks the fiber tree, measures views via UIManager, and sends bone data to the CLI. Zero overhead in production.
All frameworks output the same .bones.json format — cross-platform compatible.
CLI flags
| Flag |
Default |
Description |
[url] |
auto-detected |
URL to visit |
--breakpoints |
375,768,1280 |
Viewport widths, comma-separated |
--wait |
800 |
ms to wait after page load |
--out |
./src/bones |
Output directory |
--force |
— |
Skip incremental cache |
--watch |
— |
Re-capture on HMR changes |
--native |
— |
React Native device scanning |
--no-scan |
— |
Skip filesystem route scanning |
--cdp |
— |
Connect to existing Chrome via debug port |
--env-file |
— |
Load env vars from file |
Props
| Prop |
Type |
Default |
Description |
loading |
boolean |
— |
Show skeleton or real content |
name |
string |
— |
Unique name (generates name.bones.json) |
color |
string |
rgba(0,0,0,0.08) |
Bone fill color |
darkColor |
string |
rgba(255,255,255,0.06) |
Bone color in dark mode |
animate |
'pulse' | 'shimmer' | 'solid' |
'pulse' |
Animation style |
stagger |
number | boolean |
false |
Stagger delay between bones in ms (true = 80ms) |
transition |
number | boolean |
false |
Fade out duration when loading ends (true = 300ms) |
boneClass |
string |
— |
CSS class applied to each bone element |
fixture |
ReactNode / Snippet / Slot |
— |
Mock content for CLI capture (dev only) |
initialBones |
ResponsiveBones |
— |
Pass bones directly (overrides registry) |
fallback |
ReactNode / Snippet / Slot |
— |
Shown when loading but no bones available |
Config file
{
  "breakpoints": [375, 768, 1280],
  "out": "./src/bones",
  "wait": 800,
  "color": "#e5e5e5",
  "animate": "pulse"
}
Save as boneyard.config.json. Per-component props override config values.
Package exports
| Import |
Use |
boneyard-js |
snapshotBones, renderBones, computeLayout |
boneyard-js/react |
React <Skeleton> |
boneyard-js/preact |
Preact <Skeleton> (no compat needed) |
boneyard-js/vue |
Vue <Skeleton> |
boneyard-js/svelte |
Svelte <Skeleton> |
boneyard-js/angular |
Angular <boneyard-skeleton> |
boneyard-js/native |
React Native <Skeleton> |
boneyard-js/vite |
Vite plugin boneyardPlugin() |
Links
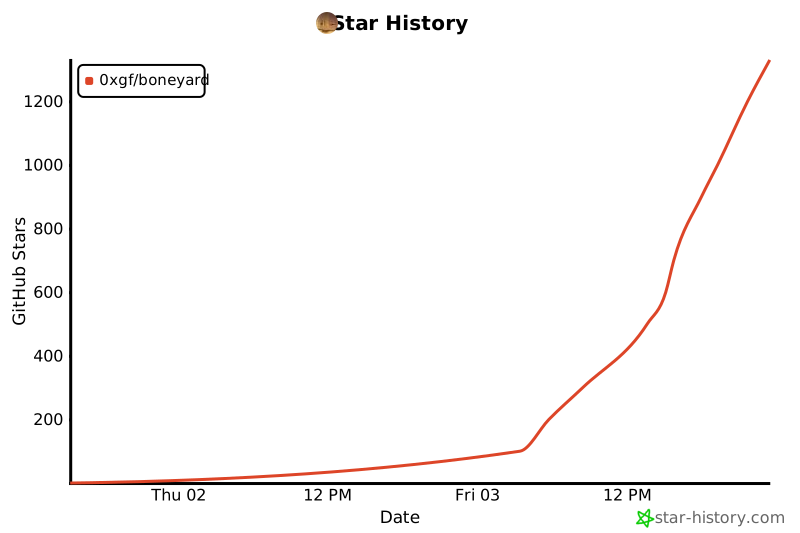
Star History
License
MIT

 Boneyard 直接根据你真实的界面生成像素级精确的骨架加载屏,不需要你手动绘制占位图形。