Join TEIN AI →
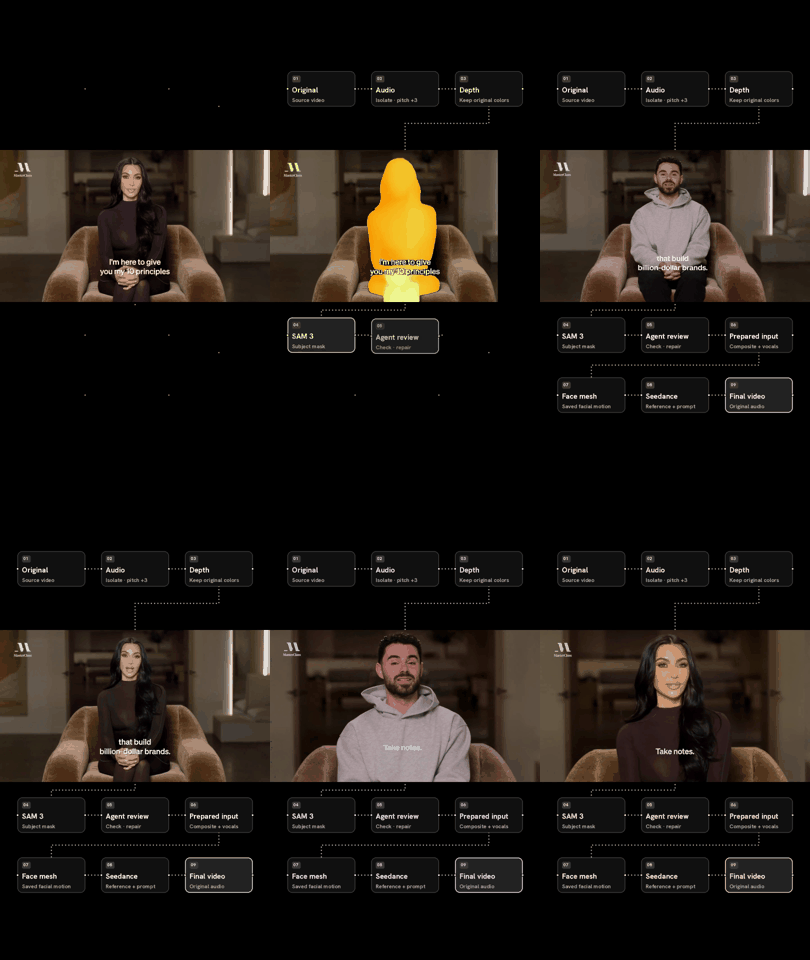
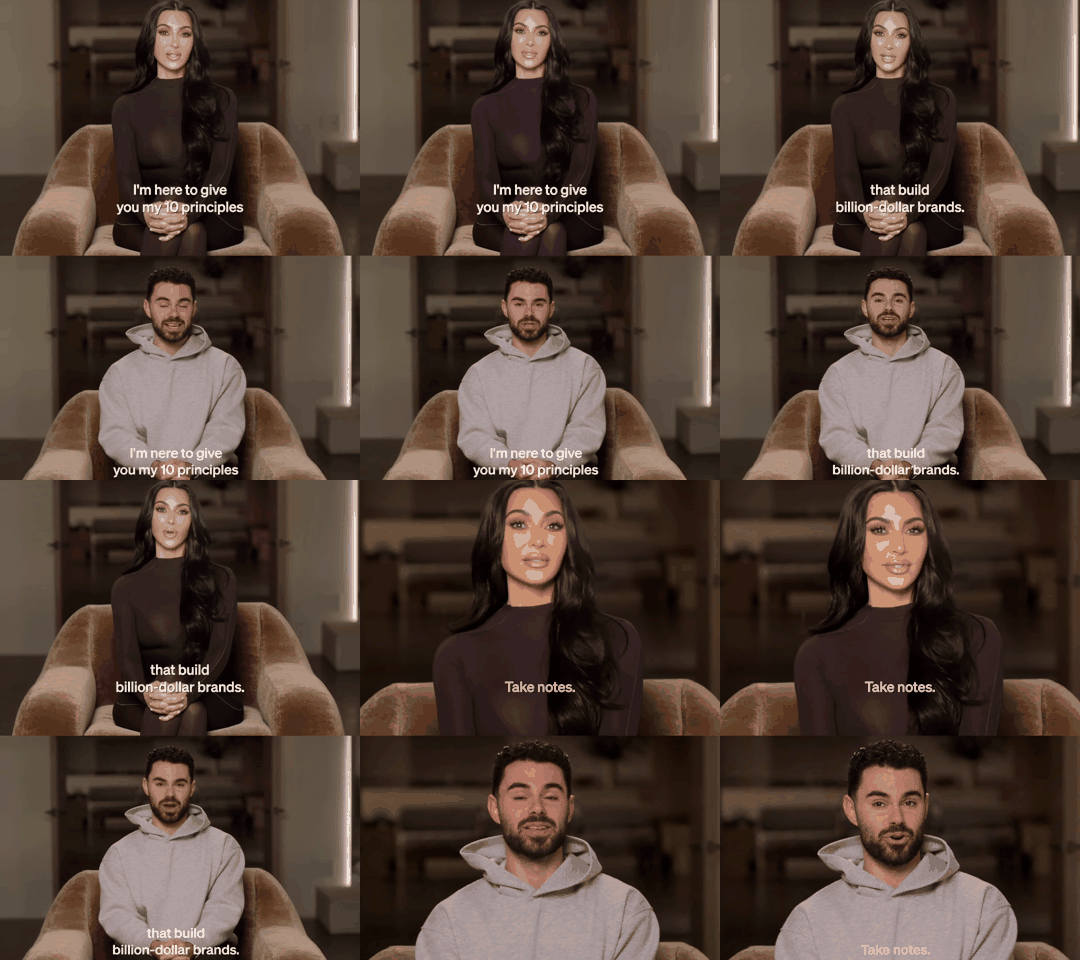
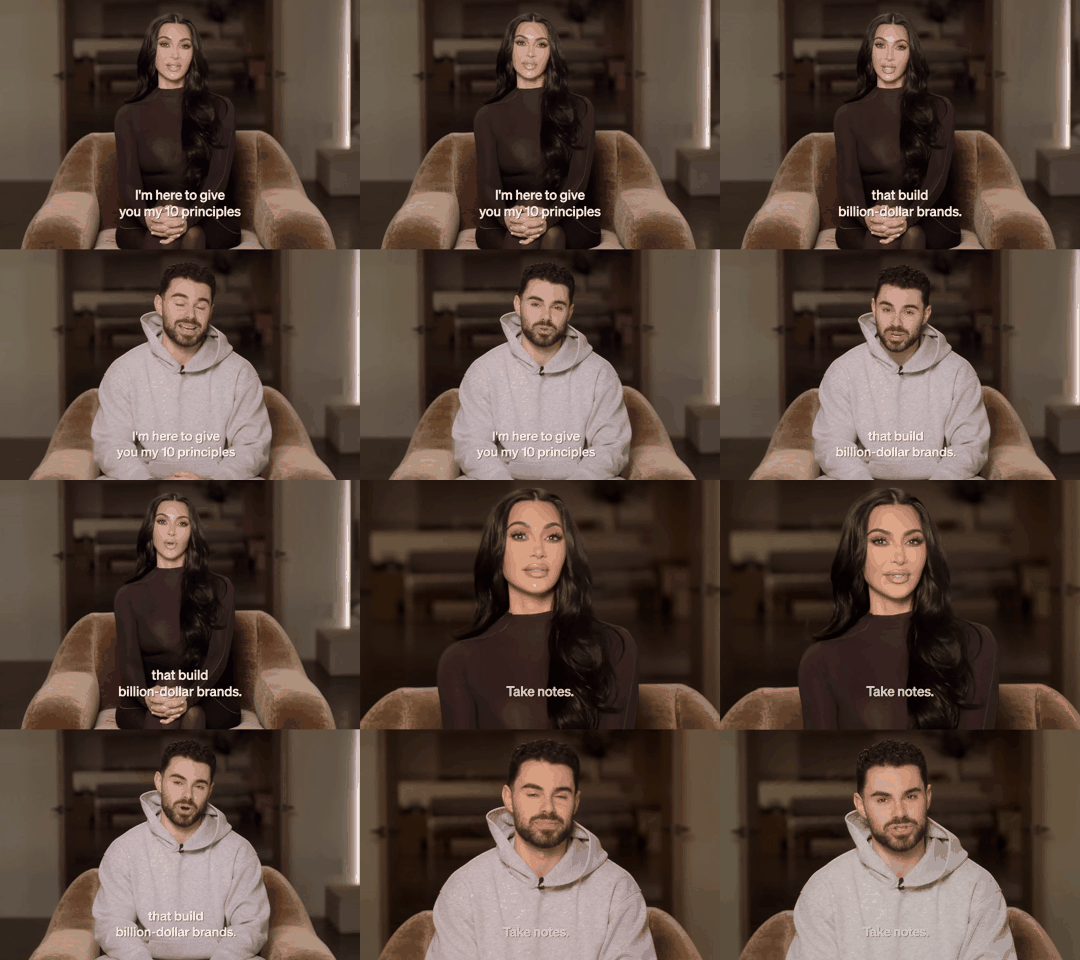
Click any preview to open its full video with audio.
Genjustsu — Open Source Workflow
Your scene. New characters.
Join TEIN AI ·
Get the Seedance API ·
Agent setup ·
Examples ·
MIT license
A local UI and agent-assisted workflow for replacing video subjects using colored depth, SAM 3 masks and Seedance through Enhancor. Draft first; approve before 1080p. The final export restores the entire original source audio, not generated audio.
Get access
- Sign up at TEIN.ai for early access: “The cheapest APIs, open source workflows, and more.”
- Get the Seedance API at Enhancor.ai — this workflow uses its Seedance integration with human-face support (
pass_faces: true), draft previews, and approved 1080p generation. Get your own key from the API dashboard. Current the lowest price in the market; with unrestricted use.
Easiest setup: let your coding agent install it
Extract the ZIP, open this folder in Codex or another coding agent with terminal/file access, and paste:
Set up this TEIN Genjustsu — Open Source Workflow project for me. Read docs/SETUP-AGENT.md and follow it end to end. Detect my OS, install missing Python/Rubber Band/cloudflared prerequisites using the supported package manager, create the main virtual environment, install dependencies, install Python 3.12 and run bash setup-face-mesh.sh for both mesh modes, and create .env without overwriting it. Open .env so I can enter my own keys privately. Run the local tests, launch the app and its callback-only tunnel, run the strict readiness check on a free localhost port, verify the UI and companion images, and give me the working URL. Work independently through setup, respecting system permission prompts. Do not submit paid generations. If keys are missing, launch the UI and clearly tell me generation is waiting for them.
The launcher starts a callback-only Quick Tunnel when no custom webhook is configured. Keep it running with the app. The agent uses the included setup runbook. You only need to supply your own provider keys and approve any required system installation. No separate agent install is required. Native Windows users should use WSL2; macOS/Linux launch scripts are included.
Manual setup
- Install Python 3.12+ (the development runtime was Python 3.14) and Rubber Band CLI:
- macOS:
brew install rubberband cloudflared
- Ubuntu/Debian or WSL:
sudo apt install rubberband-cli python3-venv
- Install cloudflared too, unless you already have a public HTTPS webhook receiver. On launch it creates a temporary callback-only tunnel; the UI and media stay on localhost.
- In this folder, run
bash setup.sh. This creates an isolated .venv, installs requirements.txt, creates a blank .env, and checks dependencies. To enable all three modes, install Python 3.12 and run bash setup-face-mesh.sh, then .venv/bin/python doctor.py --mesh. On macOS, install the worker interpreter with brew install [email protected] if needed.
- Fill
.env with your own ENHANCOR_API_KEY and REPLICATE_API_TOKEN. Get them from Enhancor and Replicate. Fund/enable the relevant API accounts. HF_TOKEN is optional for the Hugging Face depth alternative.
- Run
./start.command (or bash start.command). Open http://127.0.0.1:8770. Use PORT=8771 bash start.command if the port is occupied.
- Once running, check
.venv/bin/python doctor.py --require-keys. Enhancor requires a webhook URL: launch.py supplies one through cloudflared, or you can set ENHANCOR_WEBHOOK_URL yourself. Keep the app/tunnel running.
- Upload your own MP4/MOV, prepare it, inspect the entire mask and prepared video, approve that exact mask, provide your own character references, review the prompt, and create a draft.
- When you like the draft, click the 1080p approval button. The completed draft and HD result remain separate; both final previews use source audio.
No local model weights or GPU are needed for the default hosted setup. Python packages and the Rubber Band executable are required locally. No API keys, signed media URLs, or old jobs are included. Four user-selected demonstration videos are included in examples/. The bundled TEIN companion artwork is part of the UI.
What happens
- Save the source unchanged; extract audio and separate vocals/music with Demucs on Replicate.
- Pitch isolated vocals +3 semitones, maintaining duration with Rubber Band.
- Normalize the working video to 24 fps, up to 960 pixels; obtain colored depth with
lucataco/depth-anything-video. Preserve returned colors.
- Use SAM 3 raw PNG masks on depth. Check alignment, coverage and background spill. An agent can retry segmentation on the original RGB if depth loses detail.
- Composite the depth subject over the original background. Mandatory full-clip visual mask review gates every generation. Approval is bound to hashes of the current artifacts.
- Embed the pitched vocals into the composite MP4. Send this video, no standalone audio, with character references.
- Enhancor Seedance Edit for image references; Omni / multi_reference for a video identity reference. Generate a draft by default.
- Poll for completion, download the result, discard its audio and copy the complete original soundtrack into the final MP4.
- After explicit HD approval, complete the accepted draft at 1080p and restore the soundtrack again.
Autonomous agent operation
Open this folder in your coding agent and ask it to follow AGENTS.md and .agents/skills/tein-video-workflow/SKILL.md. No particular agent vendor or model is required, but it must be able to inspect video and files, run Python, and access the network. An agent service is not bundled or silently started. The UI/server automates processing and result collection; the agent or user performs visual QA and creative review.
Example: “Use the Genjustsu workflow for my clip and references. Prepare and inspect the entire mask, repair it if needed, show the prompt, submit the authorized draft, and retrieve the final preview. Wait for my approval before HD.”
See agent operations, API integration, models, media hosting, and troubleshooting.
Recovery and checks
.venv/bin/python doctor.py --require-keys
.venv/bin/python test_composite.py
.venv/bin/python -m unittest discover -s tests
.venv/bin/python workflow.py status LOCAL_JOB_ID
.venv/bin/python workflow.py resume LOCAL_JOB_ID
.venv/bin/python workflow.py resume LOCAL_JOB_ID --hd
The server resumes saved Seedance/HD collection on restart. It does not re-submit those requests. Preparation interrupted during a remote model call requires agent inspection of saved prediction metadata; do not blindly restart billed stages. Keep one server/collector per job. This is a local single-user application, not a multi-user hosted service. Bind to localhost; add authentication and a durable worker queue before public hosting.
Tested release
Clean installation tested on macOS ARM64 with Python 3.14.6. Thirteen automated tests passed, plus a live draft → approved 1080p run and actual browser download. The test caught and fixed the Tmpfiles URL and required-webhook setup issues. Final source audio was verified byte-for-byte. See validation and remaining limits. Other OS installations and the optional Catbox route have not been live-tested.
Sharing
Share the original clean ZIP, or remove .env, .venv, runs, logs and caches before repackaging. Runs contain private media and provider URLs. Dependencies and hosted models retain their own licenses and service terms. See THIRD-PARTY.md.
Watch the workflow and examples
Animated previews below are silent. Click a preview or its video link to open the full MP4 with audio.
Workflow walkthrough
Watch the full workflow video with audio
Example 1
Watch the full example 1 video
Example 2
Watch the full example 2 video
Previews show up to the first six seconds. See all example files. Examples are optional and not needed for setup.
Before publishing on GitHub
Use this clean project folder, not a working installation containing jobs or credentials. .gitignore excludes secrets, environments, generated jobs and logs; it cannot remove files already committed to Git history. Keep .env.example blank for secrets. Do not commit .env, runtime webhook URLs, provider responses or run folders. No repository history is included in this ZIP.
The code and documentation are licensed under MIT; example videos and TEIN artwork are excluded and require separate redistribution rights. This app is designed for localhost use, not unauthenticated public deployment.
License
Code and documentation: MIT, copyright © 2026 Sirio Berati.
TEIN names, logos, companion artwork, and all example media are excluded from the MIT grant. No permission to reuse those assets is granted here; their respective owners retain their rights. Third-party dependencies and services retain their own licenses and terms. See third-party notices.
Fast alternative: face mesh
Choose Fast · Face mesh in the UI, or use workflow.py prepare VIDEO --mode face_mesh. Install the optional worker once with bash setup-face-mesh.sh (Python 3.12 required; isolated .venv-face). The model downloads from Google's official storage on first use.
This path keeps the original video, tracks and saves facial landmarks, draws the mesh, isolates vocals and embeds the +3 pitched vocals. It makes no depth or SAM calls. It is currently designed for a single centered speaker; inspect all frames and stop on tracking gaps or incorrect face alignment. Do not claim mask review in this mode: review facial tracking and audio instead. Saved artifact hashes gate submission.
Use the same character references, draft-first submission, collection, original-audio restoration and explicitly approved HD upgrade. In the prompt, explain that mesh lines are motion guidance and must disappear, replace the complete original identity including hair, and preserve all dialogue and timing. Image reference uses Edit; video identity uses Omni. Keep advanced depth mode available. Do not submit automatically during setup.
Combined depth + face mesh
Select Advanced + Face mesh in the UI or use workflow.py prepare VIDEO --mode depth_mesh. This runs the original depth/SAM pipeline, preserves its depth composite, then tracks the face from the original frames and overlays the mesh onto that composite. Landmarks are saved in face-landmarks.json. Review BOTH mask coverage and face tracking before approval. All artifacts, including depth, mask, mesh and embedded audio, are bound to review approval. Follow the same draft → approved HD → original-audio restoration flow.
For setup with all three preparation modes, also install Python 3.12 and run bash setup-face-mesh.sh. This creates an isolated mesh environment; the main app can retain its existing Python version. A Google Face Landmarker model is downloaded at first use. No SAM/depth inference is used by fast mode. Mesh modes are experimental and currently optimized for one centered speaker.
Tech stack
| Layer |
Technology and purpose |
| Local app |
Python 3.12+, FastAPI, Uvicorn; HTML, CSS and vanilla JavaScript UI |
| Video/audio processing |
PyAV, NumPy, Pillow, OpenCV and SciPy; local encoding, compositing and audio restoration |
| Vocal isolation |
Hosted Demucs / htdemucs through Replicate |
| Pitch |
Rubber Band CLI; isolated vocals +3 semitones without changing duration |
| Colored depth |
Replicate lucataco/depth-anything-video; optional Hugging Face Video Depth Anything or chenxwh/depth-any-video |
| Segmentation |
Replicate lucataco/sam3-video; raw per-frame masks and mandatory visual review |
| Face mesh |
Local Google MediaPipe Face Landmarker; saved landmarks and overlay, isolated Python 3.12 worker environment |
| Generation |
Enhancor Seedance; Edit for image references, Omni for video references; draft first, approved 1080p upgrade |
| Media hosting |
Tmpfiles primary; configurable Catbox fallback; direct-link checks before generation |
| Completion |
Persisted job files and polling; callback-only Cloudflare Quick Tunnel for the provider callback requirement |
| Agent workflow |
Included AGENTS.md, setup runbook, skill and CLI; a user-supplied coding agent performs visual QA |
Fast face mesh skips both depth and SAM. Combined mode uses depth + SAM + facial landmarks. All modes embed pitched vocals before generation and restore the original source soundtrack afterward.
Hosting and failure recovery
The default .env.example uses MEDIA_HOST=tmpfiles and MEDIA_HOST_FALLBACKS=catbox. Each host gets two attempts with a short delay. If temporary hosting fails, the uploader tries Catbox and reports that change. Both hosts expose media through public URLs; Catbox is persistent. Set MEDIA_HOST_FALLBACKS= to disable fallback, or select Catbox as primary. CATBOX_USERHASH is optional.
The uploader checks direct URLs for HTTP errors, empty responses and HTML download pages. These checks cannot guarantee later provider access or codec compatibility. Tmpfiles references expire: for an explicitly authorized regeneration, upload fresh copies instead of reusing old request URLs. A failed upload never triggers a generation call.
Paid generation requests are not automatically retried: on a timeout or unclear response, inspect the saved request/provider status first to avoid duplicate charges. On an explicit media-format failure, validate the local videos and re-upload before retrying. Polling remains the source of truth if callbacks are delayed. See hosting details.

 Genjustsu 是一个开源工作流,使用彩色深度图、SAM 3 分割掩码和可选的人脸网格跟踪来替换视频中的人物或物体,再通过 Enhancor API 用 Seedance 生成替换内容。它运行一个本地网页界面,用于准备输入、审核掩码、预览草稿,并导出恢复原始音频的结果。