Archived: Project has Moved
This repository is no longer maintained and has been archived for provenance.
The project has continued under the name Crush, developed by the original author and the Charm team.
Please follow Crush for ongoing development.
⌬ OpenCode

⚠️ Early Development Notice: This project is in early development and is not yet ready for production use. Features may change, break, or be incomplete. Use at your own risk.
A powerful terminal-based AI assistant for developers, providing intelligent coding assistance directly in your terminal.
Overview
OpenCode is a Go-based CLI application that brings AI assistance to your terminal. It provides a TUI (Terminal User Interface) for interacting with various AI models to help with coding tasks, debugging, and more.
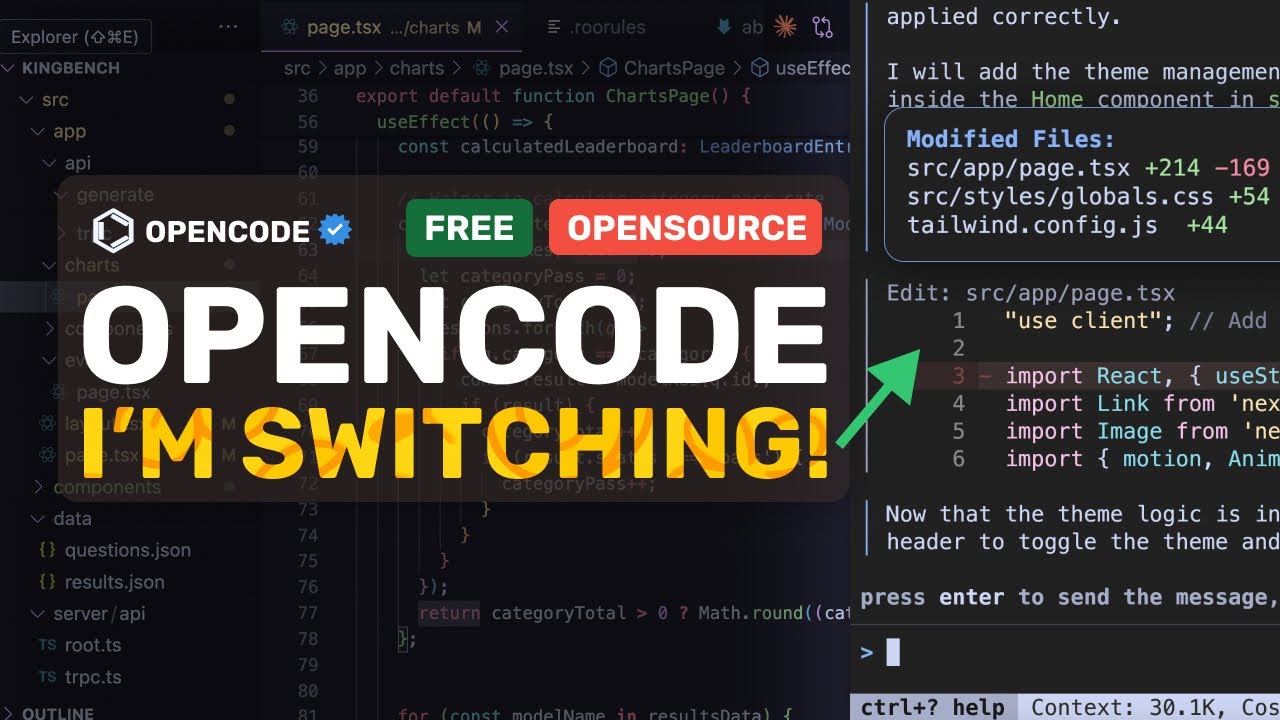
For a quick video overview, check out
 OpenCode + Gemini 2.5 Pro: BYE Claude Code! I'm SWITCHING To the FASTEST AI Coder!
Features
- Interactive TUI: Built with Bubble Tea for a smooth terminal experience
- Multiple AI Providers: Support for OpenAI, Anthropic Claude, Google Gemini, AWS Bedrock, Groq, Azure OpenAI, and OpenRouter
- Session Management: Save and manage multiple conversation sessions
- Tool Integration: AI can execute commands, search files, and modify code
- Vim-like Editor: Integrated editor with text input capabilities
- Persistent Storage: SQLite database for storing conversations and sessions
- LSP Integration: Language Server Protocol support for code intelligence
- File Change Tracking: Track and visualize file changes during sessions
- External Editor Support: Open your preferred editor for composing messages
- Named Arguments for Custom Commands: Create powerful custom commands with multiple named placeholders
Installation
Using the Install Script
# Install the latest version
curl -fsSL https://raw.githubusercontent.com/opencode-ai/opencode/refs/heads/main/install | bash

# Install a specific version
curl -fsSL https://raw.githubusercontent.com/opencode-ai/opencode/refs/heads/main/install | VERSION=0.1.0 bash
Using Homebrew (macOS and Linux)
brew install opencode-ai/tap/opencode
Using AUR (Arch Linux)
# Using yay
yay -S opencode-ai-bin

# Using paru
paru -S opencode-ai-bin
Using Go
go install github.com/opencode-ai/opencode@latest
Configuration
OpenCode looks for configuration in the following locations:
$HOME/.opencode.json$XDG_CONFIG_HOME/opencode/.opencode.json./.opencode.json (local directory)
Auto Compact Feature
OpenCode includes an auto compact feature that automatically summarizes your conversation when it approaches the model's context window limit. When enabled (default setting), this feature:
- Monitors token usage during your conversation
- Automatically triggers summarization when usage reaches 95% of the model's context window
- Creates a new session with the summary, allowing you to continue your work without losing context
- Helps prevent "out of context" errors that can occur with long conversations
You can enable or disable this feature in your configuration file:
{
  "autoCompact": true // default is true
}
Environment Variables
You can configure OpenCode using environment variables:
| Environment Variable |
Purpose |
ANTHROPIC_API_KEY |
For Claude models |
OPENAI_API_KEY |
For OpenAI models |
GEMINI_API_KEY |
For Google Gemini models |
GITHUB_TOKEN |
For Github Copilot models (see Using Github Copilot) |
VERTEXAI_PROJECT |
For Google Cloud VertexAI (Gemini) |
VERTEXAI_LOCATION |
For Google Cloud VertexAI (Gemini) |
GROQ_API_KEY |
For Groq models |
AWS_ACCESS_KEY_ID |
For AWS Bedrock (Claude) |
AWS_SECRET_ACCESS_KEY |
For AWS Bedrock (Claude) |
AWS_REGION |
For AWS Bedrock (Claude) |
AZURE_OPENAI_ENDPOINT |
For Azure OpenAI models |
AZURE_OPENAI_API_KEY |
For Azure OpenAI models (optional when using Entra ID) |
AZURE_OPENAI_API_VERSION |
For Azure OpenAI models |
LOCAL_ENDPOINT |
For self-hosted models |
SHELL |
Default shell to use (if not specified in config) |
Shell Configuration
OpenCode allows you to configure the shell used by the bash tool. By default, it uses the shell specified in the SHELL environment variable, or falls back to /bin/bash if not set.
You can override this in your configuration file:
{
  "shell": {
    "path": "/bin/zsh",
    "args": ["-l"]
  }
}
This is useful if you want to use a different shell than your default system shell, or if you need to pass specific arguments to the shell.
Configuration File Structure
{
  "data": {
    "directory": ".opencode"
  },
  "providers": {
    "openai": {
      "apiKey": "your-api-key",
      "disabled": false
    },
    "anthropic": {
      "apiKey": "your-api-key",
      "disabled": false
    },
    "copilot": {
      "disabled": false
    },
    "groq": {
      "apiKey": "your-api-key",
      "disabled": false
    },
    "openrouter": {
      "apiKey": "your-api-key",
      "disabled": false
    }
  },
  "agents": {
    "coder": {
      "model": "claude-3.7-sonnet",
      "maxTokens": 5000
    },
    "task": {
      "model": "claude-3.7-sonnet",
      "maxTokens": 5000
    },
    "title": {
      "model": "claude-3.7-sonnet",
      "maxTokens": 80
    }
  },
  "shell": {
    "path": "/bin/bash",
    "args": ["-l"]
  },
  "mcpServers": {
    "example": {
      "type": "stdio",
      "command": "path/to/mcp-server",
      "env": [],
      "args": []
    }
  },
  "lsp": {
    "go": {
      "disabled": false,
      "command": "gopls"
    }
  },
  "debug": false,
  "debugLSP": false,
  "autoCompact": true
}
Supported AI Models
OpenCode supports a variety of AI models from different providers:
OpenAI
- GPT-4.1 family (gpt-4.1, gpt-4.1-mini, gpt-4.1-nano)
- GPT-4.5 Preview
- GPT-4o family (gpt-4o, gpt-4o-mini)
- O1 family (o1, o1-pro, o1-mini)
- O3 family (o3, o3-mini)
- O4 Mini
Anthropic
- Claude 4 Sonnet
- Claude 4 Opus
- Claude 3.5 Sonnet
- Claude 3.5 Haiku
- Claude 3.7 Sonnet
- Claude 3 Haiku
- Claude 3 Opus
GitHub Copilot
- GPT-3.5 Turbo
- GPT-4
- GPT-4o
- GPT-4o Mini
- GPT-4.1
- Claude 3.5 Sonnet
- Claude 3.7 Sonnet
- Claude 3.7 Sonnet Thinking
- Claude Sonnet 4
- O1
- O3 Mini
- O4 Mini
- Gemini 2.0 Flash
- Gemini 2.5 Pro
Google
- Gemini 2.5
- Gemini 2.5 Flash
- Gemini 2.0 Flash
- Gemini 2.0 Flash Lite
AWS Bedrock
Groq
- Llama 4 Maverick (17b-128e-instruct)
- Llama 4 Scout (17b-16e-instruct)
- QWEN QWQ-32b
- Deepseek R1 distill Llama 70b
- Llama 3.3 70b Versatile
Azure OpenAI
- GPT-4.1 family (gpt-4.1, gpt-4.1-mini, gpt-4.1-nano)
- GPT-4.5 Preview
- GPT-4o family (gpt-4o, gpt-4o-mini)
- O1 family (o1, o1-mini)
- O3 family (o3, o3-mini)
- O4 Mini
Google Cloud VertexAI
- Gemini 2.5
- Gemini 2.5 Flash
Usage
# Start OpenCode
opencode

# Start with debug logging
opencode -d

# Start with a specific working directory
opencode -c /path/to/project
Non-interactive Prompt Mode
You can run OpenCode in non-interactive mode by passing a prompt directly as a command-line argument. This is useful for scripting, automation, or when you want a quick answer without launching the full TUI.
# Run a single prompt and print the AI's response to the terminal
opencode -p "Explain the use of context in Go"

# Get response in JSON format
opencode -p "Explain the use of context in Go" -f json

# Run without showing the spinner (useful for scripts)
opencode -p "Explain the use of context in Go" -q
In this mode, OpenCode will process your prompt, print the result to standard output, and then exit. All permissions are auto-approved for the session.
By default, a spinner animation is displayed while the model is processing your query. You can disable this spinner with the -q or --quiet flag, which is particularly useful when running OpenCode from scripts or automated workflows.
OpenCode supports the following output formats in non-interactive mode:
| Format |
Description |
text |
Plain text output (default) |
json |
Output wrapped in a JSON object |
The output format is implemented as a strongly-typed OutputFormat in the codebase, ensuring type safety and validation when processing outputs.
Command-line Flags
| Flag |
Short |
Description |
--help |
-h |
Display help information |
--debug |
-d |
Enable debug mode |
--cwd |
-c |
Set current working directory |
--prompt |
-p |
Run a single prompt in non-interactive mode |
--output-format |
-f |
Output format for non-interactive mode (text, json) |
--quiet |
-q |
Hide spinner in non-interactive mode |
Keyboard Shortcuts
Global Shortcuts
| Shortcut |
Action |
Ctrl+C |
Quit application |
Ctrl+? |
Toggle help dialog |
? |
Toggle help dialog (when not in editing mode) |
Ctrl+L |
View logs |
Ctrl+A |
Switch session |
Ctrl+K |
Command dialog |
Ctrl+O |
Toggle model selection dialog |
Esc |
Close current overlay/dialog or return to previous mode |
Chat Page Shortcuts
| Shortcut |
Action |
Ctrl+N |
Create new session |
Ctrl+X |
Cancel current operation/generation |
i |
Focus editor (when not in writing mode) |
Esc |
Exit writing mode and focus messages |
Editor Shortcuts
| Shortcut |
Action |
Ctrl+S |
Send message (when editor is focused) |
Enter or Ctrl+S |
Send message (when editor is not focused) |
Ctrl+E |
Open external editor |
Esc |
Blur editor and focus messages |
Session Dialog Shortcuts
| Shortcut |
Action |
↑ or k |
Previous session |
↓ or j |
Next session |
Enter |
Select session |
Esc |
Close dialog |
Model Dialog Shortcuts
| Shortcut |
Action |
↑ or k |
Move up |
↓ or j |
Move down |
← or h |
Previous provider |
→ or l |
Next provider |
Esc |
Close dialog |
Permission Dialog Shortcuts
| Shortcut |
Action |
← or left |
Switch options left |
→ or right or tab |
Switch options right |
Enter or space |
Confirm selection |
a |
Allow permission |
A |
Allow permission for session |
d |
Deny permission |
Logs Page Shortcuts
| Shortcut |
Action |
Backspace or q |
Return to chat page |
OpenCode's AI assistant has access to various tools to help with coding tasks:
| Tool |
Description |
Parameters |
glob |
Find files by pattern |
pattern (required), path (optional) |
grep |
Search file contents |
pattern (required), path (optional), include (optional), literal_text (optional) |
ls |
List directory contents |
path (optional), ignore (optional array of patterns) |
view |
View file contents |
file_path (required), offset (optional), limit (optional) |
write |
Write to files |
file_path (required), content (required) |
edit |
Edit files |
Various parameters for file editing |
patch |
Apply patches to files |
file_path (required), diff (required) |
diagnostics |
Get diagnostics information |
file_path (optional) |
| Tool |
Description |
Parameters |
bash |
Execute shell commands |
command (required), timeout (optional) |
fetch |
Fetch data from URLs |
url (required), format (required), timeout (optional) |
sourcegraph |
Search code across public repositories |
query (required), count (optional), context_window (optional), timeout (optional) |
agent |
Run sub-tasks with the AI agent |
prompt (required) |
Architecture
OpenCode is built with a modular architecture:
- cmd: Command-line interface using Cobra
- internal/app: Core application services
- internal/config: Configuration management
- internal/db: Database operations and migrations
- internal/llm: LLM providers and tools integration
- internal/tui: Terminal UI components and layouts
- internal/logging: Logging infrastructure
- internal/message: Message handling
- internal/session: Session management
- internal/lsp: Language Server Protocol integration
Custom Commands
OpenCode supports custom commands that can be created by users to quickly send predefined prompts to the AI assistant.
Creating Custom Commands
Custom commands are predefined prompts stored as Markdown files in one of three locations:
User Commands (prefixed with user:):
$XDG_CONFIG_HOME/opencode/commands/
(typically ~/.config/opencode/commands/ on Linux/macOS)
or
$HOME/.opencode/commands/
Project Commands (prefixed with project:):
<PROJECT DIR>/.opencode/commands/
Each .md file in these directories becomes a custom command. The file name (without extension) becomes the command ID.
For example, creating a file at ~/.config/opencode/commands/prime-context.md with content:
RUN git ls-files
READ README.md
This creates a command called user:prime-context.
Command Arguments
OpenCode supports named arguments in custom commands using placeholders in the format $NAME (where NAME consists of uppercase letters, numbers, and underscores, and must start with a letter).
For example:
# Fetch Context for Issue $ISSUE_NUMBER

RUN gh issue view $ISSUE_NUMBER --json title,body,comments
RUN git grep --author="$AUTHOR_NAME" -n .
RUN grep -R "$SEARCH_PATTERN" $DIRECTORY
When you run a command with arguments, OpenCode will prompt you to enter values for each unique placeholder. Named arguments provide several benefits:
- Clear identification of what each argument represents
- Ability to use the same argument multiple times
- Better organization for commands with multiple inputs
Organizing Commands
You can organize commands in subdirectories:
~/.config/opencode/commands/git/commit.md
This creates a command with ID user:git:commit.
Using Custom Commands
- Press
Ctrl+K to open the command dialog
- Select your custom command (prefixed with either
user: or project:)
- Press Enter to execute the command
The content of the command file will be sent as a message to the AI assistant.
Built-in Commands
OpenCode includes several built-in commands:
| Command |
Description |
| Initialize Project |
Creates or updates the OpenCode.md memory file with project-specific information |
| Compact Session |
Manually triggers the summarization of the current session, creating a new session with the summary |
MCP (Model Context Protocol)
OpenCode implements the Model Context Protocol (MCP) to extend its capabilities through external tools. MCP provides a standardized way for the AI assistant to interact with external services and tools.
MCP Features
- External Tool Integration: Connect to external tools and services via a standardized protocol
- Tool Discovery: Automatically discover available tools from MCP servers
- Multiple Connection Types:
- Stdio: Communicate with tools via standard input/output
- SSE: Communicate with tools via Server-Sent Events
- Security: Permission system for controlling access to MCP tools
Configuring MCP Servers
MCP servers are defined in the configuration file under the mcpServers section:
{
  "mcpServers": {
    "example": {
      "type": "stdio",
      "command": "path/to/mcp-server",
      "env": [],
      "args": []
    },
    "web-example": {
      "type": "sse",
      "url": "https://example.com/mcp",
      "headers": {
        "Authorization": "Bearer token"
      }
    }
  }
}
Once configured, MCP tools are automatically available to the AI assistant alongside built-in tools. They follow the same permission model as other tools, requiring user approval before execution.
LSP (Language Server Protocol)
OpenCode integrates with Language Server Protocol to provide code intelligence features across multiple programming languages.
LSP Features
- Multi-language Support: Connect to language servers for different programming languages
- Diagnostics: Receive error checking and linting information
- File Watching: Automatically notify language servers of file changes
Configuring LSP
Language servers are configured in the configuration file under the lsp section:
{
  "lsp": {
    "go": {
      "disabled": false,
      "command": "gopls"
    },
    "typescript": {
      "disabled": false,
      "command": "typescript-language-server",
      "args": ["--stdio"]
    }
  }
}
LSP Integration with AI
The AI assistant can access LSP features through the diagnostics tool, allowing it to:
- Check for errors in your code
- Suggest fixes based on diagnostics
While the LSP client implementation supports the full LSP protocol (including completions, hover, definition, etc.), currently only diagnostics are exposed to the AI assistant.
Using Github Copilot
Copilot support is currently experimental.
Requirements
- Copilot chat in the IDE enabled in GitHub settings
- One of:
- VSCode Github Copilot chat extension
- Github
gh CLI
- Neovim Github Copilot plugin (
copilot.vim or copilot.lua)
- Github token with copilot permissions
If using one of the above plugins or cli tools, make sure you use the authenticate
the tool with your github account. This should create a github token at one of the following locations:
- ~/.config/github-copilot/[hosts,apps].json
- $XDG_CONFIG_HOME/github-copilot/[hosts,apps].json
If using an explicit github token, you may either set the $GITHUB_TOKEN environment variable or add it to the opencode.json config file at providers.copilot.apiKey.
Using a self-hosted model provider
OpenCode can also load and use models from a self-hosted (OpenAI-like) provider.
This is useful for developers who want to experiment with custom models.
Configuring a self-hosted provider
You can use a self-hosted model by setting the LOCAL_ENDPOINT environment variable.
This will cause OpenCode to load and use the models from the specified endpoint.
LOCAL_ENDPOINT=http://localhost:1235/v1
Configuring a self-hosted model
You can also configure a self-hosted model in the configuration file under the agents section:
{
  "agents": {
    "coder": {
      "model": "local.granite-3.3-2b-instruct@q8_0",
      "reasoningEffort": "high"
    }
  }
}
Development
Prerequisites
Building from Source
# Clone the repository
git clone https://github.com/opencode-ai/opencode.git
cd opencode

# Build
go build -o opencode

# Run
./opencode
Acknowledgments
OpenCode gratefully acknowledges the contributions and support from these key individuals:
Special thanks to the broader open source community whose tools and libraries have made this project possible.
License
OpenCode is licensed under the MIT License. See the LICENSE file for details.
Contributing
Contributions are welcome! Here's how you can contribute:
- Fork the repository
- Create a feature branch (
git checkout -b feature/amazing-feature)
- Commit your changes (
git commit -m 'Add some amazing feature')
- Push to the branch (
git push origin feature/amazing-feature)
- Open a Pull Request
Please make sure to update tests as appropriate and follow the existing code style.

 这是一个运行在终端里的 AI 编程助手:一个 Go 编写的命令行工具,带有交互式 TUI 界面,AI 模型可以帮你写代码、调试和执行命令,全程不用离开终端。