WebVM


This repository hosts the source code for https://webvm.io, a Linux virtual machine that runs in your browser.
Try out the new Alpine / Xorg / i3 graphical environment: https://webvm.io/alpine.html
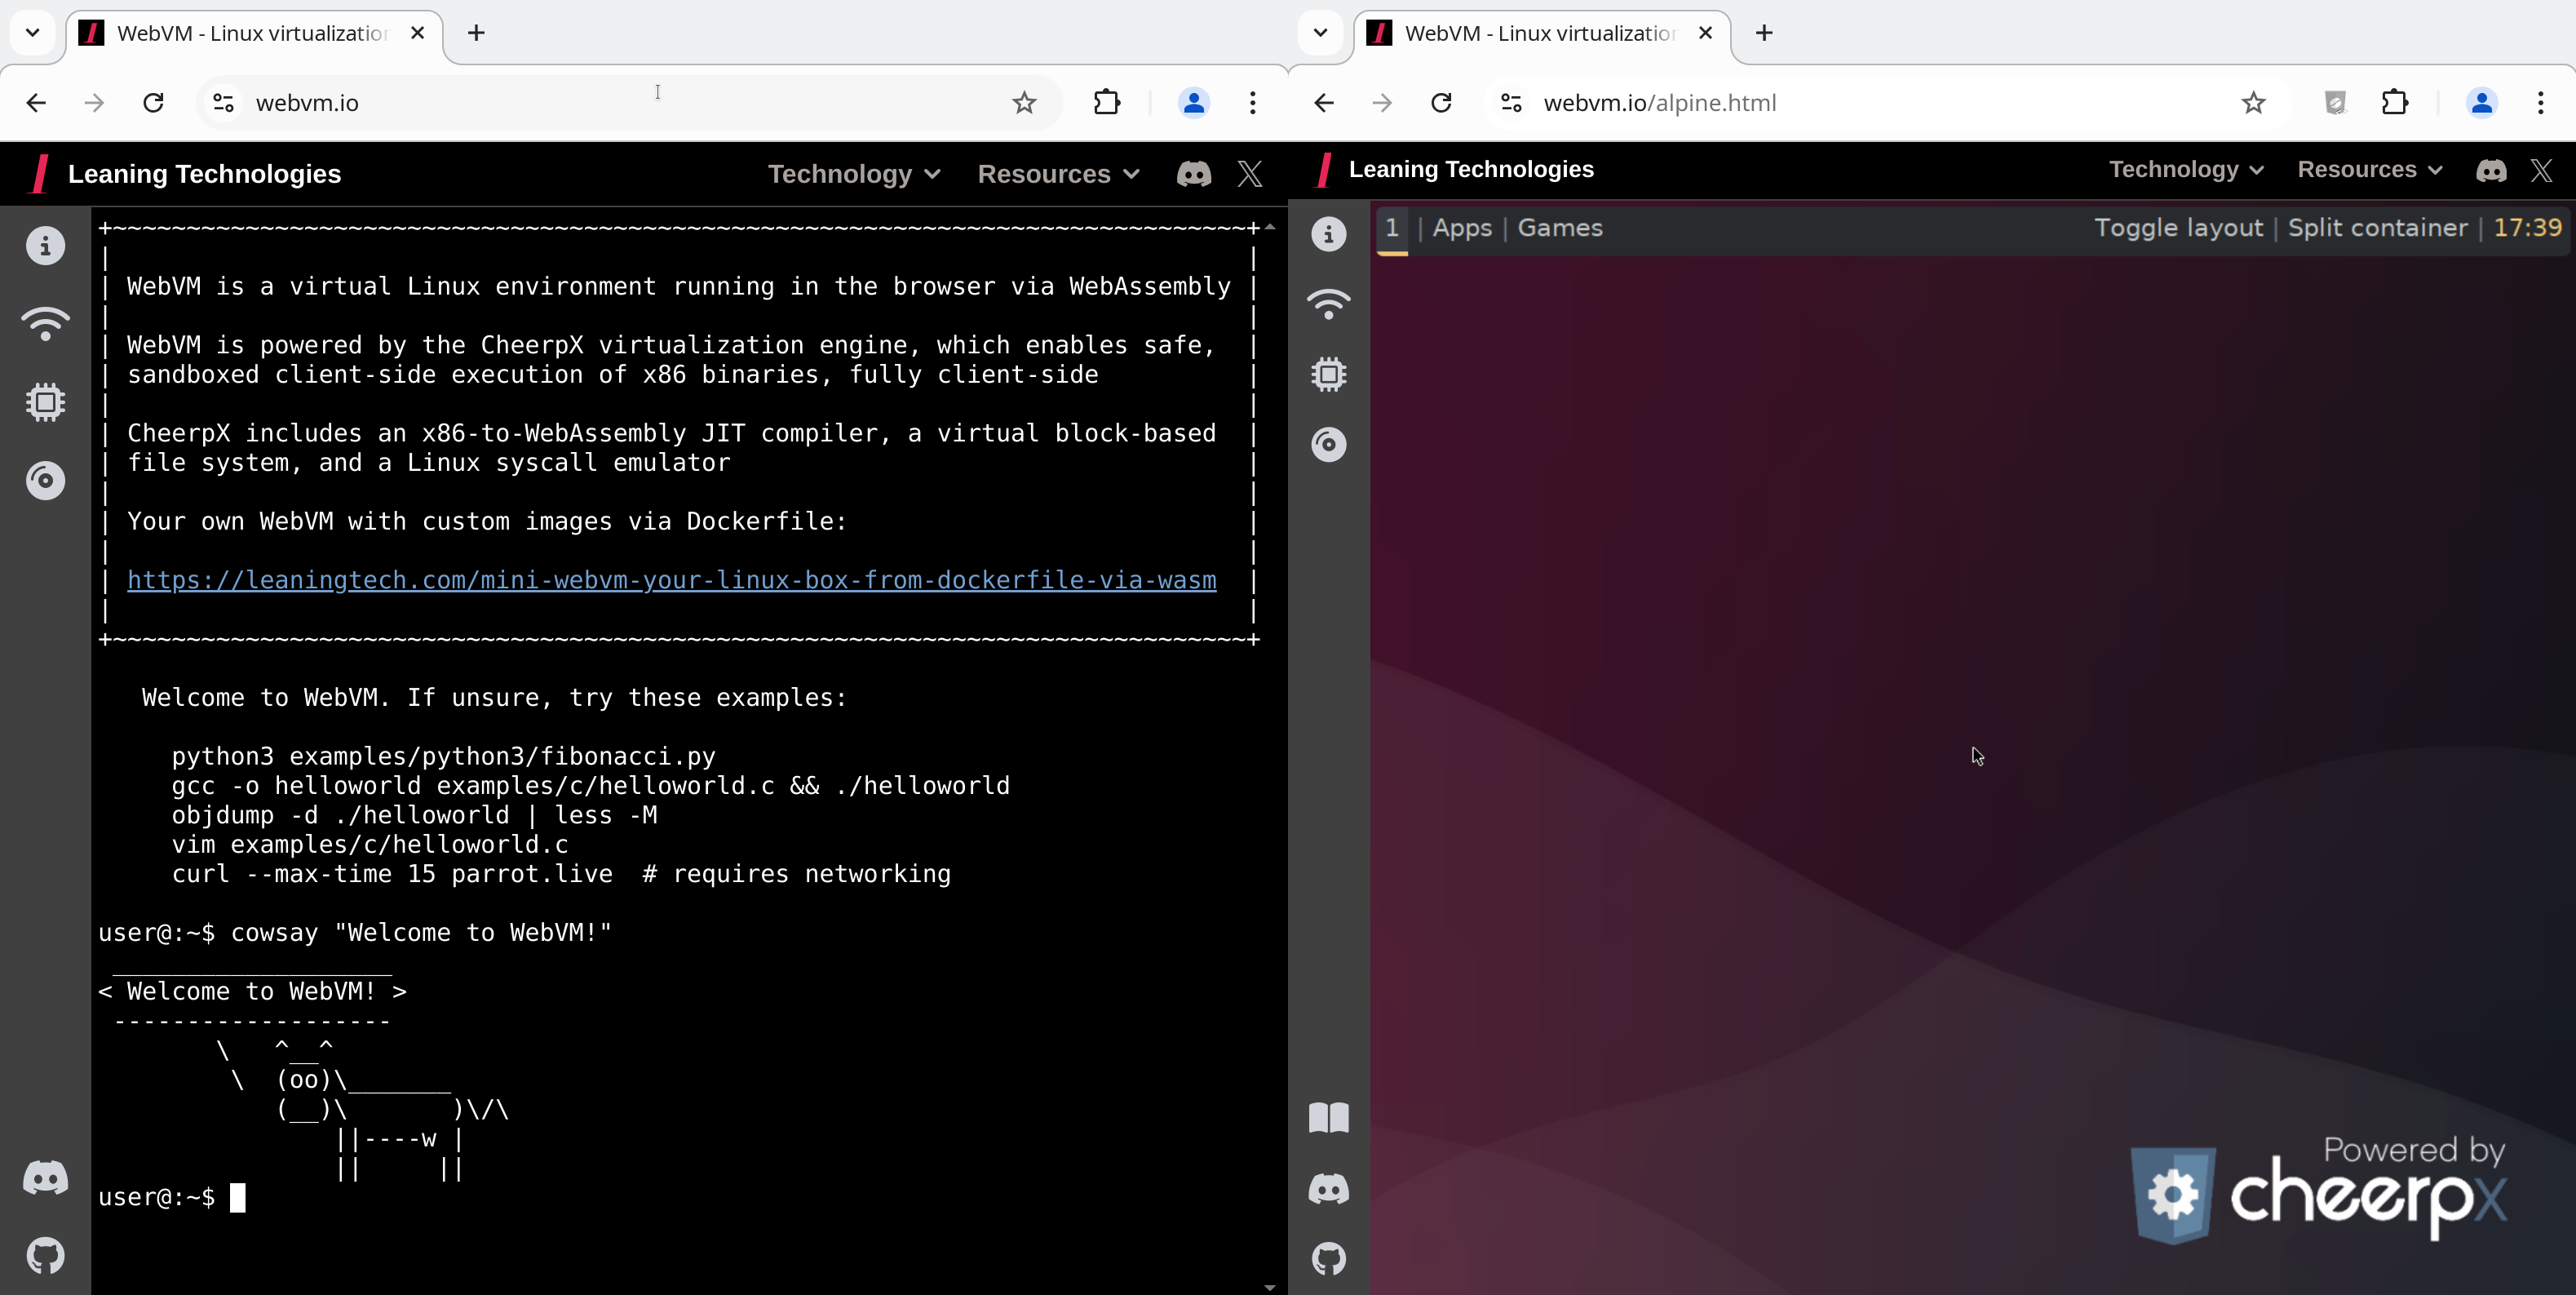
What is WebVM?
WebVM is a server-less virtual environment running fully client-side in HTML5/WebAssembly. It's designed to be Linux ABI-compatible and runs an unmodified Debian distribution including many native development toolchains.
WebVM is powered by the CheerpX virtualization engine, which provides:
- x86-to-WebAssembly JIT compiler
- Virtual block-based file system
- Linux syscall emulator
- Safe, sandboxed client-side execution
Table of Contents
[!NOTE]
Visit https://webvm.io to get started immediately in your browser. No setup required.
For local setup, custom image builds, and fork/deploy guidance, see Development & Customization.
Networking
WebVM supports Tailscale integration. So your browser VM can reach your private network and, with an exit node, the public internet too.
[!NOTE]
Some low-level networking operations (especially ICMP used by ping) are not currently available in this environment. For connectivity checks, use curl or wget.
Local network
- Open the "Networking" panel from the sidebar
- Click "Connect to Tailscale"
- Log in (create a free account at tailscale.com if needed)
- Click "Connect" when prompted
WebVM now has access to all machines in your Tailscale network!
Internet Usage Tips
[!TIP]
On slower connections there may be a short delay before initialisation. Connection status is shown as a colored dot on the button: orange = local network, green = global/internet. The button text shows your Tailscale IP address once connected.
To access the public internet from WebVM, set up an Exit Node on another device in your Tailscale network:
- Follow the Tailscale Exit Node quickstart (sections: "Advertise a device as an exit node")
- WebVM automatically uses the exit node once advertised
Using an Auth Key
As an alternative to interactive login, add your Tailscale auth key to the URL fragment:
https://webvm.io/#authKey=<your-ephemeral-key>
This is equivalent to Tailscale's --login-server option.
[!TIP]
If you also need a custom control server, add controlUrl in the same URL fragment and separate values with &, for example: #authKey=...&controlUrl=....
Self-Hosting Tailscale with Headscale
We also support headscale, a selfhosted open source implementation of the Tailscale control server.
Because Headscale does not add CORS headers by default, you will need a proxy in front of it. See the Headscale reverse proxy setup docs for an example.
Once ready, add the following line to your location / block in your nginx config file.
if ($http_origin = "https://yourdomain.com") {
    add_header 'Access-Control-Allow-Origin' "$http_origin";
    add_header 'Access-Control-Allow-Credentials' 'true' always;
}
Then access WebVM with:
https://yourdomain.com/#controlUrl=<your-headscale-url>
Development & Customization
[!NOTE]
Users have root privileges by default. sudo is not installed though this can easily be added to the Dockerfile if needed.
Deploy to GitHub Pages
This is a simple, beginner-friendly workflow. For local hosting and customization, see below Local Serving & Image Configuration.
Fork the WebVM repository to deploy your own version to GitHub Pages:
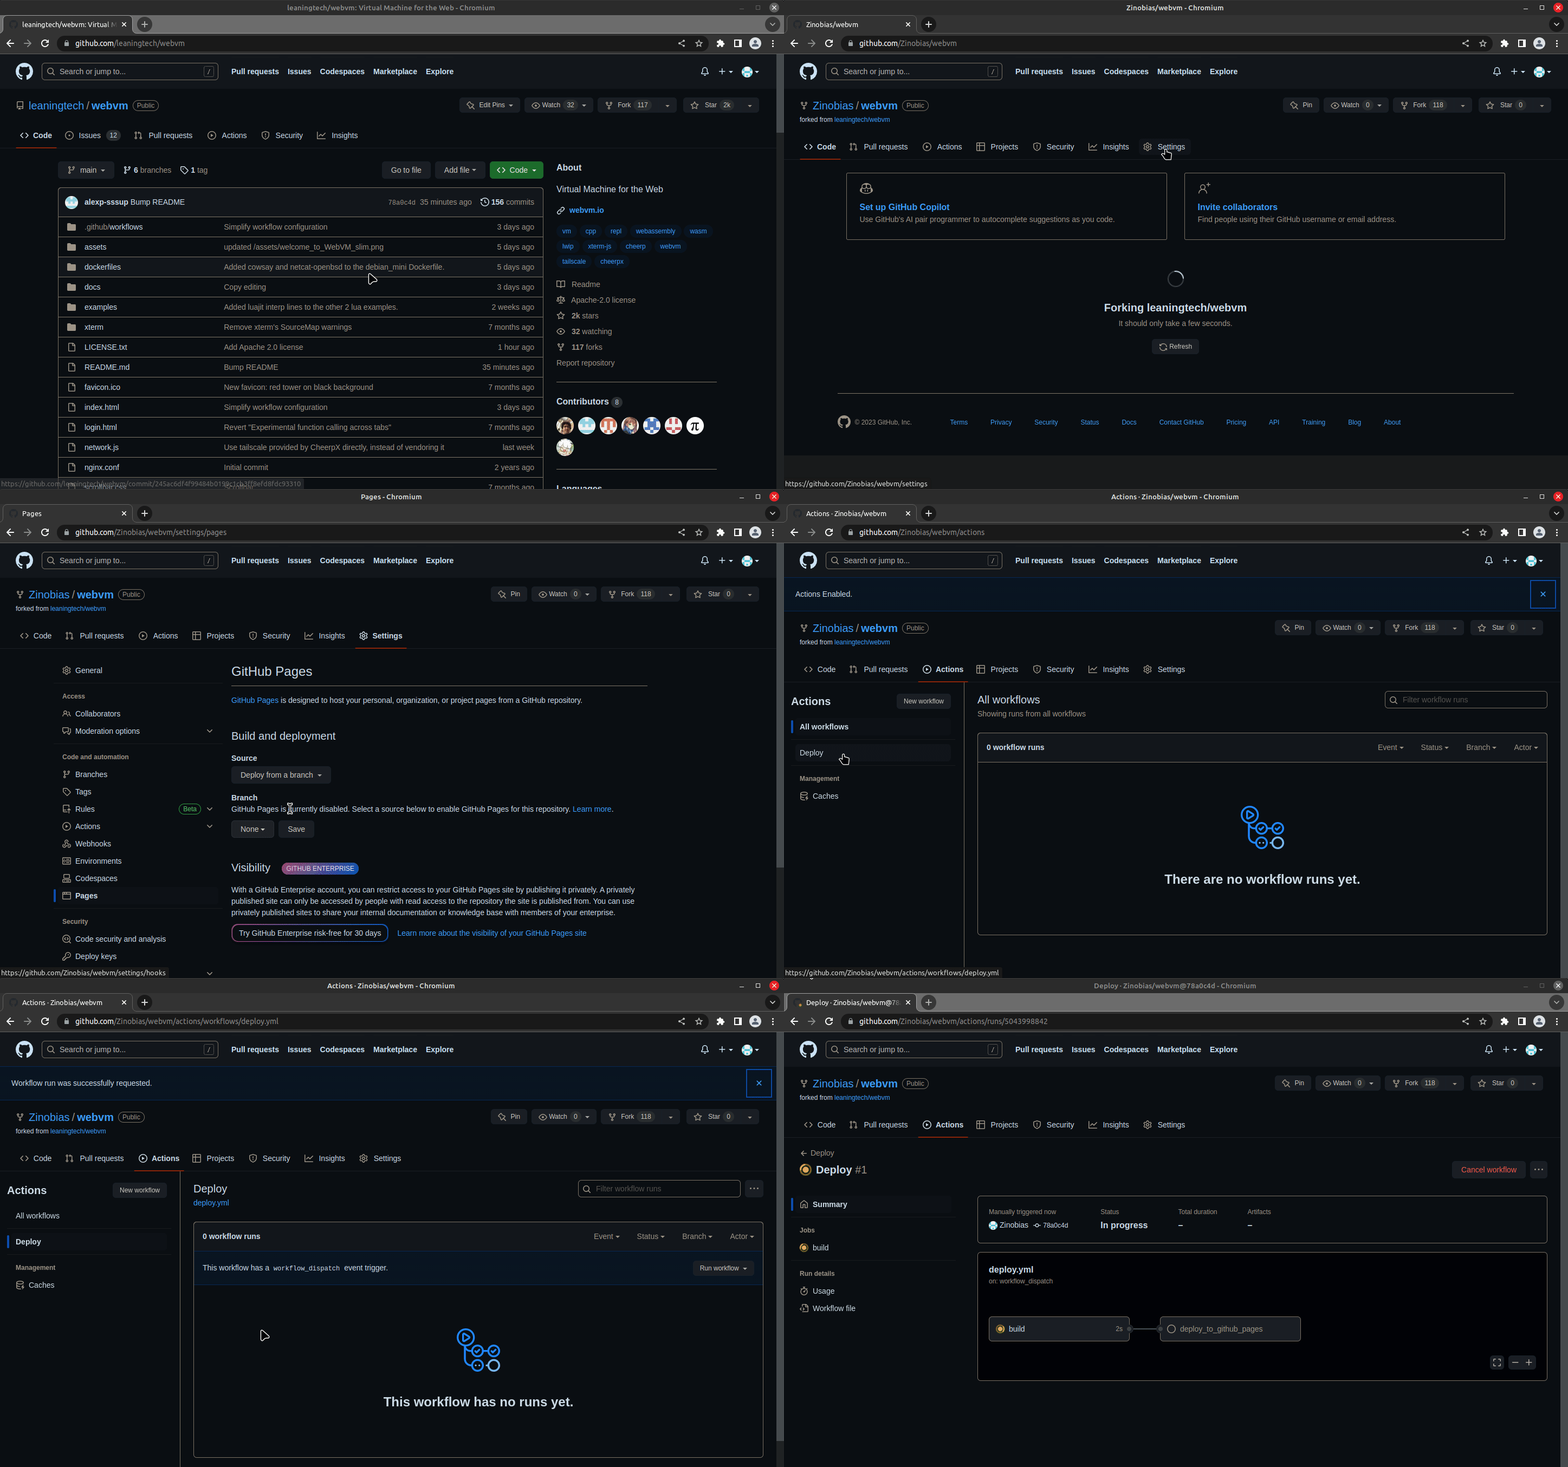
- Fork the repository
- Enable GitHub Pages via forked repository in Settings → Pages using "GitHub Actions" as source
- Run the
Deploy workflow from Actions
- After completion, open the URL shown under the
deploy_to_github_pages job

The same Deploy workflow also builds custom .ext2 disk images from a Dockerfile. You can point it at dockerfiles/debian_mini or another Dockerfile, then either publish the result as a GitHub Release asset or deploy the Pages build from your fork.
[!NOTE]
dockerfiles/debian_large is too large of an image for GitHub pages.
Local Serving & Image Configuration
1. Clone the repository
git clone https://github.com/leaningtech/webvm.git
cd webvm
2. Put your image in custom-disk-images/
This repository includes a persistent custom-disk-images/ directory for local .ext2 files.
To use the official Debian mini image, download it from Releases:
debian_mini_20230519_5022088024.ext2
You can also copy in an image you built yourself.
3. Point WebVM to your local image
Edit config_public_terminal.js:
export const diskImageUrl =
  "/custom-disk-images/debian_mini_20230519_5022088024.ext2";
export const diskImageType = "bytes";
4. Install dependencies and build
npm install
npm run build
5. Start Nginx and open WebVM
nginx -p . -c nginx.conf
Then open http://127.0.0.1:8081 and enjoy your local WebVM!
For the full Alpine desktop environment, see leaningtech/alpine-image.
For more details, see CheerpX Custom Images documentation.
[!TIP]
For Python3 REPL, the Deploy workflow takes into account the CMD specified in the Dockerfile.
To build a REPL you can simply change CMD [ "/bin/bash" ] to CMD [ "/usr/bin/python3" ] and deploy.
Claude AI Integration
To access Claude AI, you need an API key. Follow these steps to get started:
1. Create an account
- Visit Anthropic Console and sign up with your e-mail. You'll receive a sign in link to the Anthropic Console.
2. Get your API key
- Once logged in, navigate to Get API keys.
- Purchase the amount of credits you need. After completing the purchase, you'll be able to generate the key through the API console.
3. Log in with your API key
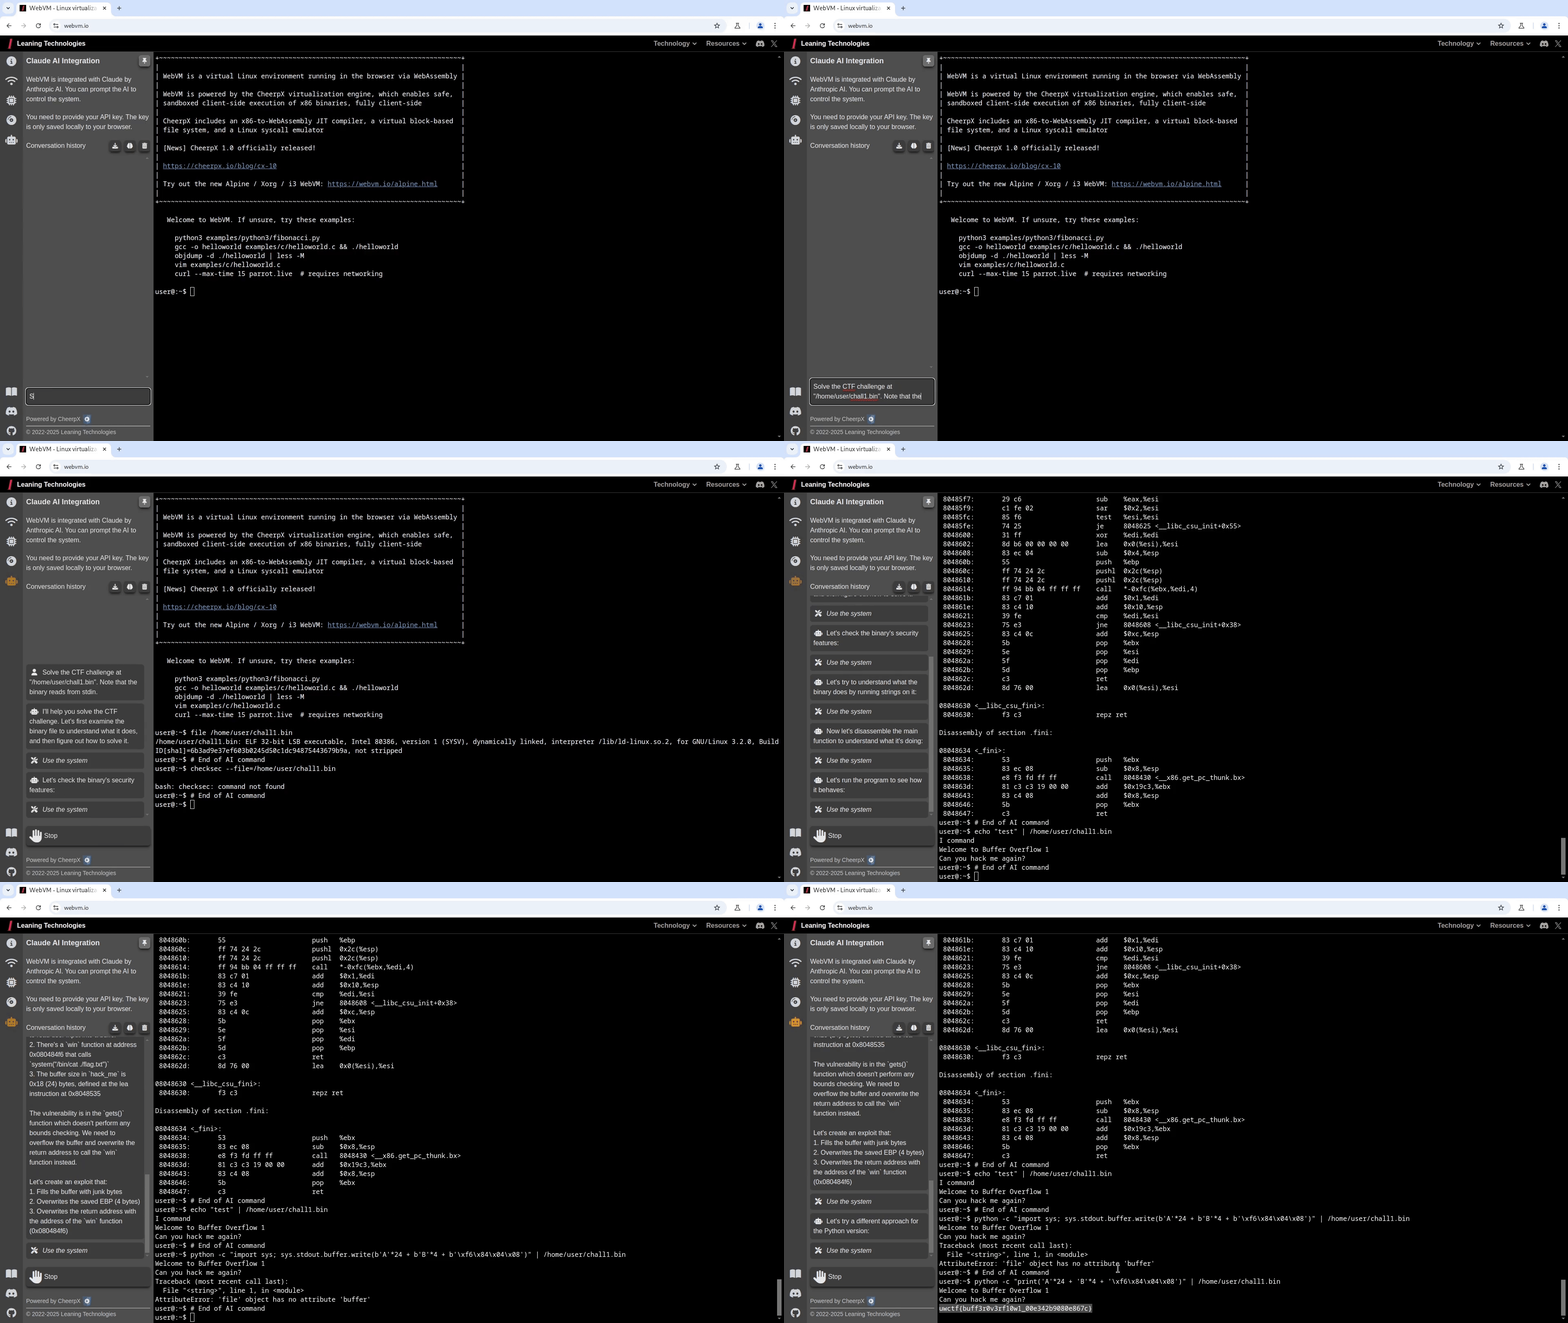
- Navigate to your WebVM and hover over the robot icon. This will show the Claude AI Integration tab. For added convenience, you can click the pin button in the top right corner to keep the tab in place.
- You'll see a prompt where you can insert your Claude API key.
4. Start using Claude AI
- Once your API key is entered, you can begin interacting with Claude AI by asking questions such as:
"Solve the CTF challenge at /home/user/chall1.bin. Note that the binary reads from stdin."
Important: Your API key is private and should never be shared. We do not have access to your key, it is only stored locally in your browser.
Report issues: Use GitHub Issues to report bugs or request features.
Chat with us: Join our Discord community to discuss WebVM, share ideas, and get help.
Learn More
Articles & Resources:
Example Deployment:
Technology Behind WebVM:
This project is powered by:
Versioning:
WebVM uses the CheerpX NPM package, which is updated on every release.
Every build is immutable. If a specific version works well for you today, it will keep working forever.
License
WebVM is released under the Apache License, Version 2.0.
You are welcome to use, modify, and redistribute the contents of this repository.
The public CheerpX deployment is provided as-is and is free to use for technological exploration, testing and use by individuals. Any other use by organizations, including non-profit, academia and the public sector, requires a license. Downloading a CheerpX build for the purpose of hosting it elsewhere is not permitted without a commercial license.
Read more here about our licensing practices.
If you want to build a product on top of CheerpX/WebVM, please see our other licensing options: CheerpX licensing or get in touch: [email protected]

 WebVM 是一个完全在你的浏览器里运行的 Linux 虚拟机——一个未经修改的 Debian 发行版,带有原生开发工具链,完全在客户端运行,无需安装,也不依赖服务器。