ComfyUI Manager
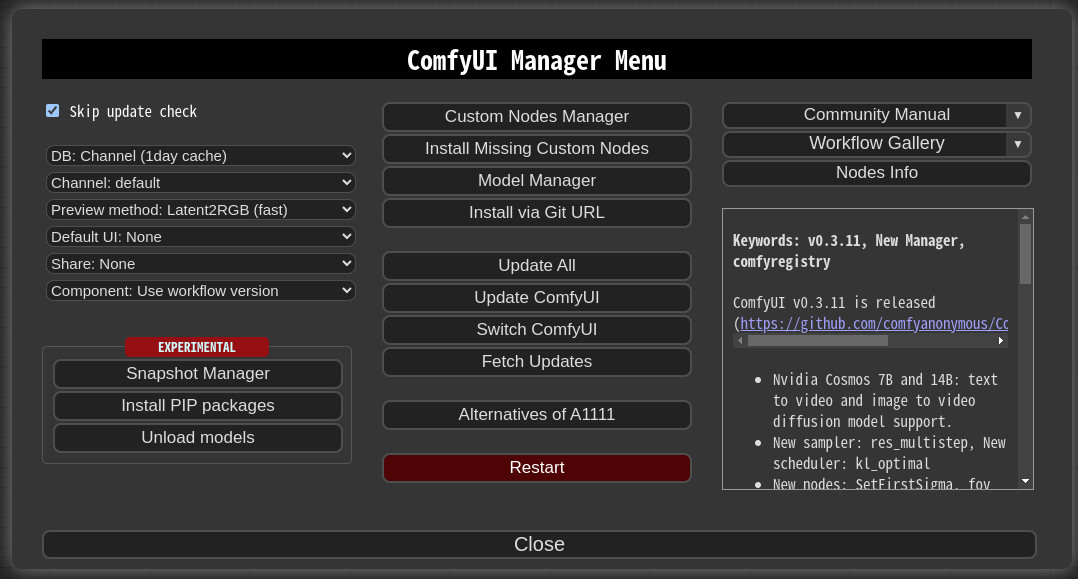
ComfyUI-Manager is an extension designed to enhance the usability of ComfyUI. It offers management functions to install, remove, disable, and enable various custom nodes of ComfyUI. Furthermore, this extension provides a hub feature and convenience functions to access a wide range of information within ComfyUI.
NOTICE
- V3.38: Security patch - Manager data migrated to protected path. See Migration Guide.
- V3.16: Support for
uv has been added. Set use_uv in config.ini.
- V3.10:
double-click feature is removed
- V3.3.2: Overhauled. Officially supports https://registry.comfy.org/.
- You can see whole nodes info on ComfyUI Nodes Info page.
Installation
Installation[method1] (General installation method: ComfyUI-Manager only)
To install ComfyUI-Manager in addition to an existing installation of ComfyUI, you can follow the following steps:
- Go to
ComfyUI/custom_nodes dir in terminal (cmd)
git clone https://github.com/ltdrdata/ComfyUI-Manager comfyui-manager- Restart ComfyUI
Installation[method2] (Installation for portable ComfyUI version: ComfyUI-Manager only)
- install git
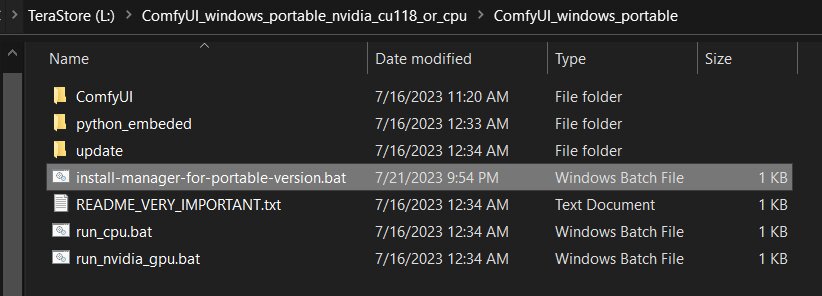
- Download scripts/install-manager-for-portable-version.bat into installed
"ComfyUI_windows_portable" directory
- Don't click. Right-click the link and choose 'Save As...'
- Double-click
install-manager-for-portable-version.bat batch file
Installation[method3] (Installation through comfy-cli: install ComfyUI and ComfyUI-Manager at once.)
RECOMMENDED: comfy-cli provides various features to manage ComfyUI from the CLI.
- prerequisite: python 3, git
Windows:
python -m venv venv
venv\Scripts\activate
pip install comfy-cli
comfy install
Linux/macOS:
python -m venv venv
. venv/bin/activate
pip install comfy-cli
comfy install
Installation[method4] (Installation for Linux+venv: ComfyUI + ComfyUI-Manager)
To install ComfyUI with ComfyUI-Manager on Linux using a venv environment, you can follow these steps:
- prerequisite: python-is-python3, python3-venv, git
- Download scripts/install-comfyui-venv-linux.sh into empty install directory
- Don't click. Right-click the link and choose 'Save As...'
- ComfyUI will be installed in the subdirectory of the specified directory, and the directory will contain the generated executable script.
chmod +x install-comfyui-venv-linux.sh./install-comfyui-venv-linux.sh
Installation Precautions
- DO:
ComfyUI-Manager files must be accurately located in the path ComfyUI/custom_nodes/comfyui-manager
- Installing in a compressed file format is not recommended.
- DON'T: Decompress directly into the
ComfyUI/custom_nodes location, resulting in the Manager contents like __init__.py being placed directly in that directory.
- You have to remove all ComfyUI-Manager files from
ComfyUI/custom_nodes
- DON'T: In a form where decompression occurs in a path such as
ComfyUI/custom_nodes/ComfyUI-Manager/ComfyUI-Manager.
- DON'T: In a form where decompression occurs in a path such as
ComfyUI/custom_nodes/ComfyUI-Manager-main.
- In such cases,
ComfyUI-Manager may operate, but it won't be recognized within ComfyUI-Manager, and updates cannot be performed. It also poses the risk of duplicate installations. Remove it and install properly via git clone method.
You can execute ComfyUI by running either ./run_gpu.sh or ./run_cpu.sh depending on your system configuration.
Colab Notebook
This repository provides Colab notebooks that allow you to install and use ComfyUI, including ComfyUI-Manager. To use ComfyUI, click on this link.
- Support for installing ComfyUI
- Support for basic installation of ComfyUI-Manager
- Support for automatically installing dependencies of custom nodes upon restarting Colab notebooks.
How To Use
Click "Manager" button on main menu

If you click on 'Install Custom Nodes' or 'Install Models', an installer dialog will open.
There are three DB modes: DB: Channel (1day cache), DB: Local, and DB: Channel (remote).
Channel (1day cache) utilizes Channel cache information with a validity period of one day to quickly display the list.
- This information will be updated when there is no cache, when the cache expires, or when external information is retrieved through the Channel (remote).
- Whenever you start ComfyUI anew, this mode is always set as the default mode.
Local uses information stored locally in ComfyUI-Manager.
- This information will be updated only when you update ComfyUI-Manager.
- For custom node developers, they should use this mode when registering their nodes in
custom-node-list.json and testing them.
Channel (remote) retrieves information from the remote channel, always displaying the latest list.- In cases where retrieval is not possible due to network errors, it will forcibly use local information.
The Fetch Updates menu retrieves update data for custom nodes locally. Actual updates are applied by clicking the Update button in the Install Custom Nodes menu.
Click 'Install' or 'Try Install' button.
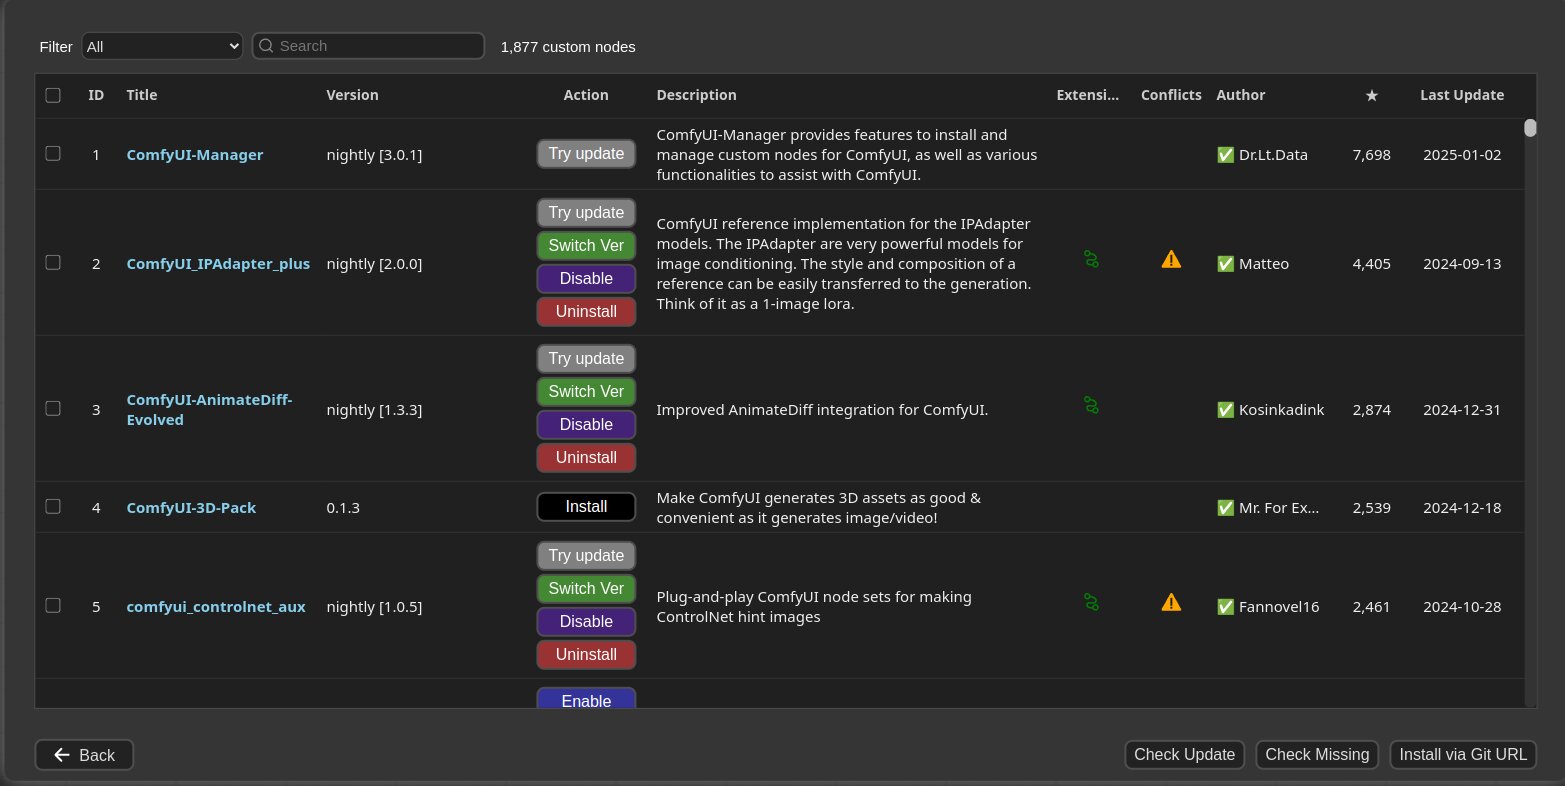
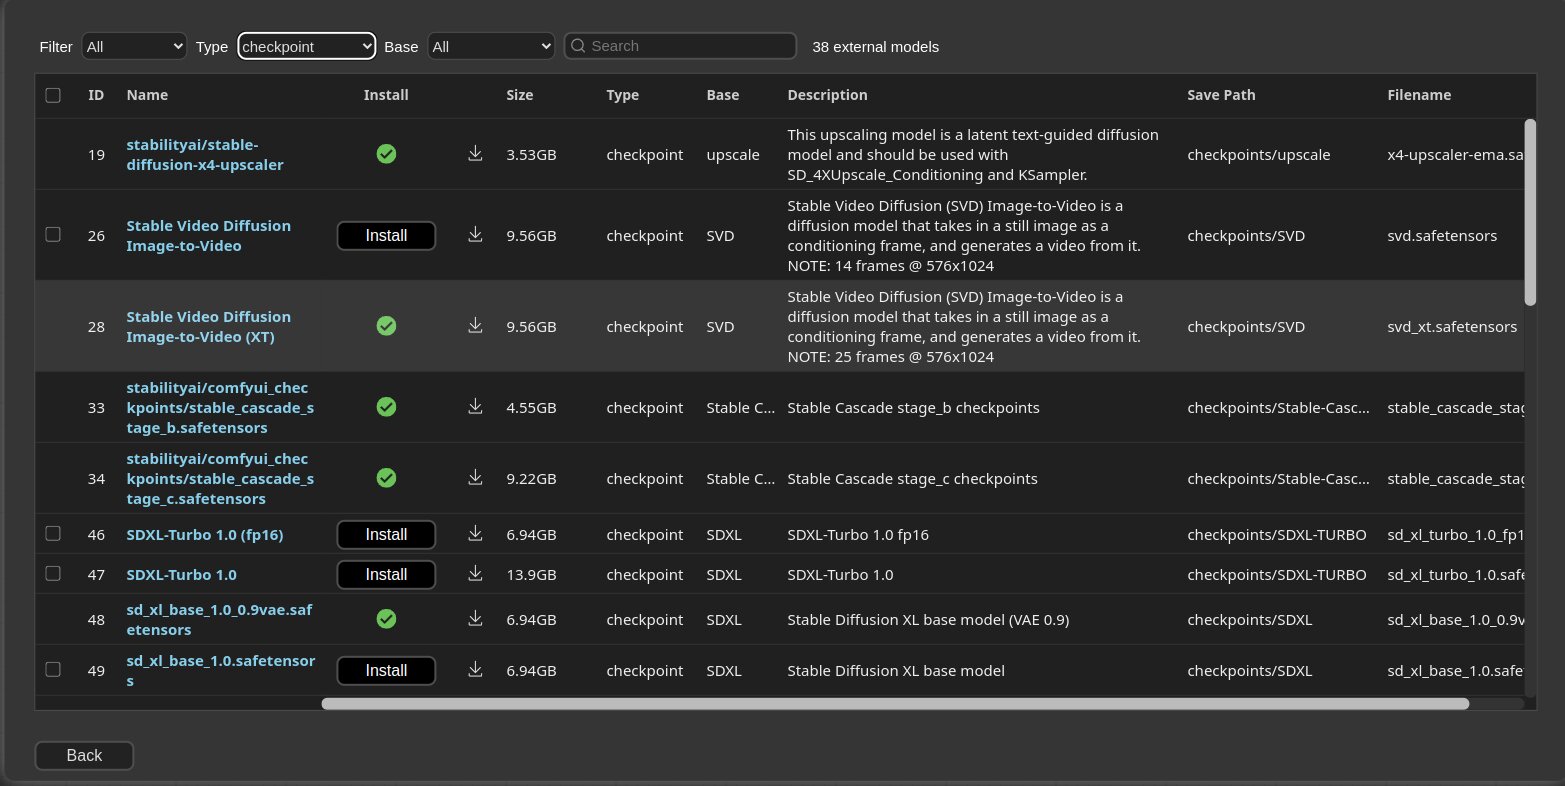
Installed: This item is already installed.
Install: Clicking this button will install the item.
Try Install: This is a custom node of which installation information cannot be confirmed. Click the button to try installing it.
If a red background Channel indicator appears at the top, it means it is not the default channel. Since the amount of information held is different from the default channel, many custom nodes may not appear in this channel state.
- Channel settings have a broad impact, affecting not only the node list but also all functions like "Update all."
Conflicted Nodes with a yellow background show a list of nodes conflicting with other extensions in the respective extension. This issue needs to be addressed by the developer, and users should be aware that due to these conflicts, some nodes may not function correctly and may need to be installed accordingly.
Share
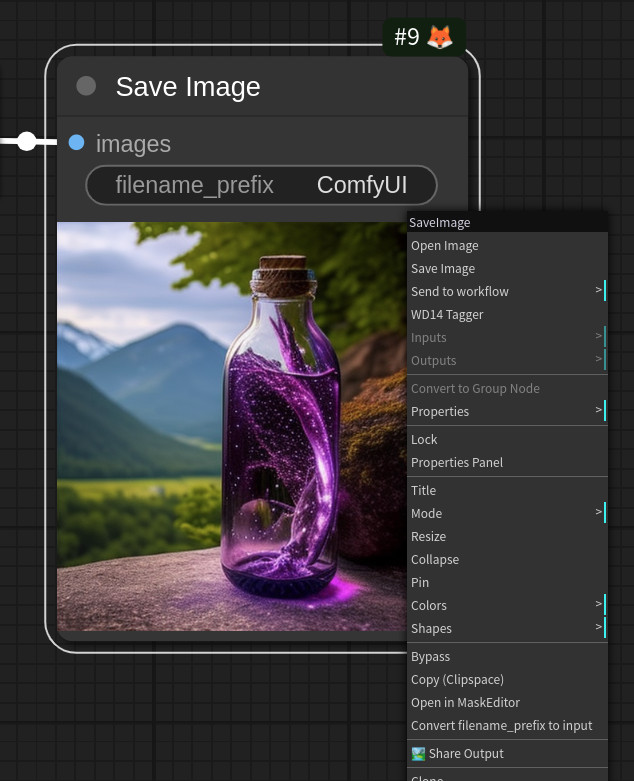
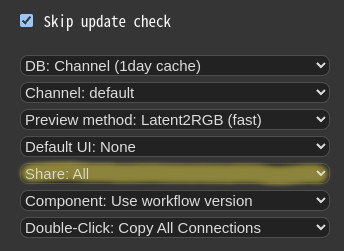
- Through the Share settings in the Manager menu, you can configure the behavior of the Share button in the Main menu or Share Output button on Context Menu.
None: hide from Main menuAll: Show a dialog where the user can select a title for sharing.
Paths
Starting from V3.38, Manager uses a protected system path for enhanced security.
-
* If executed without any options, the path defaults to ComfyUI/user.
* It can be set using --user-directory .
| ComfyUI Version |
Manager Path |
| v0.3.76+ (with System User API) |
<USER_DIRECTORY>/__manager/ |
| Older versions |
<USER_DIRECTORY>/default/ComfyUI-Manager/ |
- Basic config files:
config.ini
- Configurable channel lists:
channels.list
- Configurable pip overrides:
pip_overrides.json
- Configurable pip blacklist:
pip_blacklist.list
- Configurable pip auto fix:
pip_auto_fix.list
- Saved snapshot files:
snapshots/
- Startup script files:
startup-scripts/
- Component files:
components/
Note: See Migration Guide for upgrade details.
The following settings are applied based on the section marked as is_default.
custom_nodes: Path for installing custom nodes
- Importing does not need to adhere to the path set as
is_default, but this is the path where custom nodes are installed by the ComfyUI Nodes Manager.
download_model_base: Path for downloading models
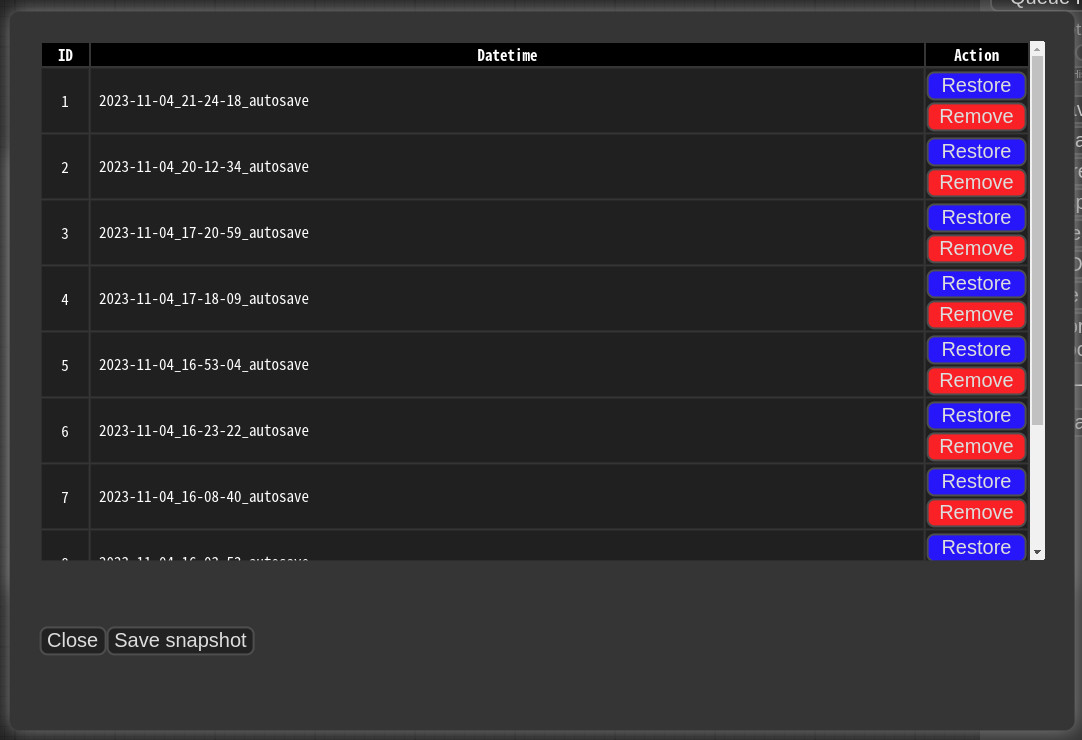
Snapshot-Manager
- When you press
Save snapshot or use Update All on Manager Menu, the current installation status snapshot is saved.
- Snapshot file dir:
<USER_DIRECTORY>/default/ComfyUI-Manager/snapshots
- You can rename snapshot file.
- Press the "Restore" button to revert to the installation status of the respective snapshot.
- However, for custom nodes not managed by Git, snapshot support is incomplete.
- When you press
Restore, it will take effect on the next ComfyUI startup.
- The selected snapshot file is saved in
<USER_DIRECTORY>/default/ComfyUI-Manager/startup-scripts/restore-snapshot.json, and upon restarting ComfyUI, the snapshot is applied and then deleted.
- A tool is provided that allows you to use the features of ComfyUI-Manager without running ComfyUI.
- For more details, please refer to the cm-cli documentation.
How to register your custom node into ComfyUI-Manager
- Add an entry to
custom-node-list.json located in the root of ComfyUI-Manager and submit a Pull Request.
- NOTE: Before submitting the PR after making changes, please check
Use local DB and ensure that the extension list loads without any issues in the Install custom nodes dialog. Occasionally, missing or extra commas can lead to JSON syntax errors.
- The remaining JSON will be updated through scripts in the future, so you don't need to worry about it.
Custom node support guide
Special purpose files (optional)
pyproject.toml - Spec file for comfyregistry.node_list.json - When your custom nodes pattern of NODE_CLASS_MAPPINGS is not conventional, it is used to manually provide a list of nodes for reference. (example)requirements.txt - When installing, this pip requirements will be installed automatically install.py - When installing, it is automatically called- All scripts are executed from the root path of the corresponding custom node.
Component Sharing
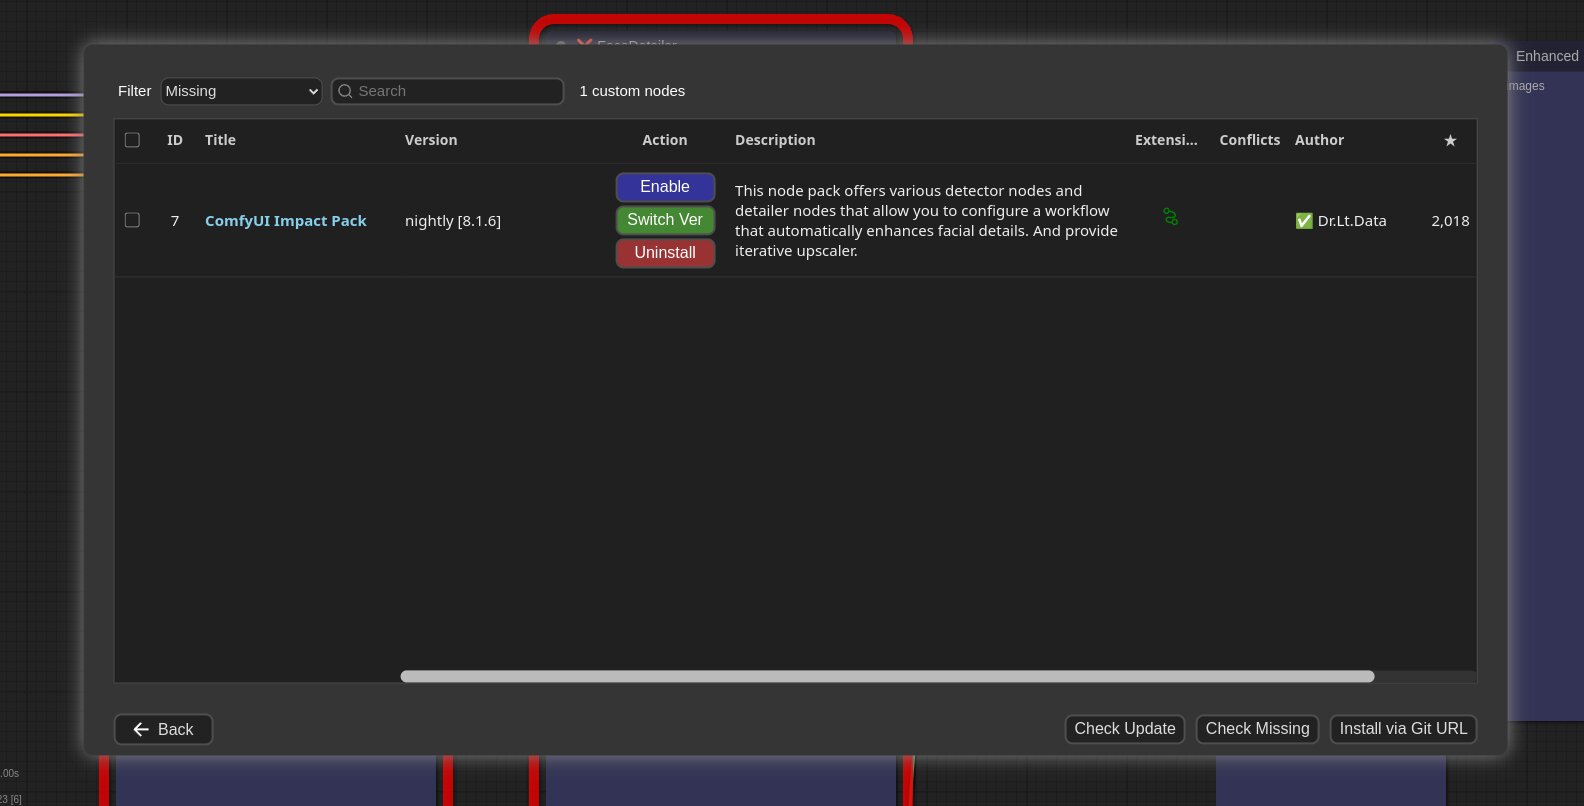
Support for installing missing nodes
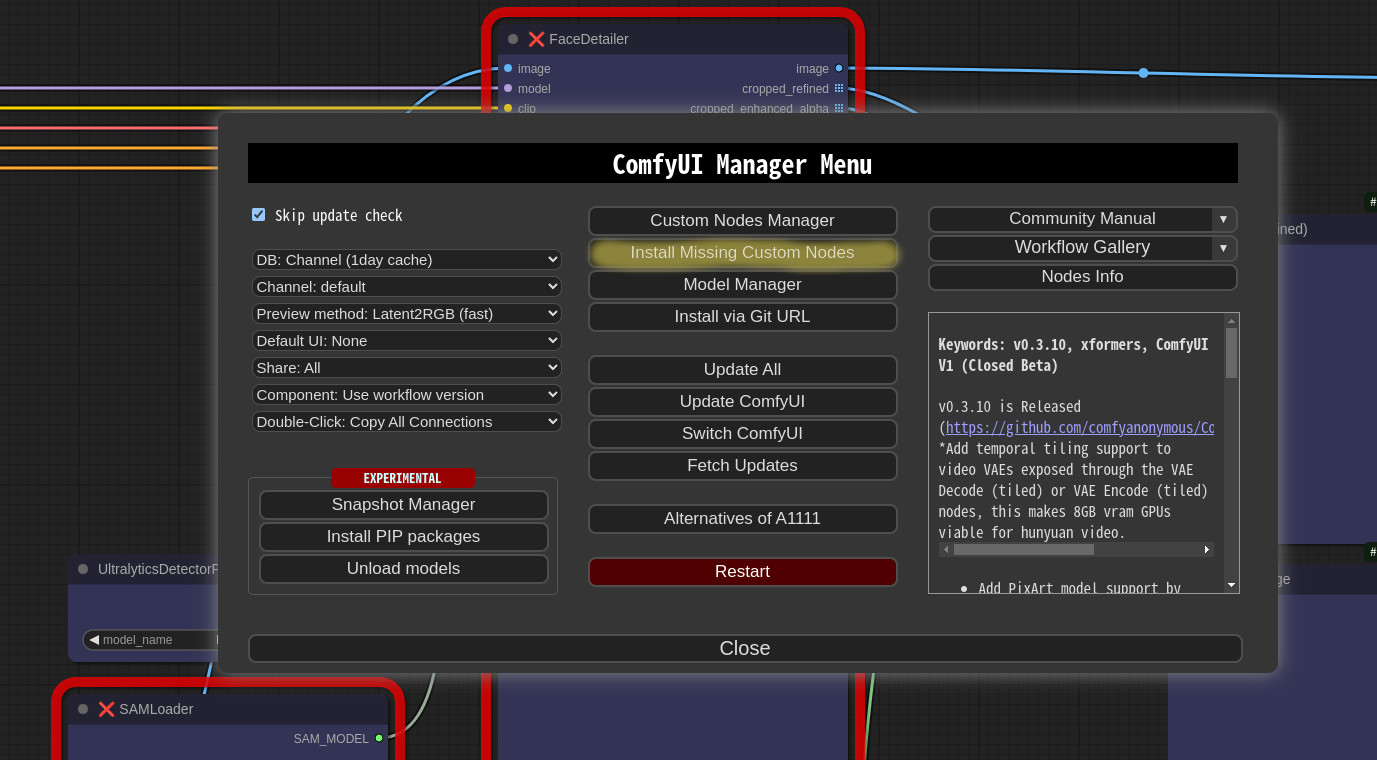
- When you click on the
Install Missing Custom Nodes button in the menu, it displays a list of extension nodes that contain nodes not currently present in the workflow.
Config
You can modify the config.ini file to apply the settings for ComfyUI-Manager.
Configuration options:
[default]
git_exe = <Manually specify the path to the git executable. If left empty, the default git executable path will be used.>
use_uv = <Use uv instead of pip for dependency installation.>
default_cache_as_channel_url = <Determines whether to retrieve the DB designated as channel_url at startup>
bypass_ssl = <Set to True if SSL errors occur to disable SSL.>
file_logging = <Configure whether to create a log file used by ComfyUI-Manager.>
windows_selector_event_loop_policy = <If an event loop error occurs on Windows, set this to True.>
model_download_by_agent = <When downloading models, use an agent instead of torchvision_download_url.>
downgrade_blacklist = <Set a list of packages to prevent downgrades. List them separated by commas.>
security_level = <Set the security level => strong|normal|normal-|weak>
always_lazy_install = <Whether to perform dependency installation on restart even in environments other than Windows.>
network_mode = <Set the network mode => public|private|offline>
- network_mode:
- public: An environment that uses a typical public network.
- private: An environment that uses a closed network, where a private node DB is configured via
channel_url. (Uses cache if available)
- offline: An environment that does not use any external connections when using an offline network. (Uses cache if available)
Additional Feature
Logging to file feature
- This feature is enabled by default and can be disabled by setting
file_logging = False in the config.ini.
Fix node (recreate): When right-clicking on a node and selecting Fix node (recreate), you can recreate the node. The widget's values are reset, while the connections maintain those with the same names.
- It is used to correct errors in nodes of old workflows created before, which are incompatible with the version changes of custom nodes.
Double-Click Node Title: You can set the double-click behavior of nodes in the ComfyUI-Manager menu.
Copy All Connections, Copy Input Connections: Double-clicking a node copies the connections of the nearest node.
- This action targets the nearest node within a straight-line distance of 1000 pixels from the center of the node.
- In the case of
Copy All Connections, it duplicates existing outputs, but since it does not allow duplicate connections, the existing output connections of the original node are disconnected.
- This feature copies only the input and output that match the names.
Possible Input Connections: It connects all outputs that match the closest type within the specified range.
- This connection links to the closest outputs among the nodes located on the left side of the target node.
Possible(left) + Copy(right): When you Double-Click on the left half of the title, it operates as Possible Input Connections, and when you Double-Click on the right half, it operates as Copy All Connections.
Prevent downgrade of specific packages
Custom pip mapping
- When you create the
pip_overrides.json file, it changes the installation of specific pip packages to installations defined by the user.
- Please refer to the
pip_overrides.json.template file.
Prevent the installation of specific pip packages
- List the package names one per line in the
pip_blacklist.list file.
Automatically Restoring pip Installation
If you list pip spec requirements in pip_auto_fix.list, similar to requirements.txt, it will automatically restore the specified versions when starting ComfyUI or when versions get mismatched during various custom node installations.
--index-url can be used.
Use aria2 as downloader
Environment Variables
The following features can be configured using environment variables:
- COMFYUI_PATH: The installation path of ComfyUI
- GITHUB_ENDPOINT: Reverse proxy configuration for environments with limited access to GitHub
- HF_ENDPOINT: Reverse proxy configuration for environments with limited access to Hugging Face
Example 1:
Redirecting https://github.com/ltdrdata/ComfyUI-Impact-Pack to https://mirror.ghproxy.com/https://github.com/ltdrdata/ComfyUI-Impact-Pack
GITHUB_ENDPOINT=https://mirror.ghproxy.com/https://github.com
Example 2:
Changing https://huggingface.co/path/to/somewhere to https://some-hf-mirror.com/path/to/somewhere
HF_ENDPOINT=https://some-hf-mirror.com
Scanner
When you run the scan.sh script:
It updates the extension-node-map.json.
- To do this, it pulls or clones the custom nodes listed in
custom-node-list.json into ~/.tmp/default.
- To skip this step, add the
--skip-update option.
- If you want to specify a different path instead of
~/.tmp/default, run python scanner.py [path] directly instead of scan.sh.
It updates the github-stats.json.
- This uses the GitHub API, so set your token with
export GITHUB_TOKEN=your_token_here to avoid quickly reaching the rate limit and malfunctioning.
- To skip this step, add the
--skip-stat-update option.
The --skip-all option applies both --skip-update and --skip-stat-update.
Troubleshooting
- If your
git.exe is installed in a specific location other than system git, please install ComfyUI-Manager and run ComfyUI. Then, specify the path including the file name in git_exe = in the <USER_DIRECTORY>/default/ComfyUI-Manager/config.ini file that is generated.
- If updating ComfyUI-Manager itself fails, please go to the ComfyUI-Manager directory and execute the command
git update-ref refs/remotes/origin/main a361cc1 && git fetch --all && git pull.
- If you encounter the error message
Overlapped Object has pending operation at deallocation on ComfyUI Manager load under Windows
- Edit
config.ini file: add windows_selector_event_loop_policy = True
- If the
SSL: CERTIFICATE_VERIFY_FAILED error occurs.
- Edit
config.ini file: add bypass_ssl = True
Security policy
Edit config.ini file: add security_level = <LEVEL>
strong
- doesn't allow
high and middle level risky feature
normal
- doesn't allow
high level risky feature
middle level risky feature is available
normal-
- doesn't allow
high level risky feature if --listen is specified and not starts with 127.
middle level risky feature is available
weak
high level risky features
- Downloading models that are not in
.safetensors format and not
registered in the default channel model list
- NOTE:
Install via git url, pip install, and installation of custom nodes
not registered in the default channel are no longer governed by
security_level — they are governed by the dedicated install flags
described below.
middle level risky features
- Uninstall/Update
- Installation of custom nodes registered in the
default channel.
- Fix custom nodes
- Restore/Remove Snapshot
- Restart
low level risky features
Dedicated install flags: allow_git_url_install / allow_pip_install
The two arbitrary-install surfaces are governed by dedicated boolean keys in
config.ini ([default] section), fully decoupled from security_level:
allow_git_url_install
- governs
Install via Git URL (POST /customnode/install/git_url) and
the unknown-git-URL arm of the batch install queue
(POST /manager/queue/install, including reinstall delegation) — i.e.
installing any custom node from a git URL that is not registered in the
default channel catalog
- on the batch queue path, the flag is necessary but not
sufficient: the queue's normal
security_level entry gate (middle)
must ALSO pass — at security_level = strong, batch unknown-URL
installs stay denied even with the flag set to true (only the direct
Install via Git URL endpoint is fully independent of security_level)
- covers the entire install transaction it starts, including the
pack's transitive dependency pip installs
allow_pip_install
- governs only the standalone
pip install feature
(POST /customnode/install/pip)
Key properties:
- Decoupled from
security_level (replace, not and) — on the two
direct endpoints (Install via Git URL and pip install),
security_level no longer has any effect in either direction: a strict
level cannot deny them when the flag is true, and a weak level cannot
allow them when the flag is false. (The batch queue path keeps its
security_level entry gate in ADDITION to the flag — see the scope bullet
above.) Every other gated feature remains governed by security_level as
described above.
- Loopback only — the flags take effect only when the server listens
on a loopback address (e.g.
--listen 127.0.0.1). On a non-loopback
listener these surfaces stay denied regardless of the flags; the flags
never widen the exposure of a public deployment.
- Default deny / explicit opt-in — both flags default to
false. Only
the case-insensitive string true enables a flag; a missing or malformed
key reads as false.
To opt in, edit config.ini:
[default]
allow_git_url_install = true
allow_pip_install = true
Changes take effect after a restart (no hot reload).
Migration note: there is no automatic migration from security_level.
If you previously relied on security_level = weak (or normal-) to use
install-via-git-URL / pip install, you must opt in explicitly with the flags
above. See CHANGELOG.md for details, including a behavior note for
outdated ComfyUI deployments.
Flagged CNR versions: allow_flagged_nodepack_install
Manager checks the version status in the existing CNR install response; no
additional Registry request is needed. Active versions continue to install
normally, subject to the existing security policy. Registry refusals (including
HTTP 404) still prevent installation.
Flagged versions must also satisfy the existing security policy and Registry
checks. In addition, they require either all --listen addresses to be
loopback, such as 127.0.0.1 or ::1, or the explicit override below.
A mixed loopback/non-loopback listener is non-local.
For a trusted private network, administrators can explicitly allow flagged
versions on non-loopback listeners:
[default]
allow_flagged_nodepack_install = true
The default is false; only the case-insensitive value true enables it.
Restart ComfyUI after editing the setting. This option does not detect private
networks and is independent of network_mode. It does not bypass
security_level, allow_git_url_install, or allow_pip_install.
When the flagged-version check denies an action, the UI reports that the current
security configuration does not allow it and directs users to the terminal.
Only the terminal provides the loopback-only --listen examples, the private
network override setting, and the instruction to restart ComfyUI after changes.
Enabling an already installed version does not query the Registry or reinstall it.
Older deferred switches without a stored status require loopback-only listeners
or the override. Otherwise they are rejected without changing the installed pack;
request the installation again so Manager can check its current Registry status.
The check applies to server-initiated installation, reinstallation, version switches, updates,
and snapshot restores. A policy refusal preserves the existing nodepack.
Scheduled version switches save the returned status and check the current
listener and setting again at startup, before downloading or running scripts.
Server-scheduled snapshot restores inherit the permission computed from the
server's current listener and setting. Standalone cm-cli commands remain local
administrator operations and do not use the server listener policy.
Saved statuses are not refreshed from the Registry.
Disclaimer
- This extension simply provides the convenience of installing custom nodes and does not guarantee their proper functioning.
Credit
ComfyUI/ComfyUI - A powerful and modular stable diffusion GUI.
And, for all ComfyUI custom node developers

 ComfyUI-Manager 是 ComfyUI 的扩展,可以在 ComfyUI 里安装、卸载、禁用和启用自定义节点,还提供一个中心页面和一些便利功能,方便浏览相关信息。