ChatGPT Web
Disclaimer: This project is only published on GitHub, based on the MIT license, free and for open source learning usage. And there will be no any form of account selling, paid service, discussion group, discussion group and other behaviors. Beware of being deceived.
中文
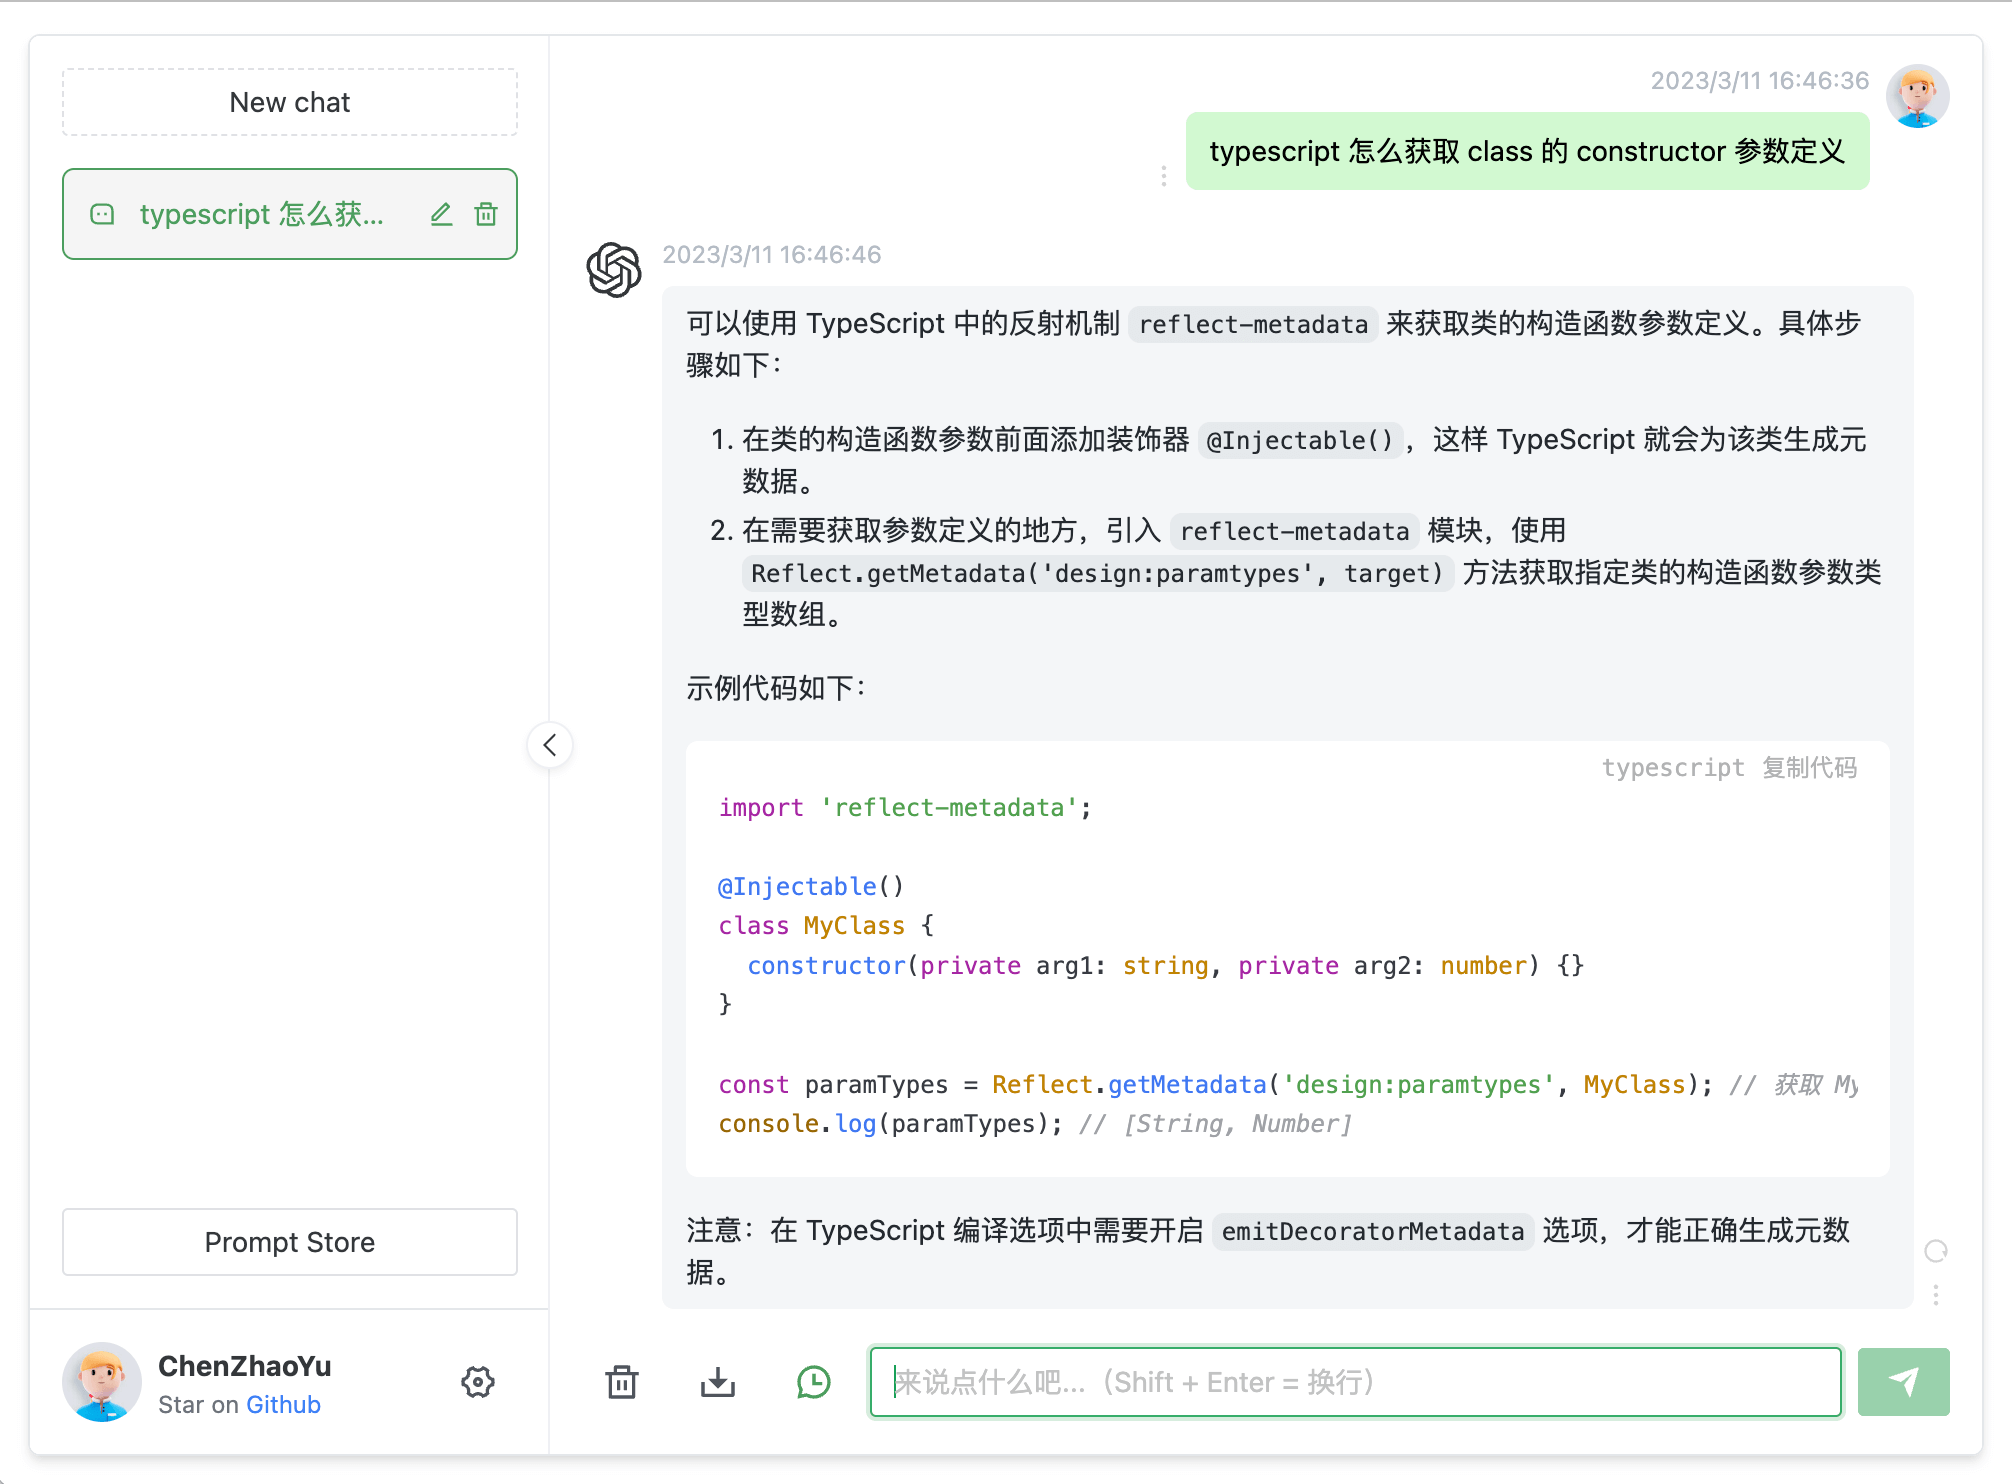
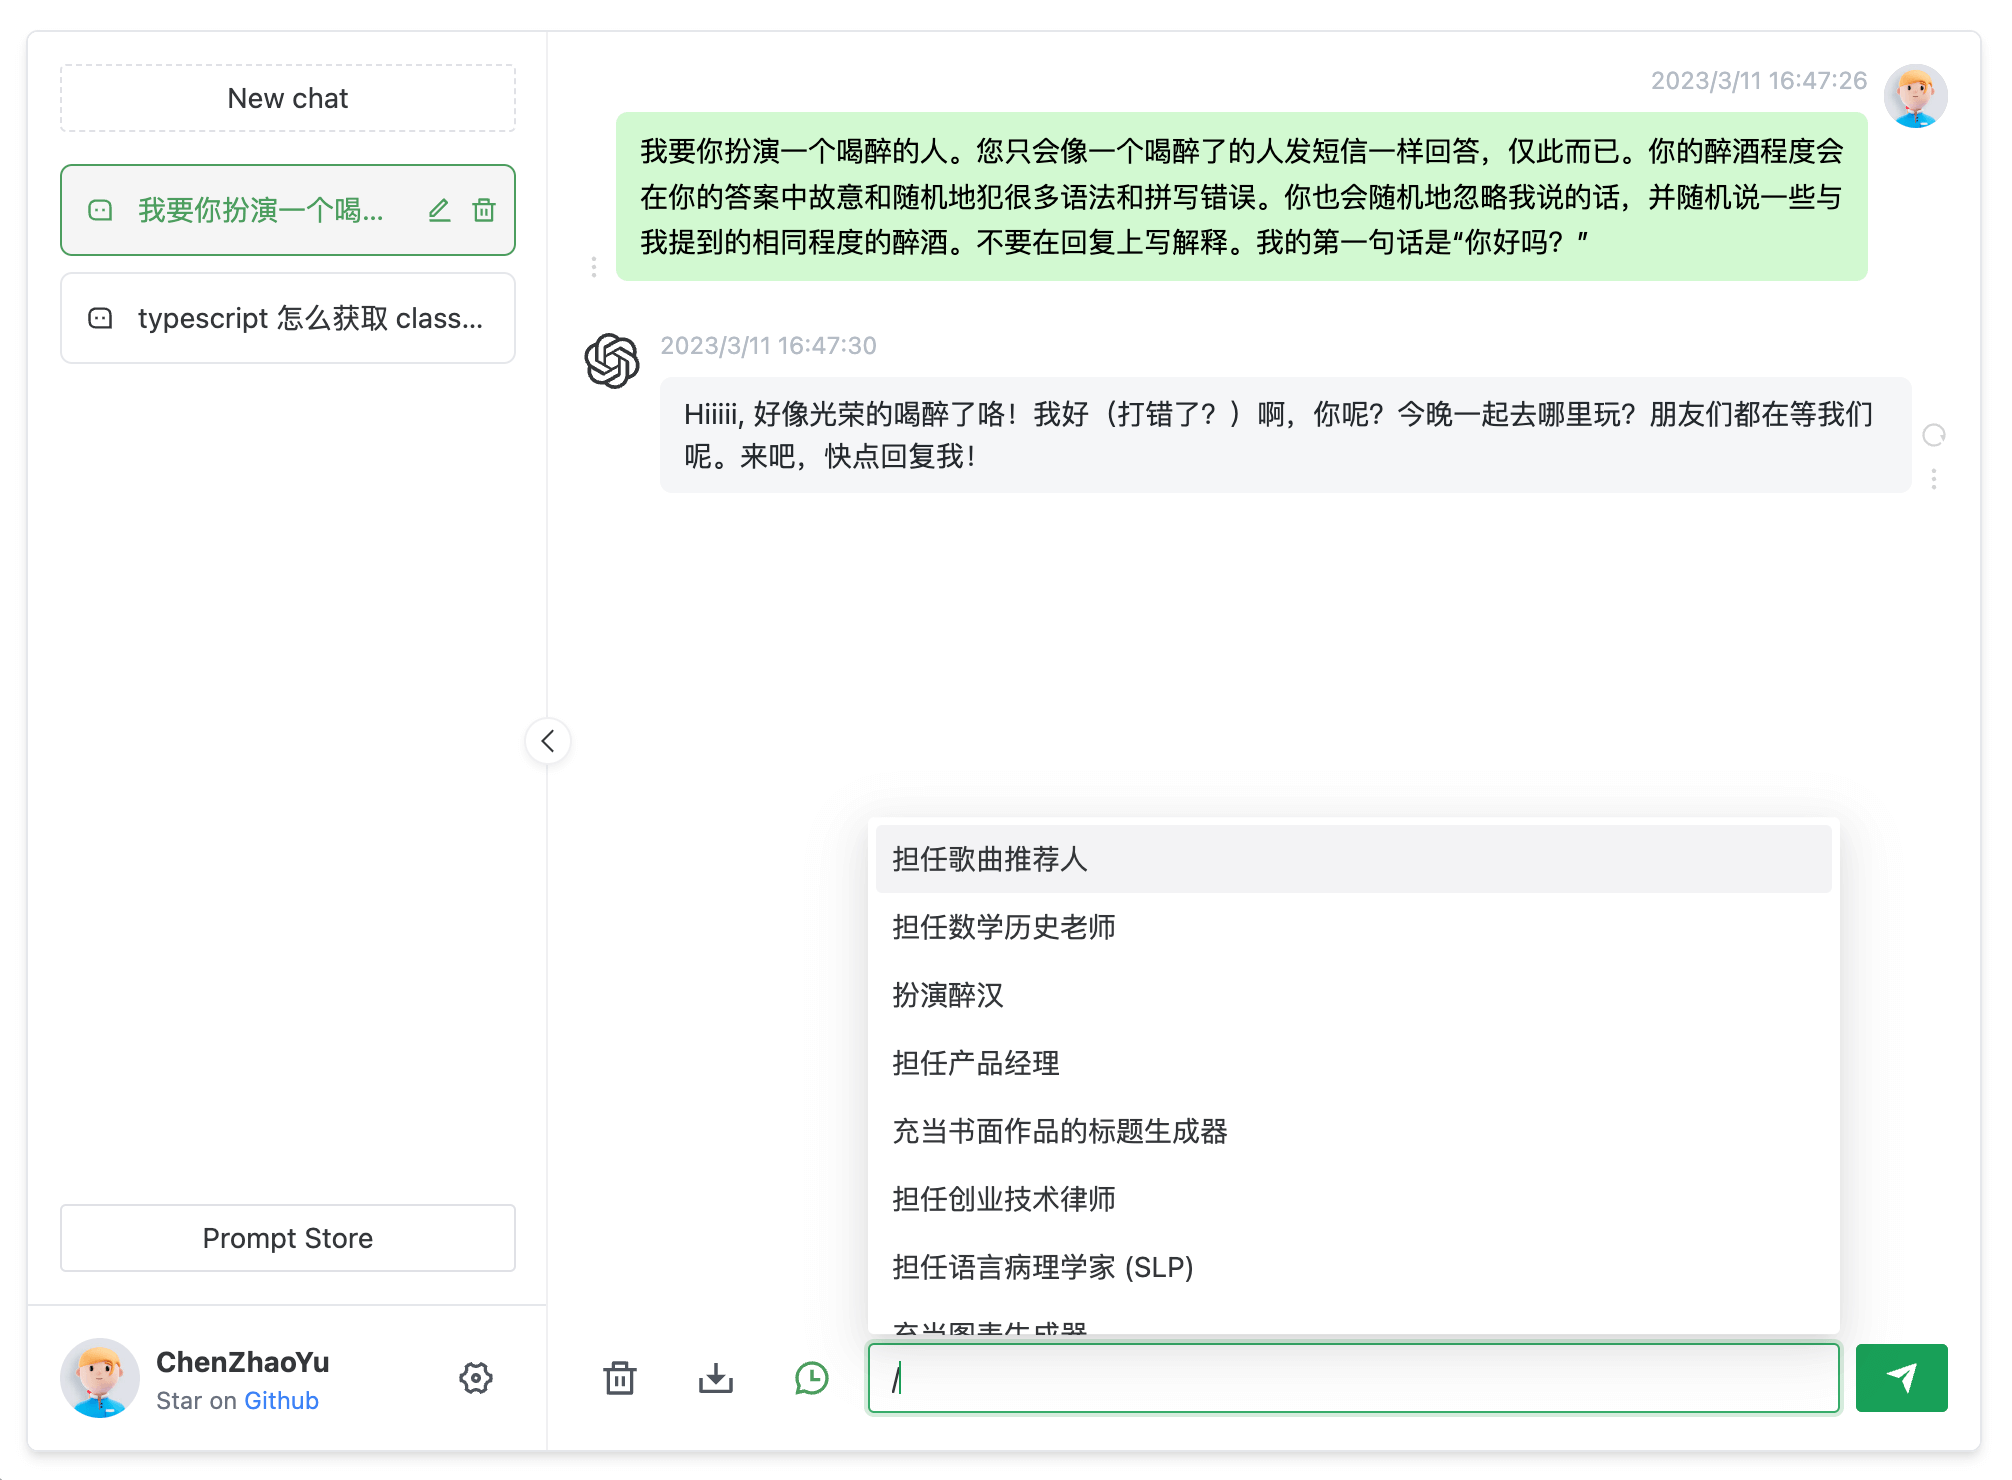
Introduction
Supports dual models and provides two unofficial ChatGPT API methods
| Method |
Free? |
Reliability |
Quality |
ChatGPTAPI(gpt-3.5-turbo-0301) |
No |
Reliable |
Relatively stupid |
ChatGPTUnofficialProxyAPI(web accessToken) |
Yes |
Relatively unreliable |
Smart |
Comparison:
ChatGPTAPI uses gpt-3.5-turbo through OpenAI official API to call ChatGPTChatGPTUnofficialProxyAPI uses unofficial proxy server to access ChatGPT's backend API, bypass Cloudflare (dependent on third-party servers, and has rate limits)
Warnings:
- You should first use the
API method
- When using the
API, if the network is not working, it is blocked in China, you need to build your own proxy, never use someone else's public proxy, which is dangerous.
- When using the
accessToken method, the reverse proxy will expose your access token to third parties. This should not have any adverse effects, but please consider the risks before using this method.
- When using
accessToken, whether you are a domestic or foreign machine, proxies will be used. The default proxy is pengzhile's https://ai.fakeopen.com/api/conversation. This is not a backdoor or monitoring unless you have the ability to flip over CF verification yourself. Use beforehand acknowledge. Community Proxy (Note: Only these two are recommended, other third-party sources, please identify for yourself)
- When publishing the project to public network, you should set the
AUTH_SECRET_KEY variable to add your password access, you should also modify the title in index. html to prevent it from being searched by keywords.
Switching methods:
- Enter the
service/.env.example file, copy the contents to the service/.env file
- To use
OpenAI API Key, fill in the OPENAI_API_KEY field (get apiKey)
- To use
Web API, fill in the OPENAI_ACCESS_TOKEN field (get accessToken)
OpenAI API Key takes precedence when both exist
Environment variables:
See all parameter variables here
Roadmap
[✓] Dual models
[✓] Multi-session storage and context logic
[✓] Formatting and beautification of code and other message types
[✓] Access control
[✓] Data import/export
[✓] Save messages as local images
[✓] Multilingual interface
[✓] Interface themes
[✗] More...
Prerequisites
Node
node requires version ^16 || ^18 || ^19 (node >= 14 needs fetch polyfill installation), use nvm to manage multiple local node versions
node -v
PNPM
If you haven't installed pnpm
npm install pnpm -g
Filling in the Key
Get Openai Api Key or accessToken and fill in the local environment variables Go to Introduction
# service/.env file

# OpenAI API Key - https://platform.openai.com/overview
OPENAI_API_KEY=

# change this to an `accessToken` extracted from the ChatGPT site's `https://chat.openai.com/api/auth/session` response
OPENAI_ACCESS_TOKEN=
Install Dependencies
For the convenience of "backend developers" to understand the burden, the front-end "workspace" mode is not adopted, but separate folders are used to store them. If you only need to do secondary development of the front-end page, delete the service folder.
Backend
Enter the folder /service and run the following commands
pnpm install
Frontend
Run the following commands at the root directory
pnpm bootstrap
Run in Test Environment
Backend Service
Enter the folder /service and run the following commands
pnpm start
Frontend Webpage
Run the following commands at the root directory
pnpm dev
Environment Variables
API available:
OPENAI_API_KEY and OPENAI_ACCESS_TOKEN choose oneOPENAI_API_MODEL Set model, optional, default: gpt-3.5-turboOPENAI_API_BASE_URL Set interface address, optional, default: https://api.openai.comOPENAI_API_DISABLE_DEBUG Set interface to close debug logs, optional, default: empty does not close
ACCESS_TOKEN available:
OPENAI_ACCESS_TOKEN and OPENAI_API_KEY choose one, OPENAI_API_KEY takes precedence when both existAPI_REVERSE_PROXY Set reverse proxy, optional, default: https://ai.fakeopen.com/api/conversation, Community (Note: Only these two are recommended, other third party sources, please identify for yourself)
Common:
AUTH_SECRET_KEY Access permission key, optionalMAX_REQUEST_PER_HOUR Maximum number of requests per hour, optional, unlimited by defaultTIMEOUT_MS Timeout, unit milliseconds, optionalSOCKS_PROXY_HOST and SOCKS_PROXY_PORT take effect together, optionalSOCKS_PROXY_PORT and SOCKS_PROXY_HOST take effect together, optionalHTTPS_PROXY Support http, https, socks5, optionalALL_PROXY Support http, https, socks5, optional
Packaging
Use Docker
Docker Parameter Examples
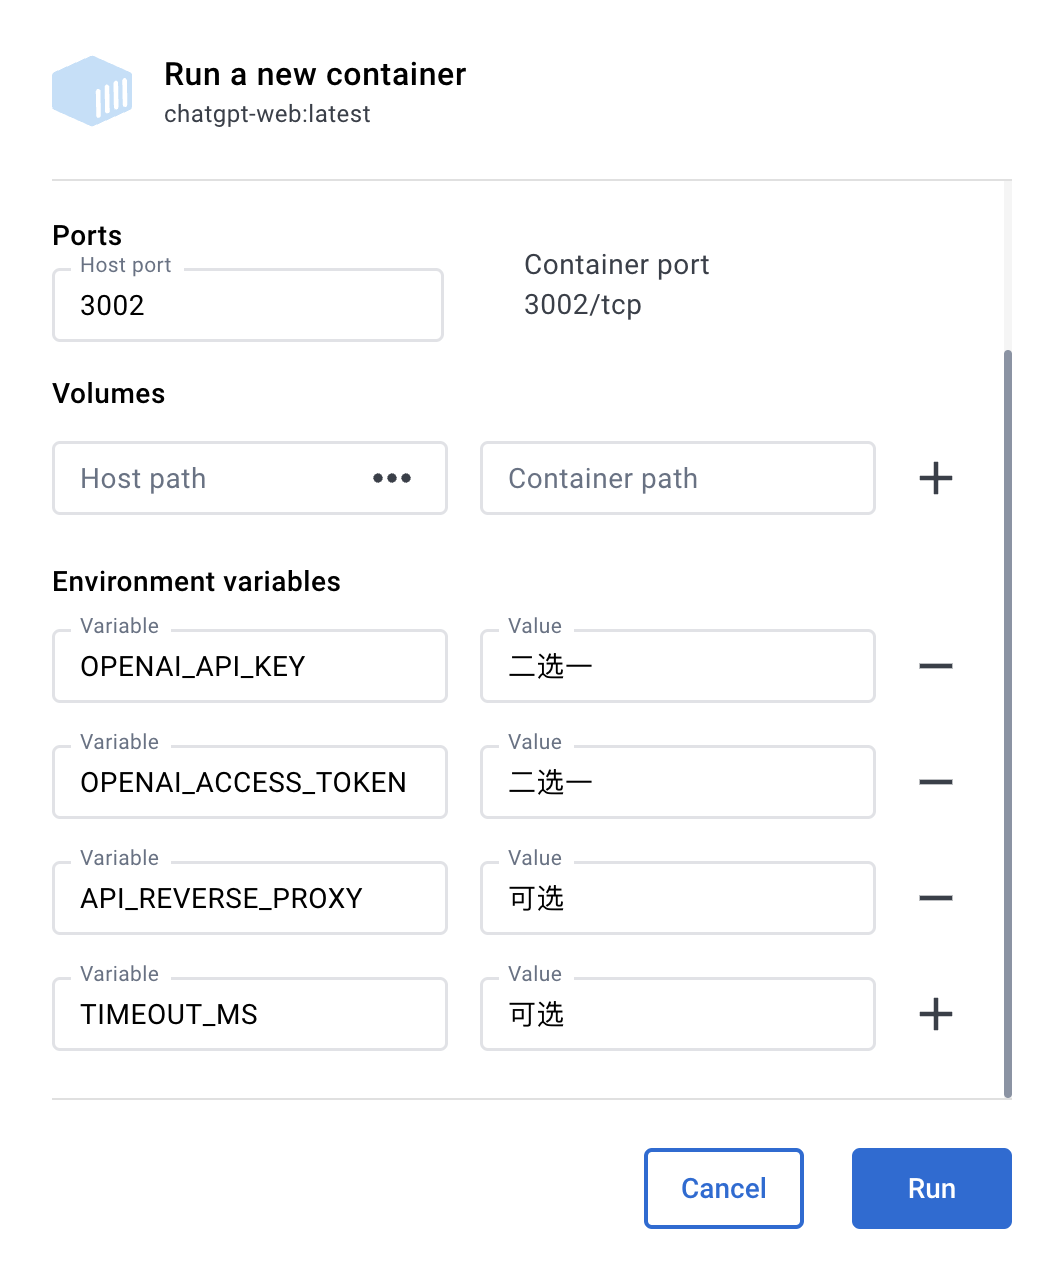
Docker build & Run
docker build -t chatgpt-web .

# Foreground running
docker run --name chatgpt-web --rm -it -p 127.0.0.1:3002:3002 --env OPENAI_API_KEY=your_api_key chatgpt-web

# Background running
docker run --name chatgpt-web -d -p 127.0.0.1:3002:3002 --env OPENAI_API_KEY=your_api_key chatgpt-web

# Run address
http://localhost:3002/
Docker compose
Hub address
version: '3'

services:
  app:
    image: chenzhaoyu94/chatgpt-web # always use latest, pull the tag image again to update
    ports:
      - 127.0.0.1:3002:3002
    environment:
      # choose one
      OPENAI_API_KEY: sk-xxx
      # choose one
      OPENAI_ACCESS_TOKEN: xxx
      # API interface address, optional, available when OPENAI_API_KEY is set
      OPENAI_API_BASE_URL: xxx
      # API model, optional, available when OPENAI_API_KEY is set, https://platform.openai.com/docs/models
      # gpt-4, gpt-4o, gpt-4o-mini, gpt-4-turbo, gpt-4-turbo-preview, gpt-4-0125-preview, gpt-4-1106-preview, gpt-4-0314, gpt-4-0613, gpt-4-32k, gpt-4-32k-0314, gpt-4-32k-0613, gpt-3.5-turbo-16k, gpt-3.5-turbo-16k-0613, gpt-3.5-turbo, gpt-3.5-turbo-0301, gpt-3.5-turbo-0613, text-davinci-003, text-davinci-002, code-davinci-002
      OPENAI_API_MODEL: xxx
      # reverse proxy, optional
      API_REVERSE_PROXY: xxx
      # access permission key, optional
      AUTH_SECRET_KEY: xxx
      # maximum number of requests per hour, optional, unlimited by default
      MAX_REQUEST_PER_HOUR: 0
      # timeout, unit milliseconds, optional
      TIMEOUT_MS: 60000
      # Socks proxy, optional, take effect with SOCKS_PROXY_PORT
      SOCKS_PROXY_HOST: xxx
      # Socks proxy port, optional, take effect with SOCKS_PROXY_HOST
      SOCKS_PROXY_PORT: xxx
      # HTTPS proxy, optional, support http,https,socks5
      HTTPS_PROXY: http://xxx:7890
OPENAI_API_BASE_URL Optional, available when OPENAI_API_KEY is setOPENAI_API_MODEL Optional, available when OPENAI_API_KEY is set
Prevent Crawlers
nginx
Fill in the following configuration in the nginx configuration file to prevent crawlers. You can refer to the docker-compose/nginx/nginx.conf file to add anti-crawler methods
    # Prevent crawlers
    if ($http_user_agent ~* "360Spider|JikeSpider|Spider|spider|bot|Bot|2345Explorer|curl|wget|webZIP|qihoobot|Baiduspider|Googlebot|Googlebot-Mobile|Googlebot-Image|Mediapartners-Google|Adsbot-Google|Feedfetcher-Google|Yahoo! Slurp|Yahoo! Slurp China|YoudaoBot|Sosospider|Sogou spider|Sogou web spider|MSNBot|ia_archiver|Tomato Bot|NSPlayer|bingbot")
    {
      return 403;
    }
Deploy with Railway

Railway Environment Variables
| Environment variable name |
Required |
Remarks |
PORT |
Required |
Default 3002 |
AUTH_SECRET_KEY |
Optional |
Access permission key |
MAX_REQUEST_PER_HOUR |
Optional |
Maximum number of requests per hour, optional, unlimited by default |
TIMEOUT_MS |
Optional |
Timeout, unit milliseconds |
OPENAI_API_KEY |
OpenAI API choose one |
apiKey required for OpenAI API (get apiKey) |
OPENAI_ACCESS_TOKEN |
Web API choose one |
accessToken required for Web API (get accessToken) |
OPENAI_API_BASE_URL |
Optional, available when OpenAI API |
API interface address |
OPENAI_API_MODEL |
Optional, available when OpenAI API |
API model |
API_REVERSE_PROXY |
Optional, available when Web API |
Web API reverse proxy address Details |
SOCKS_PROXY_HOST |
Optional, take effect with SOCKS_PROXY_PORT |
Socks proxy |
SOCKS_PROXY_PORT |
Optional, take effect with SOCKS_PROXY_HOST |
Socks proxy port |
SOCKS_PROXY_USERNAME |
Optional, take effect with SOCKS_PROXY_HOST |
Socks proxy username |
SOCKS_PROXY_PASSWORD |
Optional, take effect with SOCKS_PROXY_HOST |
Socks proxy password |
HTTPS_PROXY |
Optional |
HTTPS proxy, support http,https, socks5 |
ALL_PROXY |
Optional |
All proxies, support http,https, socks5 |
Note: Modifying environment variables on Railway will re-Deploy
Deploy with Sealos

Environment variables are consistent with Docker environment variables
Package Manually
Backend Service
If you don't need the node interface of this project, you can omit the following operations
Copy the service folder to the server where you have the node service environment.
# Install
pnpm install

# Pack
pnpm build

# Run
pnpm prod
PS: It is also okay to run pnpm start directly on the server without packing
Frontend Webpage
Modify the VITE_GLOB_API_URL field in the .env file at the root directory to your actual backend interface address
Run the following commands at the root directory, then copy the files in the dist folder to the root directory of your website service
[Reference](https://cn.vitejs.dev/guide/static -deploy.html#building-the-app)
pnpm build
FAQ
Q: Why does Git commit always report errors?
A: Because there is a commit message verification, please follow the Commit Guide
Q: Where to change the request interface if only the front-end page is used?
A: The VITE_GLOB_API_URL field in the .env file at the root directory.
Q: All files explode red when saving?
A: vscode please install the recommended plug-ins for the project, or manually install the Eslint plug-in.
Q: No typewriter effect on the front end?
A: One possible reason is that after Nginx reverse proxy, buffer is turned on, then Nginx will try to buffer some data from the backend before sending it to the browser. Please try adding proxy_buffering off; after the reverse proxy parameter, then reload Nginx. Other web server configurations are similar.
Contributing
Please read the Contributing Guide before contributing
Thanks to everyone who has contributed!

Acknowledgements
Thanks to JetBrains SoftWare for providing free Open Source license for this project.
If you find this project helpful and can afford it, you can give me a little support. Anyway, thanks for your support~

WeChat Pay

Alipay
License
MIT © [ChenZhaoYu]

 一个用 Express 和 Vue3 搭建的可自托管 ChatGPT 演示网页:浏览器里的聊天界面,可以通过官方 OpenAI API 连接 ChatGPT,也可以通过非官方的网页 accessToken 代理来连接。