NexBoot: diskless boot server for Windows and Linux
Boot a whole internet cafe, LAN center or computer lab from one master image. PXE + iSCSI + ZFS in a single Go binary, with a web console and an optional HA cluster.
English · 简体中文





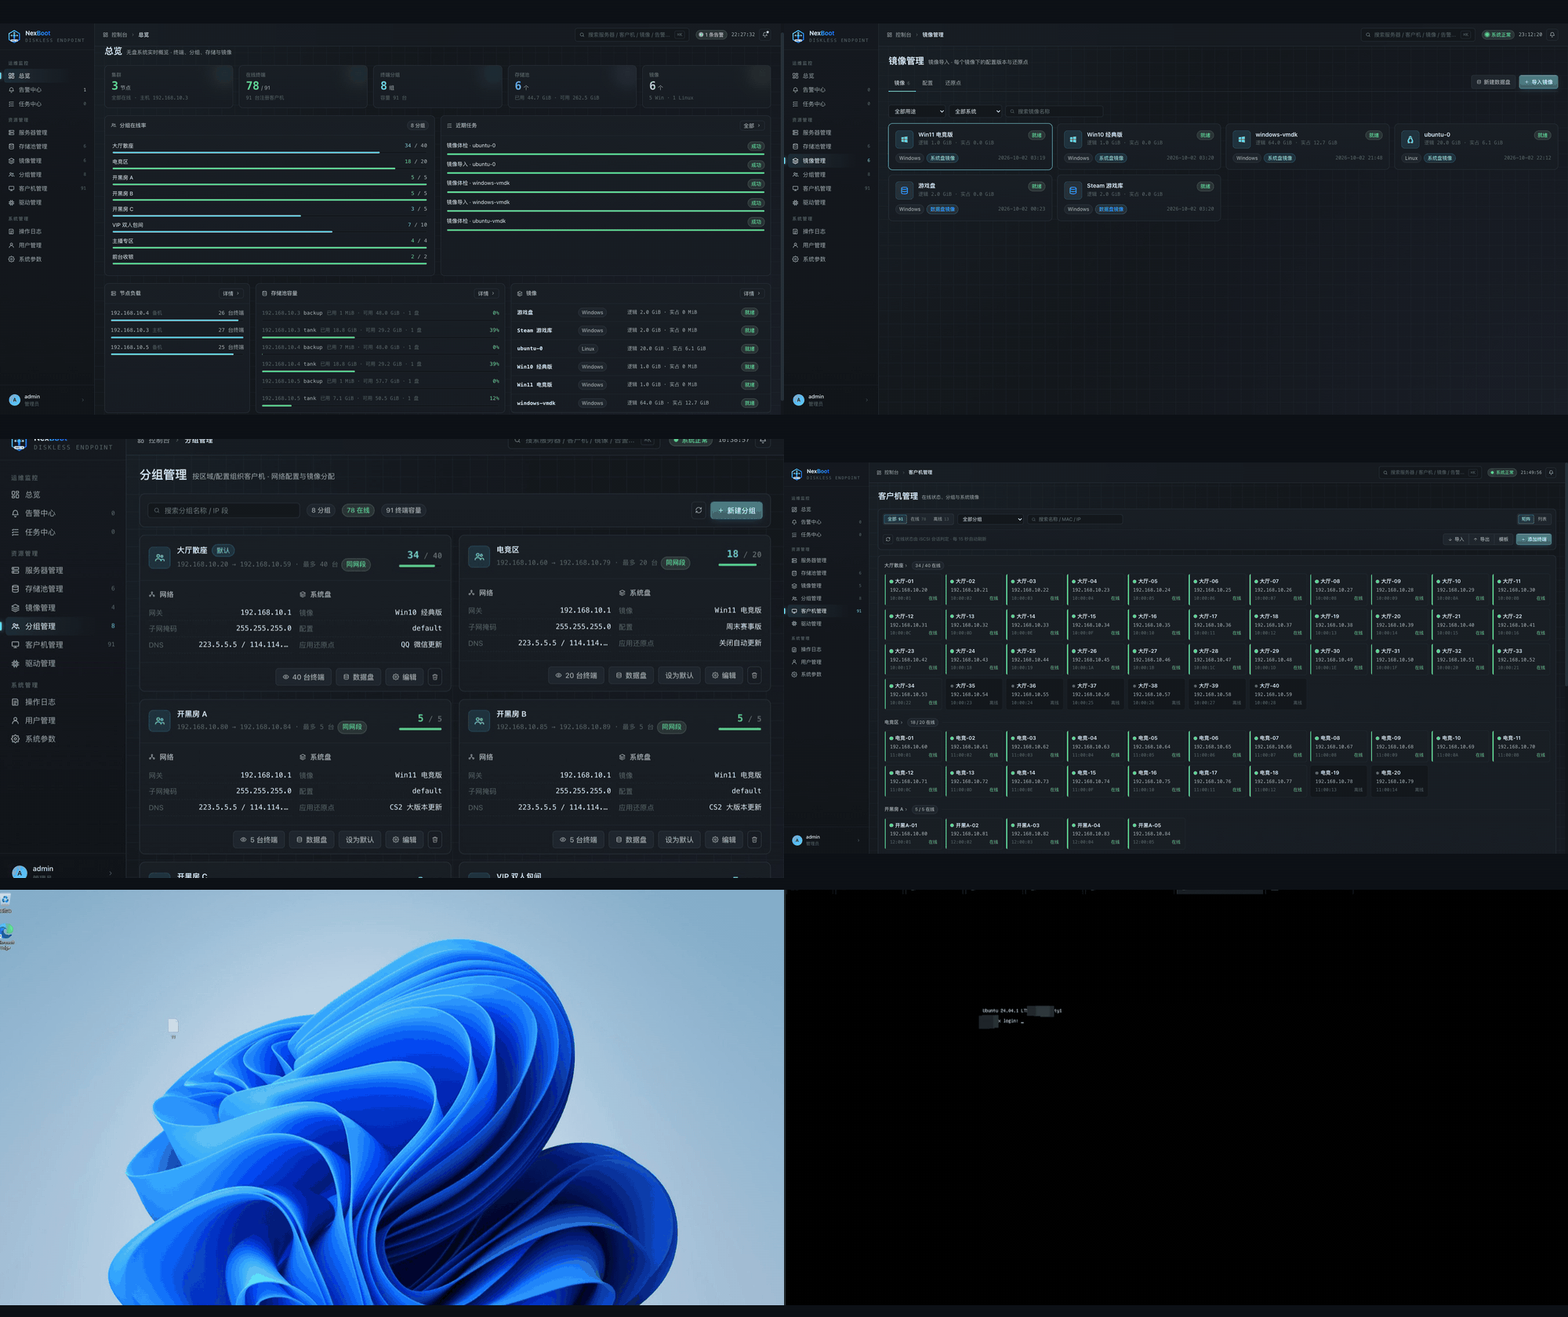
Online demo
Open the demo · Username: demo · Password: demo
Explore menus, searches and detail views with simulated business data. Buttons for modifying data remain visible, but their actions are disabled. The demo runs independently of the real storage and diskless boot services.
Login logs contain real visitor IP addresses, login times and client information, and are visible to all demo visitors. Do not enter personal or production passwords.
Why NexBoot
Keeping 50 or 500 PCs on the same Windows build is a chore. Every game patch, driver update or bad install means walking from seat to seat.
With NexBoot the PCs have no system disk of their own. They boot over the network, and each one gets its own writable copy of a master image. You update the image once. Every PC picks it up on the next reboot, and a reboot always brings a PC back to a clean state.
| Without NexBoot |
With NexBoot |
| Patch every PC by hand |
Patch one image, reboot the room |
| A broken PC needs a reinstall |
A reboot restores it |
| Disks fail, PCs go down |
No local system disk to fail |
| No easy way back after a bad update |
Apply an earlier restore point in one click |
Quick start
On an Ubuntu 22.04 / 24.04 server with a spare disk for the ZFS pool:
sudo apt install ./ndiskless_<version>_amd64.deb
sudo ndiskless-configure --bootstrap-password '<admin password>'
Then open http://<server-ip>:8080, sign in as admin and follow the setup wizard:
- Pick the network card that faces the clients.
- Create a storage pool on the spare disk.
- Import a Windows or Ubuntu image (
.vmdk, .vhdx, .qcow2, .raw or an exported .zfs stream).
- Create a group (IP range + image) and register the clients by MAC address.
- Set the clients to boot from the network. Done.
No internet at the site? Use the offline bundle: sudo ./install.sh from nexboot-offline-ubuntu24.04-amd64.tar.gz. See Install for all options.
How it works
 client PC                 NexBoot server (one Go binary)
 ─────────                 ──────────────────────────────────────────────
 PXE ROM ──DHCP/TFTP────▶  dnsmasq (managed)  ──▶ iPXE
 iPXE ────HTTP /boot────▶  boot script for this MAC (which image, which disk)
 iPXE ────iSCSI─────────▶  LIO target ──▶ ZFS clone of the restore point
 Windows / Linux boots     ▲
 from the network disk     └─ image ─▶ config ─▶ restore point ─▶ per-PC clone
- Copy-on-write clones. Each PC boots from a ZFS clone of a restore point. Clones cost almost no space and take a second to create.
- Images, configs and restore points. One image can have several configs (for example "esports" and "office"), and each config keeps its own history of restore points.
- Super machine. Boot one PC in edit mode, install your updates, shut it down and save the result as a new restore point.
- Data plane stays local. DHCP,
/boot and iSCSI go to the node that hosts the PC. Nothing is proxied through a central controller.
Features
| Area |
What you get |
| Delivery |
One static binary with the web UI built in; .deb package and an offline bundle for sites without internet |
| Client OS |
Windows (BIOS and UEFI) and Ubuntu, including Ubuntu Server's default LVM layout |
| Image import |
.vmdk / .vhd(x) / .qcow2 / .raw / .zfs streams; Windows and Linux images are adapted for iSCSI boot automatically |
| Image management |
Configs, restore points, one-click apply, save as new image, export, overwrite base image, health check |
| Groups and clients |
Fixed IP per MAC via DHCP, data disks per group, client status matrix, cross-subnet groups via DHCP relay |
| Hardware models |
Discovers the NIC. When the image has no configuration for a Windows NIC, the server writes that PC's boot configuration from the image's already-installed NIC and a matching driver (built into the image, or an uploaded x64 pack), so there is no per-model adaptation step. The models page shows each model's actual boot result (OK, boot failed, waiting for first boot) and offers a full WinPE adaptation only after a failed boot |
| Storage |
ZFS pools with mirrors, cache and spare disks, managed from the UI; scheduled backups to a second pool |
| High availability |
keepalived VIP, catalogue replication with resume, epoch fencing, planned switchover; grow from one node to a cluster online |
| Operations |
Alarms (nodes, pools, replication, boot failures, image health), audit log, task center |
Screenshots
|
|
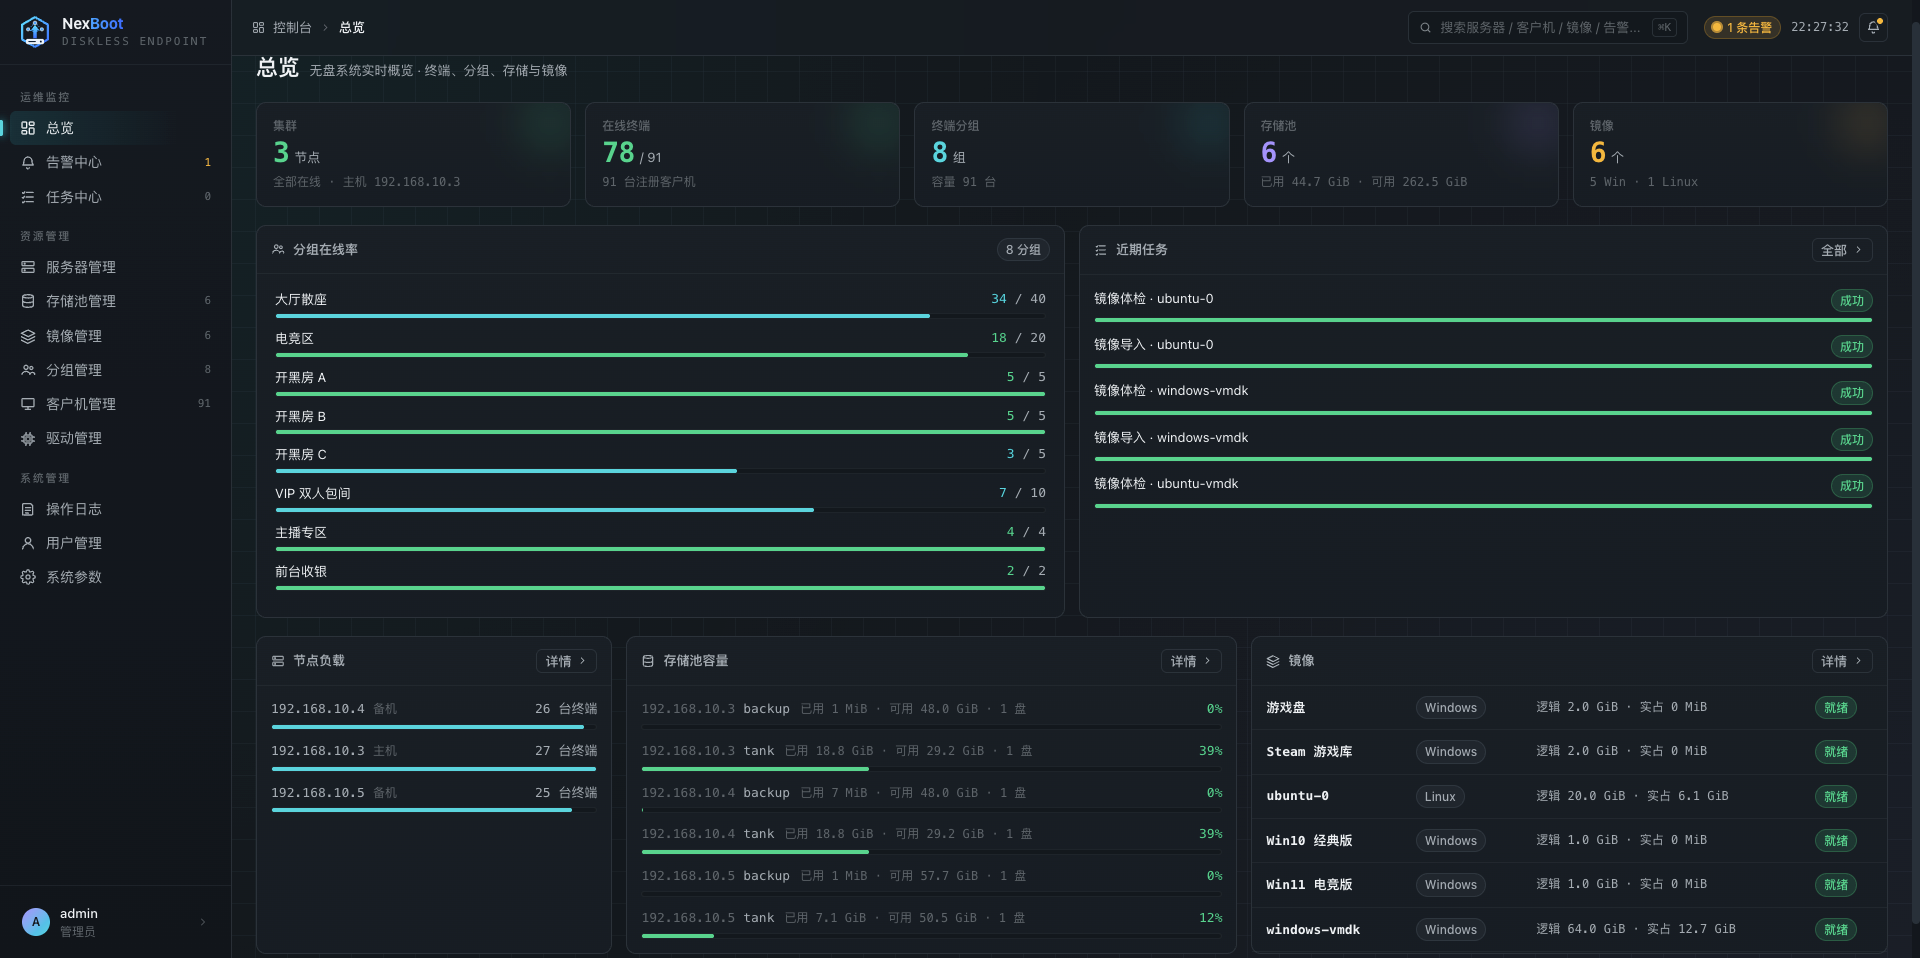
Overview: nodes, clients, groups and storage at a glance |
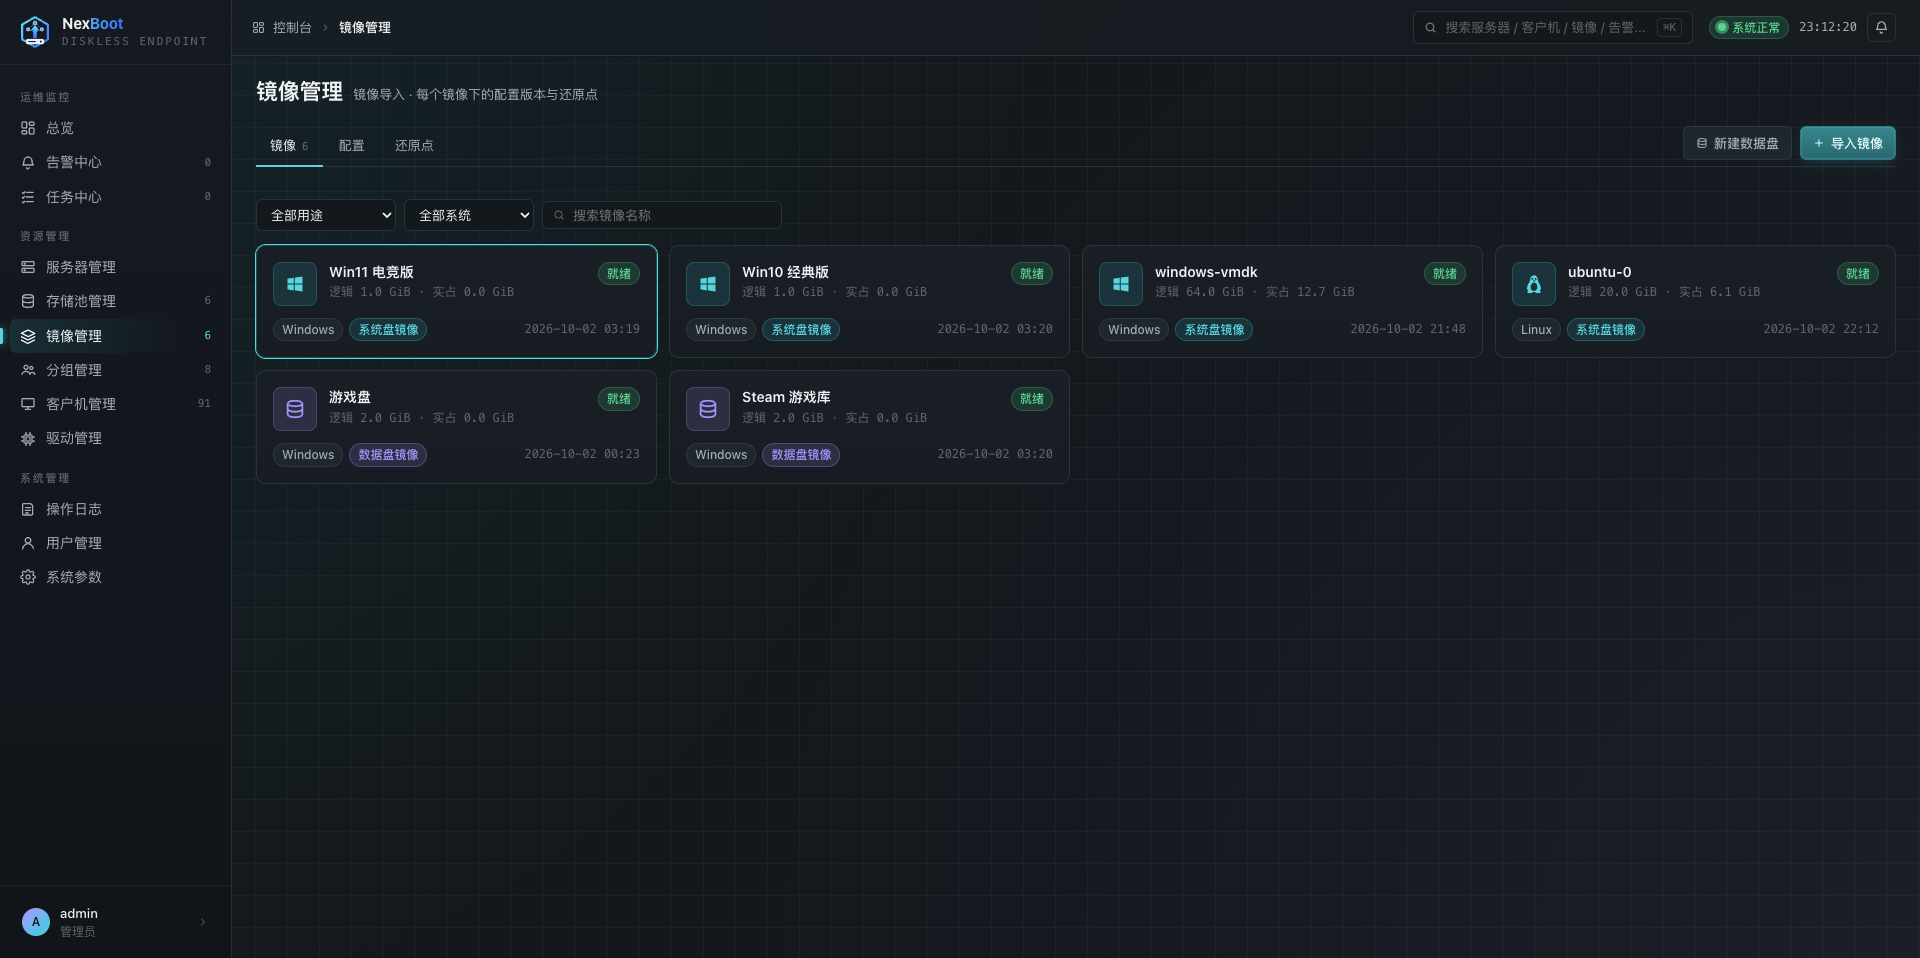
Images: system disks, data disks, and create from ISO |
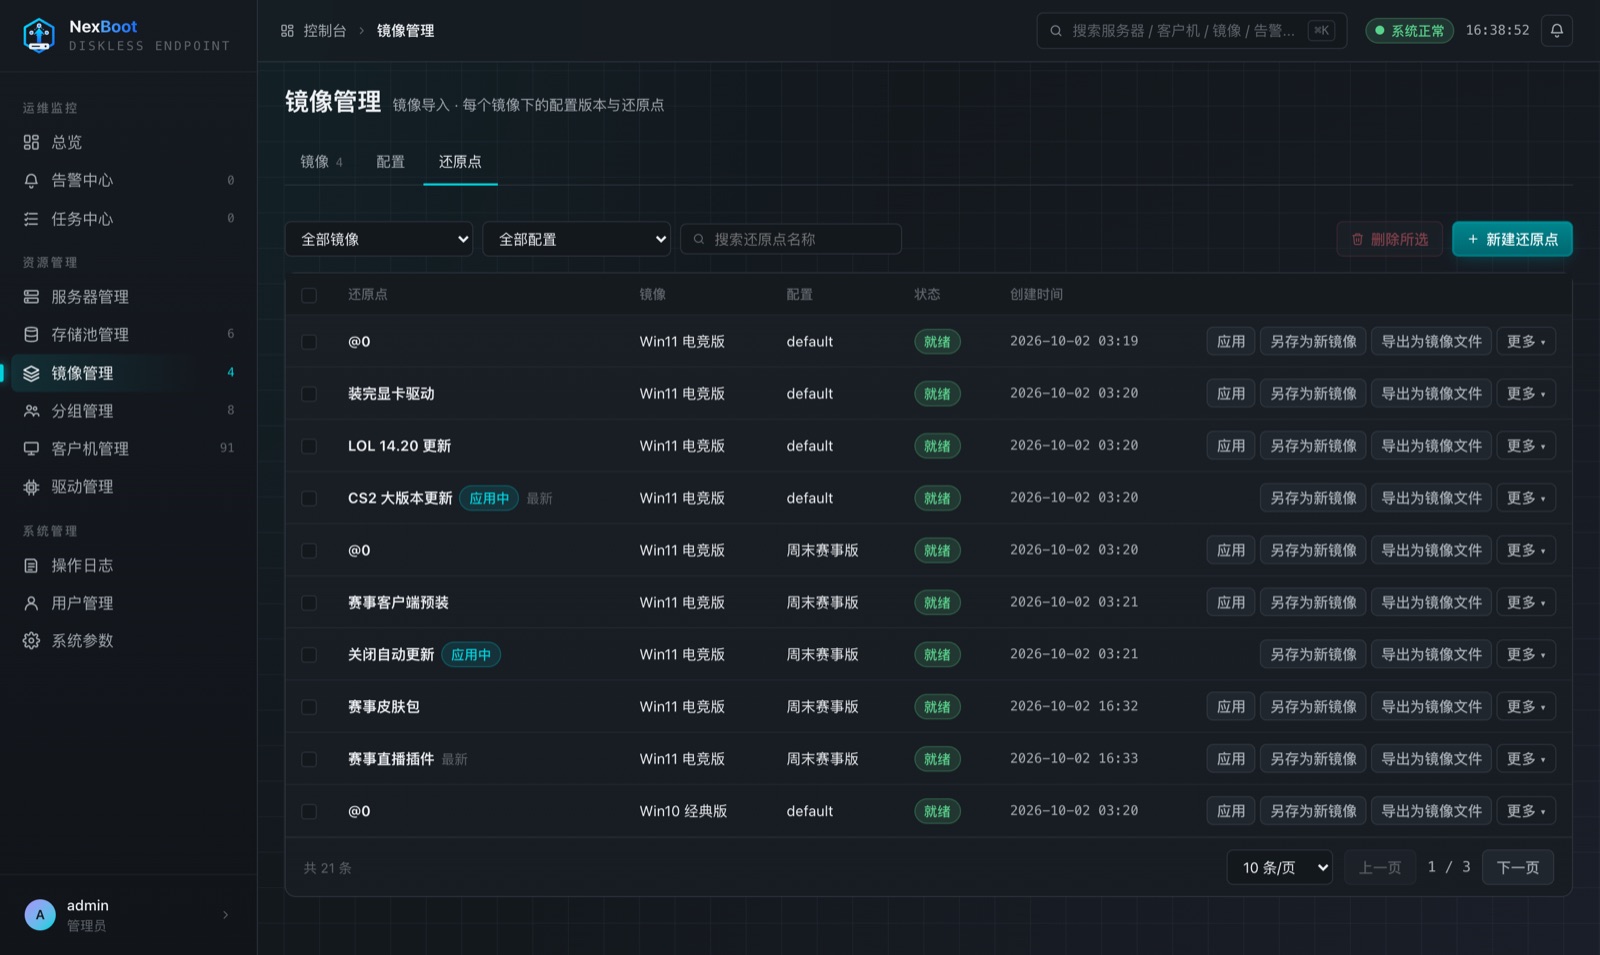
Restore points: apply, save as image, export |
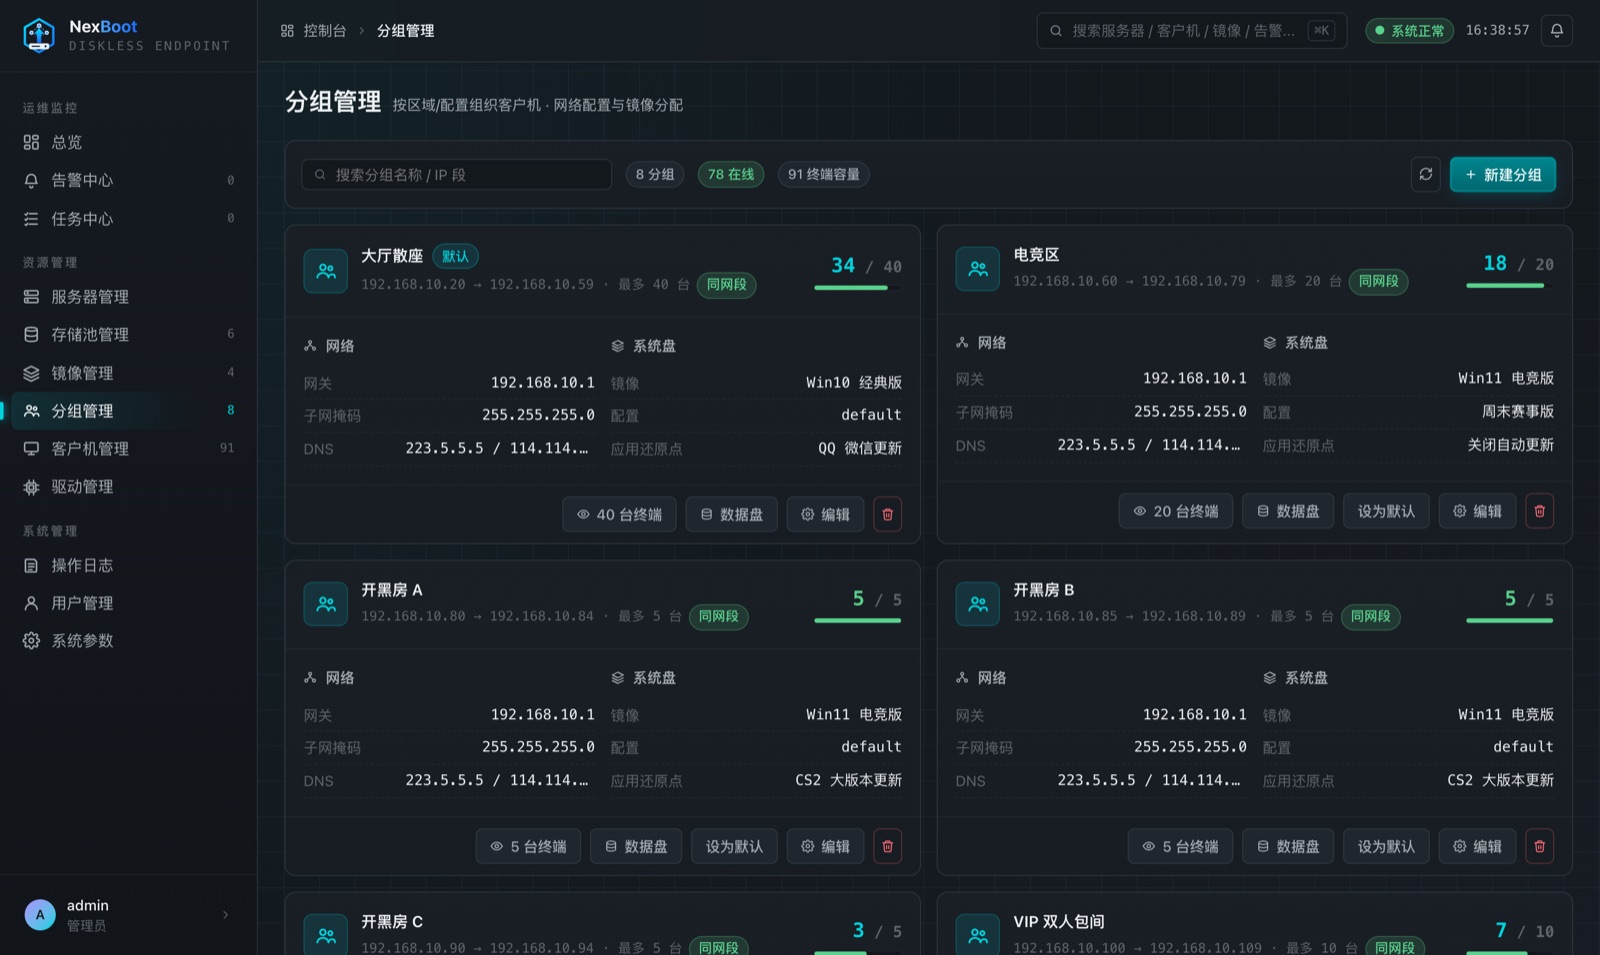
Groups: IP range, system disk and data disks |
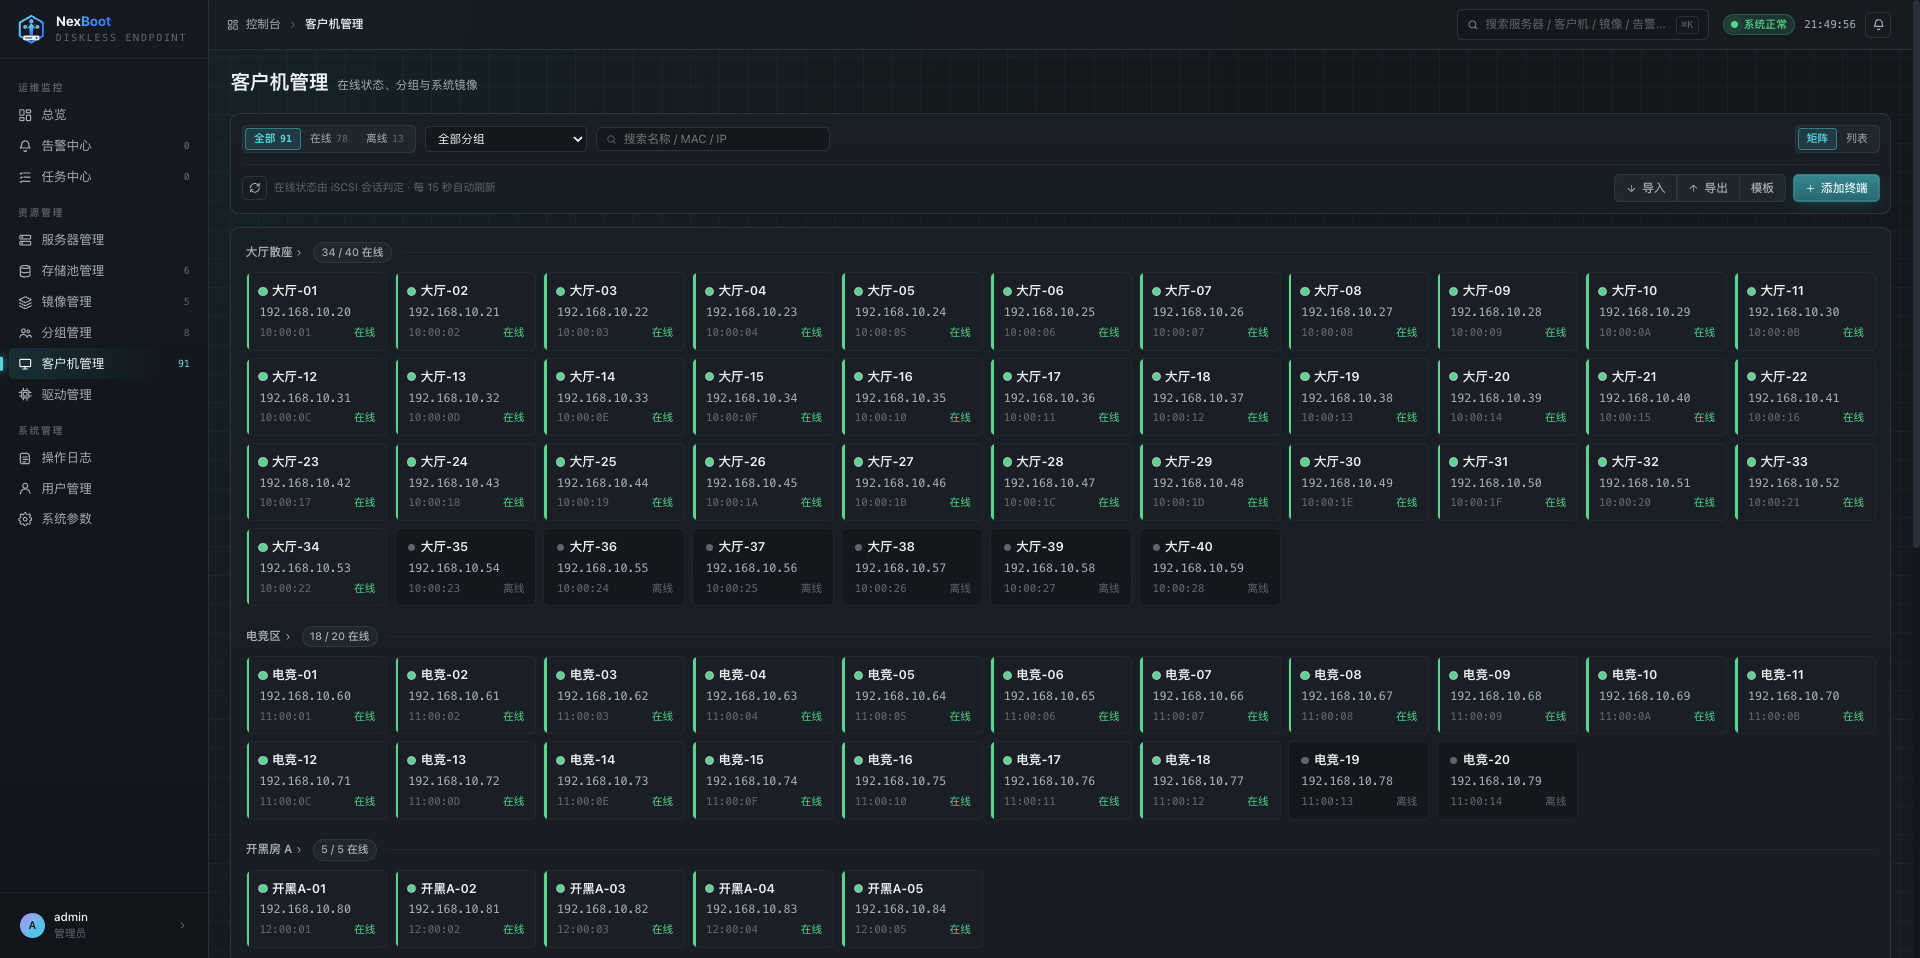
Client matrix |
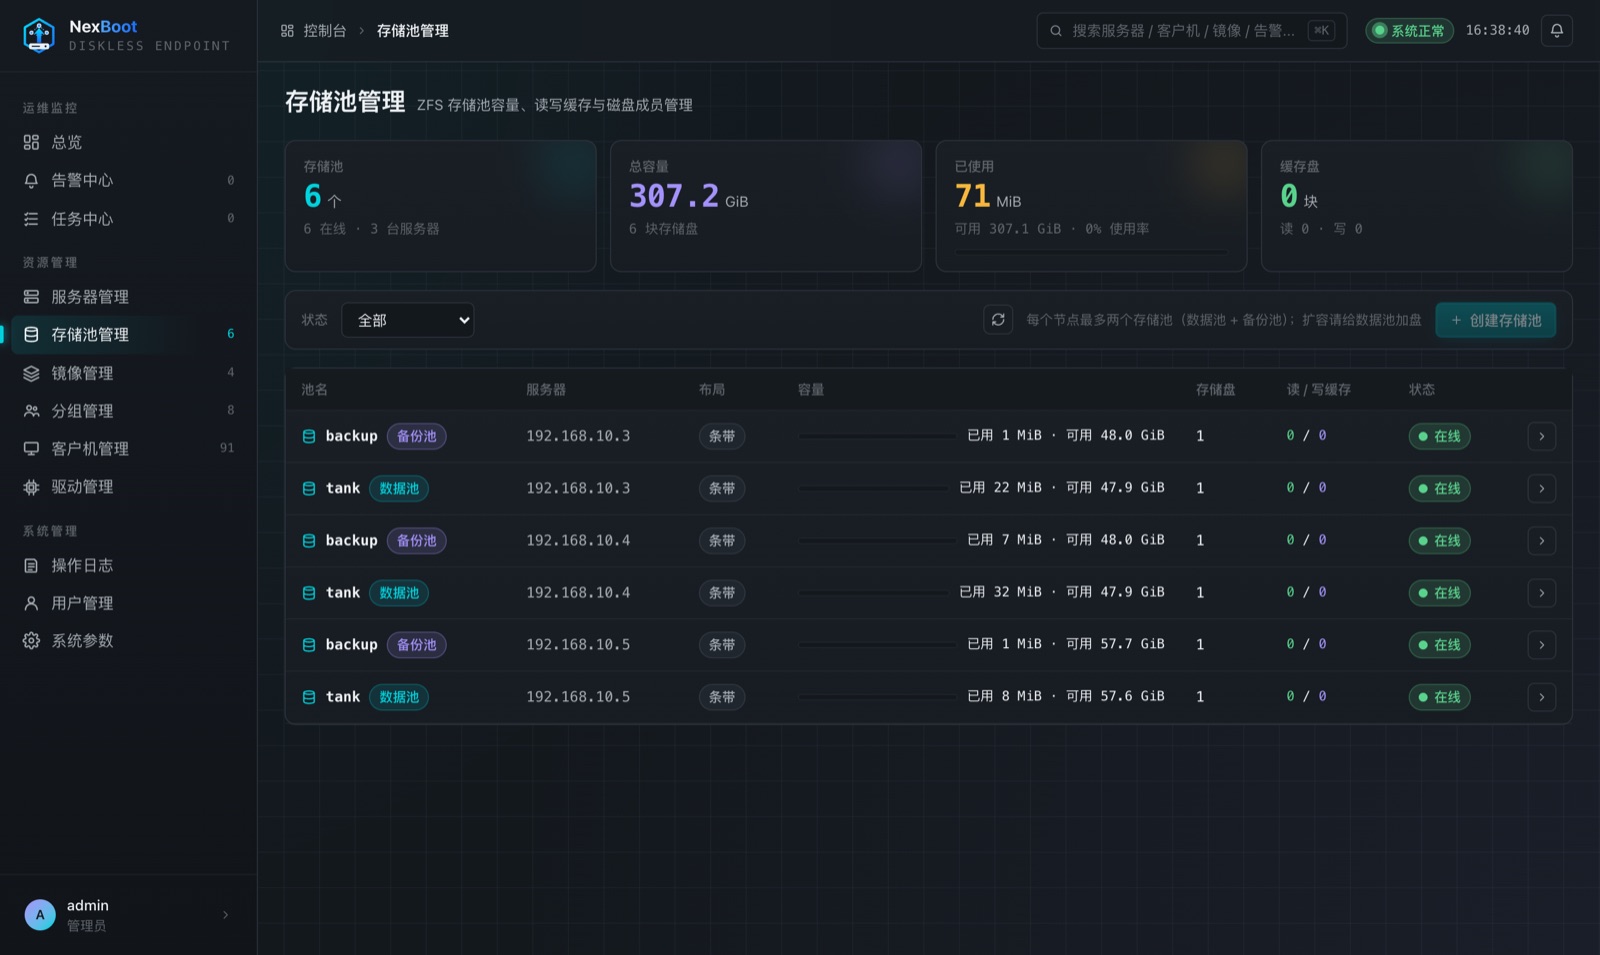
Storage pools per node |
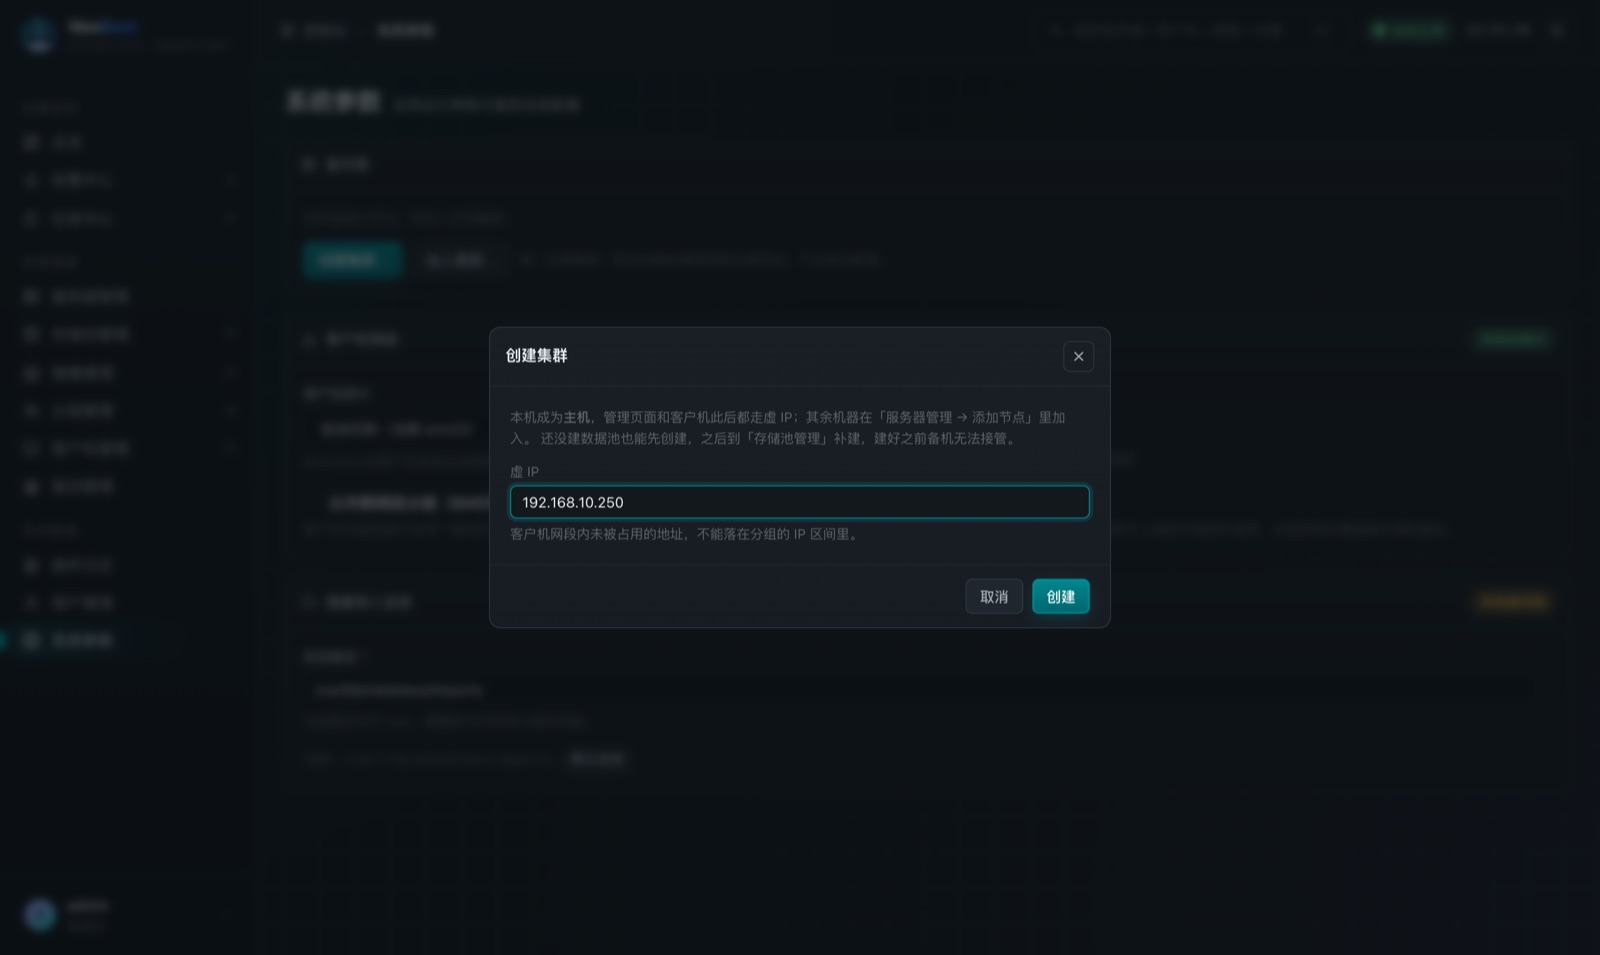
Create a cluster with just a VIP |
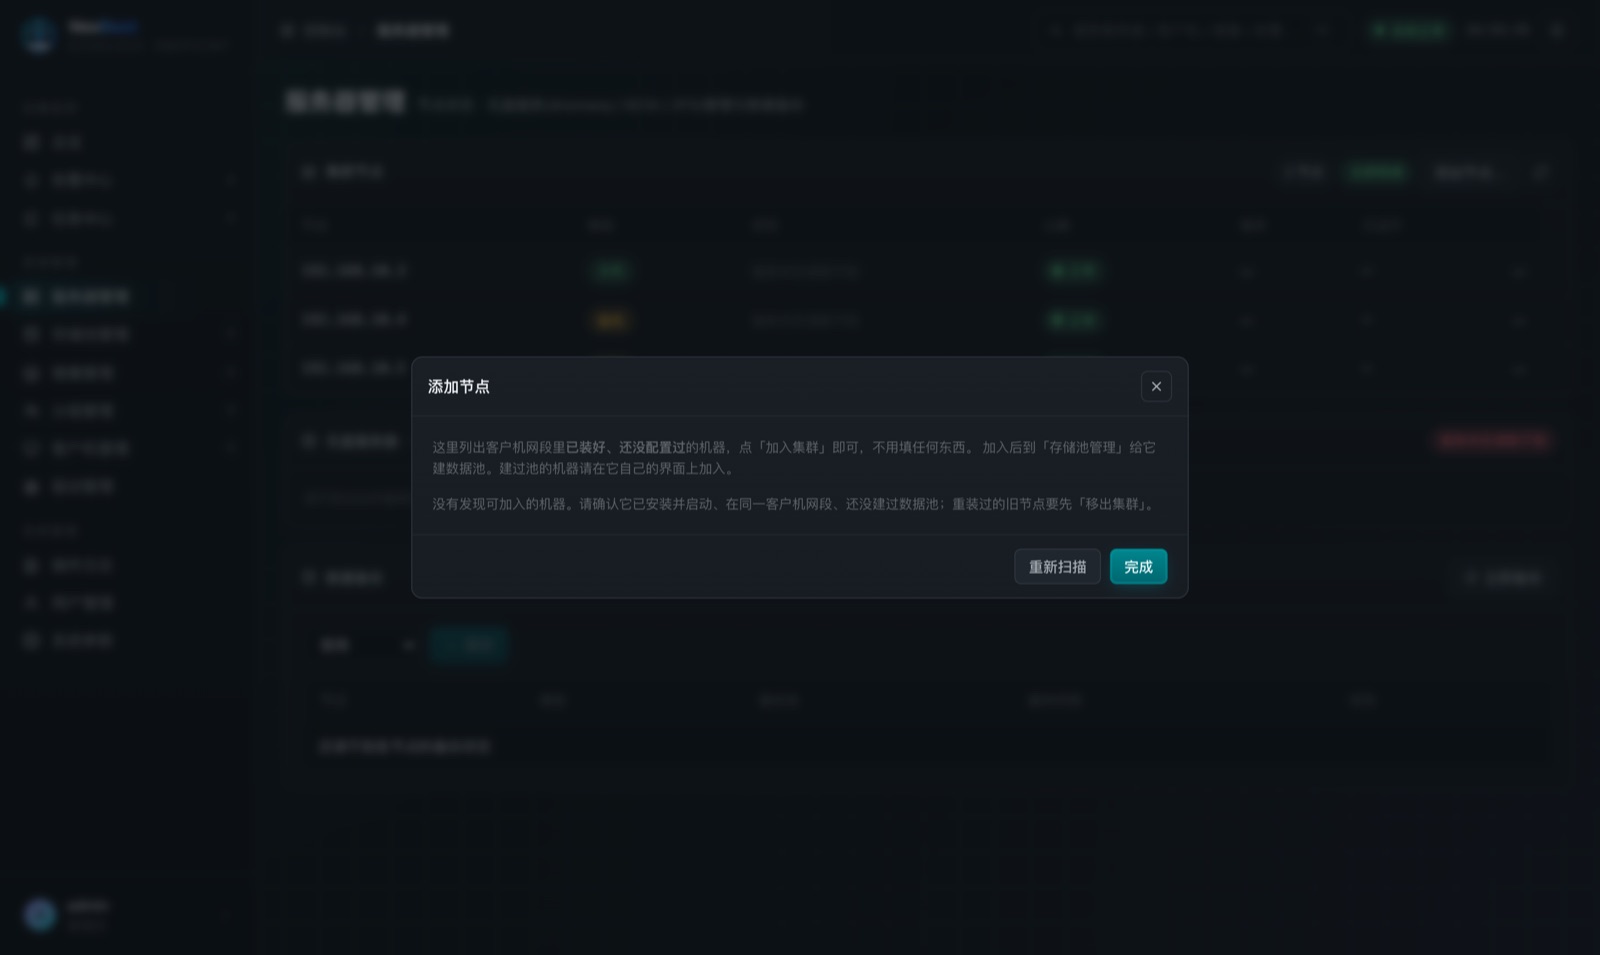
Add nodes found on the network |
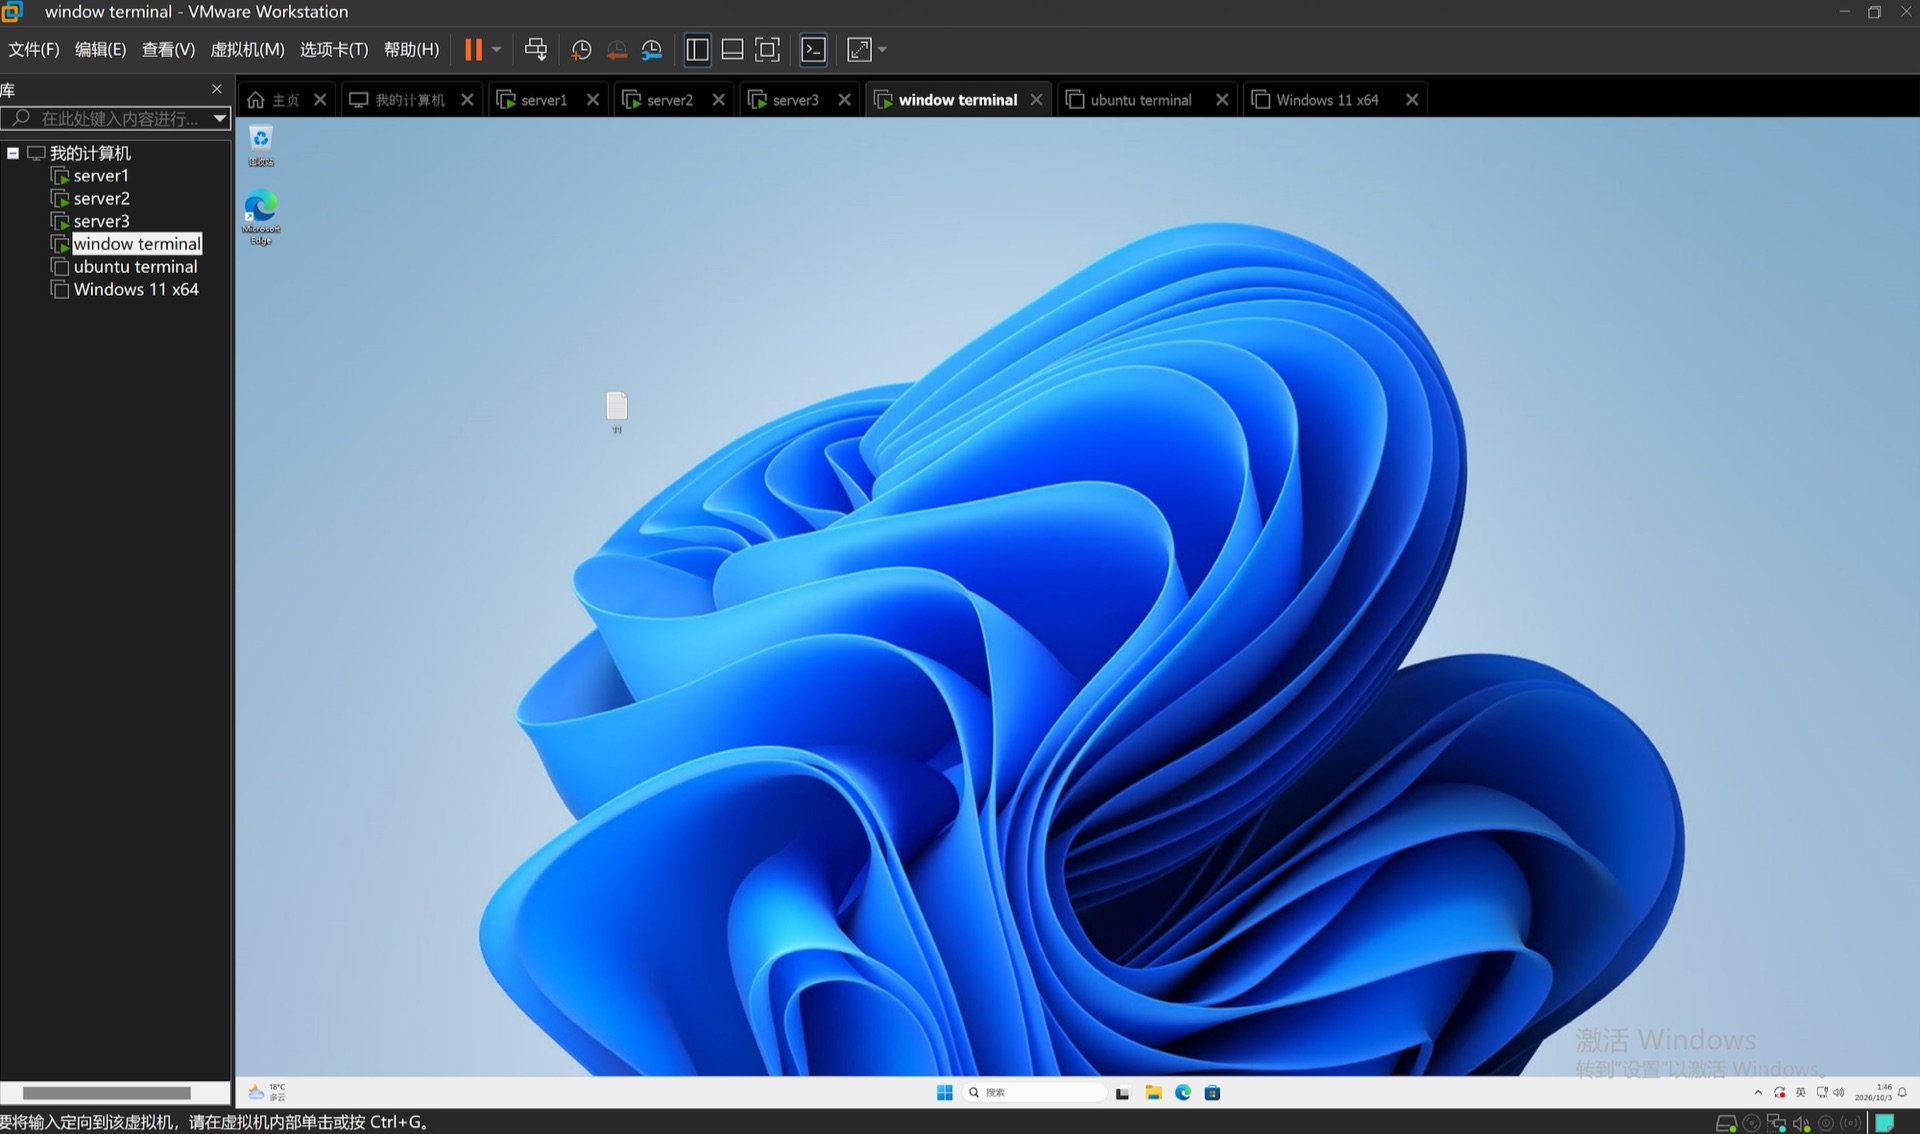
Windows 11 client booted over the network |
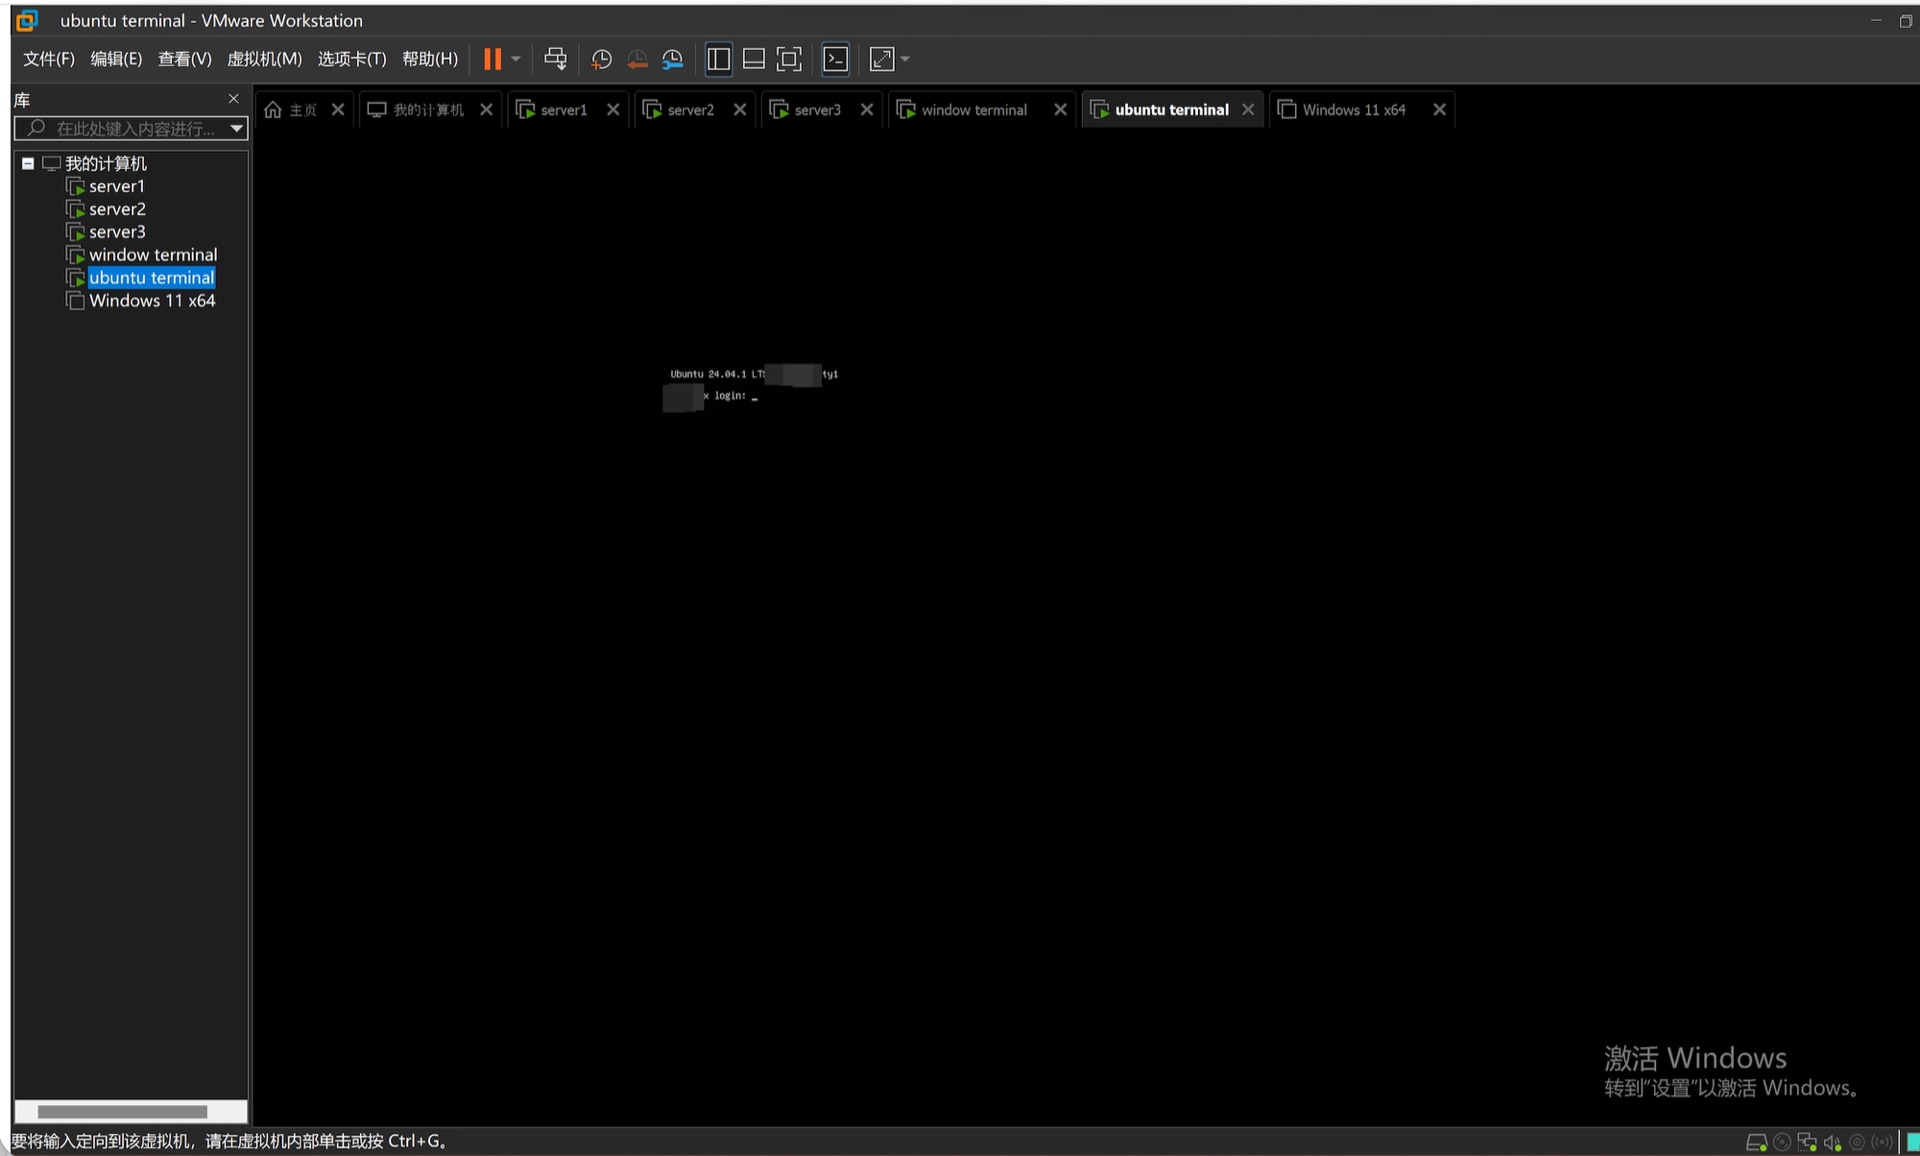
Ubuntu 24.04 client booted over the network |
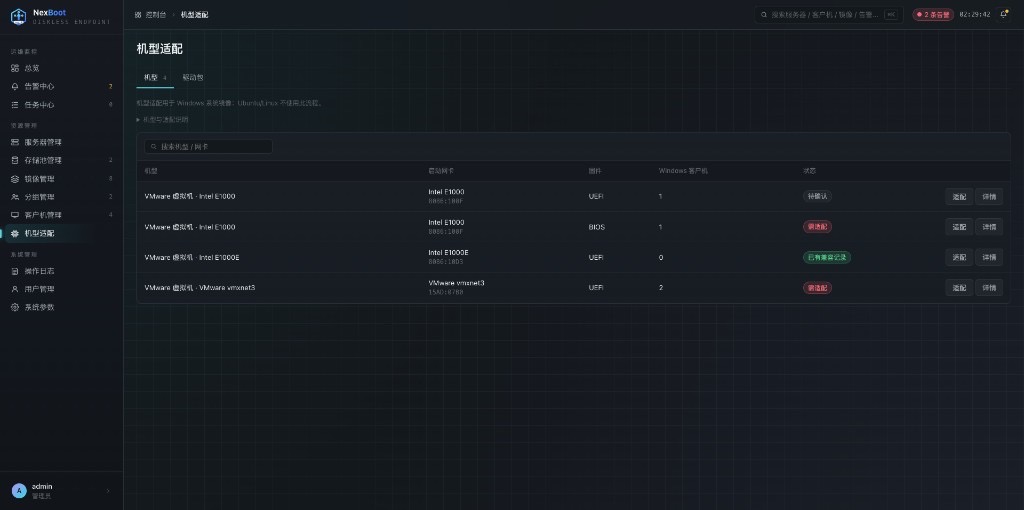
Hardware models: OK, boot failed, or waiting for first boot |
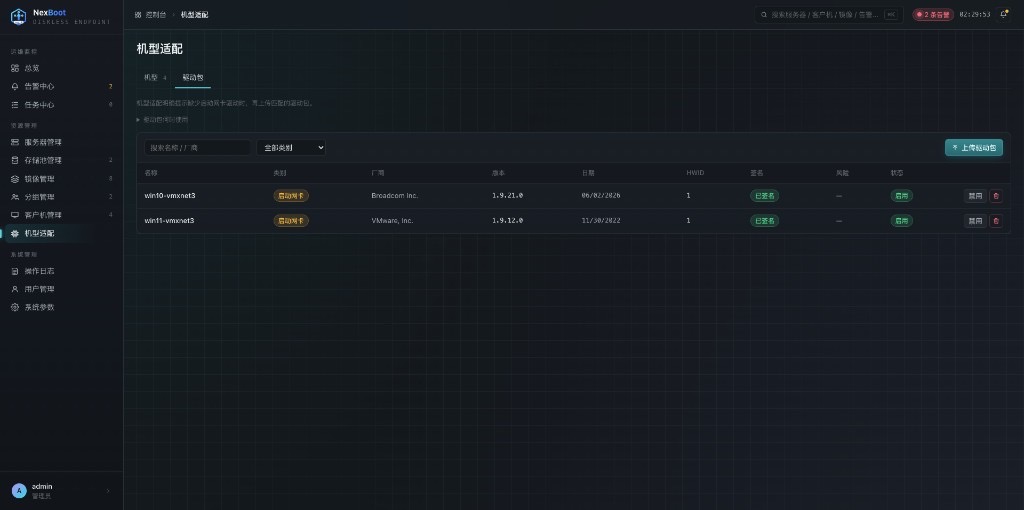
Driver packs: signed x64 NIC drivers, enabled or disabled |
More screenshots are in the Chinese README.
Requirements
Each server
| Item |
Requirement |
| OS |
Ubuntu 22.04 / 24.04 (other systemd + ZFS distributions should work) |
| Disks |
At least one disk besides the system disk, for the ZFS pool |
| Memory |
8 GB minimum, 32 GB or more recommended (enough ZFS ARC for your hot images) |
| Network |
Same layer-2 segment as the clients; cluster nodes share it too (VRRP runs there) |
| IP address |
Every server needs a static IP, not DHCP |
| Packages |
dnsmasq, dnsmasq-utils, qemu-utils, targetcli-fb, zfsutils-linux, keepalived, curl, libhivex-bin, libwin-hivex-perl (pulled in by the .deb, bundled in the offline package) |
Network
- No other DHCP server may answer the clients. NexBoot only answers registered MACs, and a second server would hand out wrong addresses.
- Set the clients to boot from the network card. BIOS and UEFI both work.
Client images
Create an image from an ISO: the ISO wizard supports Windows 10/11 and Server 2016+, Ubuntu 24.04, and Anaconda-based CentOS / RHEL / Rocky Linux / AlmaLinux 7/8/9 full DVDs (x86_64, UEFI). Linux installation uses packages on the ISO and exposes the ISO as a read-only iSCSI installation medium; boot/netinstall media missing required offline packages are rejected with a specific reason. RHEL-family installs use Kickstart and dracut/iBFT, with separate preparation and Anaconda logs. The CentOS 7 DVD is covered by media checks and automated regression tests; actual installation, reboot, and another client's diskless boot still require hardware acceptance. This does not add automatic adaptation of arbitrary imported RHEL disk images. See ISO acceptance steps.
| OS |
Status |
Before you capture the image |
| Windows |
Supported |
Set the network card to obtain an IP automatically. Windows 11 24H2 / 25H2 builds 26100.7705 / 26200.7705 or later are recommended (KB5074105 fixes a possible iSCSI boot failure). Earlier or unknown revisions show an advisory and can still be installed; compatibility requires an actual diskless boot test |
| Ubuntu |
Supported |
sudo apt install open-iscsi. Plain partitions and linear LVM volumes both work |
| CentOS / RHEL / Rocky / AlmaLinux |
Full-DVD ISO installation implemented; hardware acceptance pending |
Automatic adaptation of imported disk images is not extended; see the Chinese README for manual dracut setup |
Don't set a static IP inside the image. Every PC boots the same image, so a fixed address would be claimed by all of them at once. NexBoot gives each MAC its own address over DHCP. Ubuntu images are switched to DHCP automatically on import.
Turn off automatic updates, automatic restarts, sleep and hibernation in Windows images. Every boot starts from a clean copy, so each PC downloads the same updates again, restarts on its own and can end up powered off halfway through, because the iSCSI system disk is already disconnected during the restart. Install updates on a super machine and save them as a restore point instead.
Install
Every server runs the same install and starts as a standalone node. Whether it joins a cluster is decided later in the web UI.
# .deb package (recommended)
sudo apt install ./ndiskless_<version>_amd64.deb
sudo ndiskless-configure --bootstrap-password '<admin password>'

# offline bundle, for sites without internet
mkdir nexboot && tar -xzf nexboot-offline-ubuntu24.04-amd64.tar.gz -C nexboot && cd nexboot
sudo ./install.sh
sudo ndiskless-configure --bootstrap-password '<admin password>'

# from source (see Development for build prerequisites)
make build-static
sudo bash scripts/install-go.sh --install-deps --binary ./bin/ndiskless-linux-amd64 \
  --bootstrap-password '<admin password>'
Check it is up:
systemctl is-active ndiskless            # active
curl -s http://127.0.0.1:8080/healthz    # {"status":"ok"}
Upgrading a .deb does not restart the service. Run sudo systemctl restart ndiskless; in a cluster, upgrade the standbys first and the active node last.
High availability
|
Single node |
Two nodes |
Three or more |
| Who accepts changes |
This node |
Active node |
Active node |
| Who serves client disks |
This node |
Both, balanced (or pinned per group) |
All nodes, balanced (or pinned per group) |
| One node fails |
All clients down |
Only its clients reboot once |
Only its clients reboot once |
Failover is automatic and takes seconds to minutes, not zero. Clients running on a failed node blue-screen and reboot once, then come back on another node. The VIP moves in about a second.
To build a cluster:
- On the first node: System → Parameters → High availability → Create cluster, and enter a free VIP.
- Servers → Cluster nodes → Add node. NexBoot scans the client network for installed but unconfigured servers.
- Create a storage pool on every node.
- Wait for the first replication to finish (shown under High availability).
A single node that already has images and clients can be turned into a cluster in place. Nothing is reinstalled or migrated.
Project structure
cmd/ndiskless/   entry point, wiring, HA role selection
internal/
  api/           HTTP routes, auth, /boot
  boot/          iPXE scripts and embedded TFTP assets
  control/       images, configs, restore points, groups, clients, drivers, alarms, backup, cluster ops
  dhcp/          dnsmasq config generation
  ha/            role state machine, epoch fencing, replication endpoints
  storage/       ZFS, iSCSI (LIO), image import and adaptation
  store/         SQLite repositories and goose migrations
web/             React web console, embedded into the binary
deploy/          systemd unit, keepalived template, health scripts
packaging/       .deb and offline bundle builders
tools/e2e/       end-to-end test matrices run against real servers
docs/images/     screenshots, demo GIF and project artwork
Development
Use the Go version specified in go.mod and Node.js 22 (at least 22.22.2) or 24 (at least 24.15.0), with npm. Build and verification targets install frontend dependencies with npm ci, build web/dist and embed it before compiling Go. Generated files are not committed.
make dev          # dev binary at bin/ndiskless-dev
make verify       # gofmt, vet, go test, static build
make verify-web   # vitest, vite build
make verify-all   # all checks; shares the frontend build
make deb          # .deb package (on Linux)
make offline      # offline bundle (on the target Ubuntu version)
End-to-end matrices need real ZFS, LIO and keepalived, so they are not part of CI. See tools/e2e/README.md.
Contributing
Issues and pull requests are welcome. Read CONTRIBUTING.md first.
License
AGPL-3.0. You can use, study and modify NexBoot for free, including running it in your own internet cafe or school. If you distribute a modified version, or offer a modified version to others over a network, you must publish its full source under the AGPL.
The NexBoot name and logo are not covered by the license. Bundled third-party components (iPXE, wimboot) keep their own licenses; see THIRD_PARTY_NOTICES.md.
Built by waterlemon0108. If NexBoot saves you a walk around the room, a star helps others find it.


 NexBoot 是一个用 Go 编写的自托管无盘启动平台,结合了 PXE 网络启动、iSCSI 和 ZFS 存储,让整个网吧、局域网机房或电脑教室的众多电脑都能从同一个母版镜像启动,并通过网页控制台统一管理。