








A robust, performance-focused and full-featured Redis client for Node.js.
Supports Redis >= 2.6.12. Completely compatible with Redis 7.x.
ioredis is a stable project and maintenance is done on a best-effort basis for relevant issues (contributions to ioredis will still be evaluated, reviewed, and merged when they benefit the project). For new projects, node-redis is the recommended client library. node-redis is the open-source (MIT license) Redis JavaScript client library redesigned from the ground up and actively maintained. node-redis supports new (hash-field expiration) and future commands and the capabilities available in Redis Stack and Redis 8 (search, JSON, time-series, probabilistic data structures).
Features
ioredis is a robust, full-featured Redis client that is
used in the world's biggest online commerce company Alibaba and many other awesome companies.
- Full-featured. It supports Cluster, Sentinel, Streams, Pipelining, and of course Lua scripting, Redis Functions, Pub/Sub (with the support of binary messages).
- High performance 🚀.
- Delightful API 😄. It works with Node callbacks and Native promises.
- Transformation of command arguments and replies.
- Transparent key prefixing.
- Abstraction for Lua scripting, allowing you to define custom commands.
- Supports binary data.
- Supports TLS 🔒.
- Supports offline queue and ready checking.
- Supports ES6 types, such as
Map and Set.
- Supports GEO commands 📍.
- Supports Redis ACL.
- Sophisticated error handling strategy.
- Supports NAT mapping.
- Supports autopipelining.
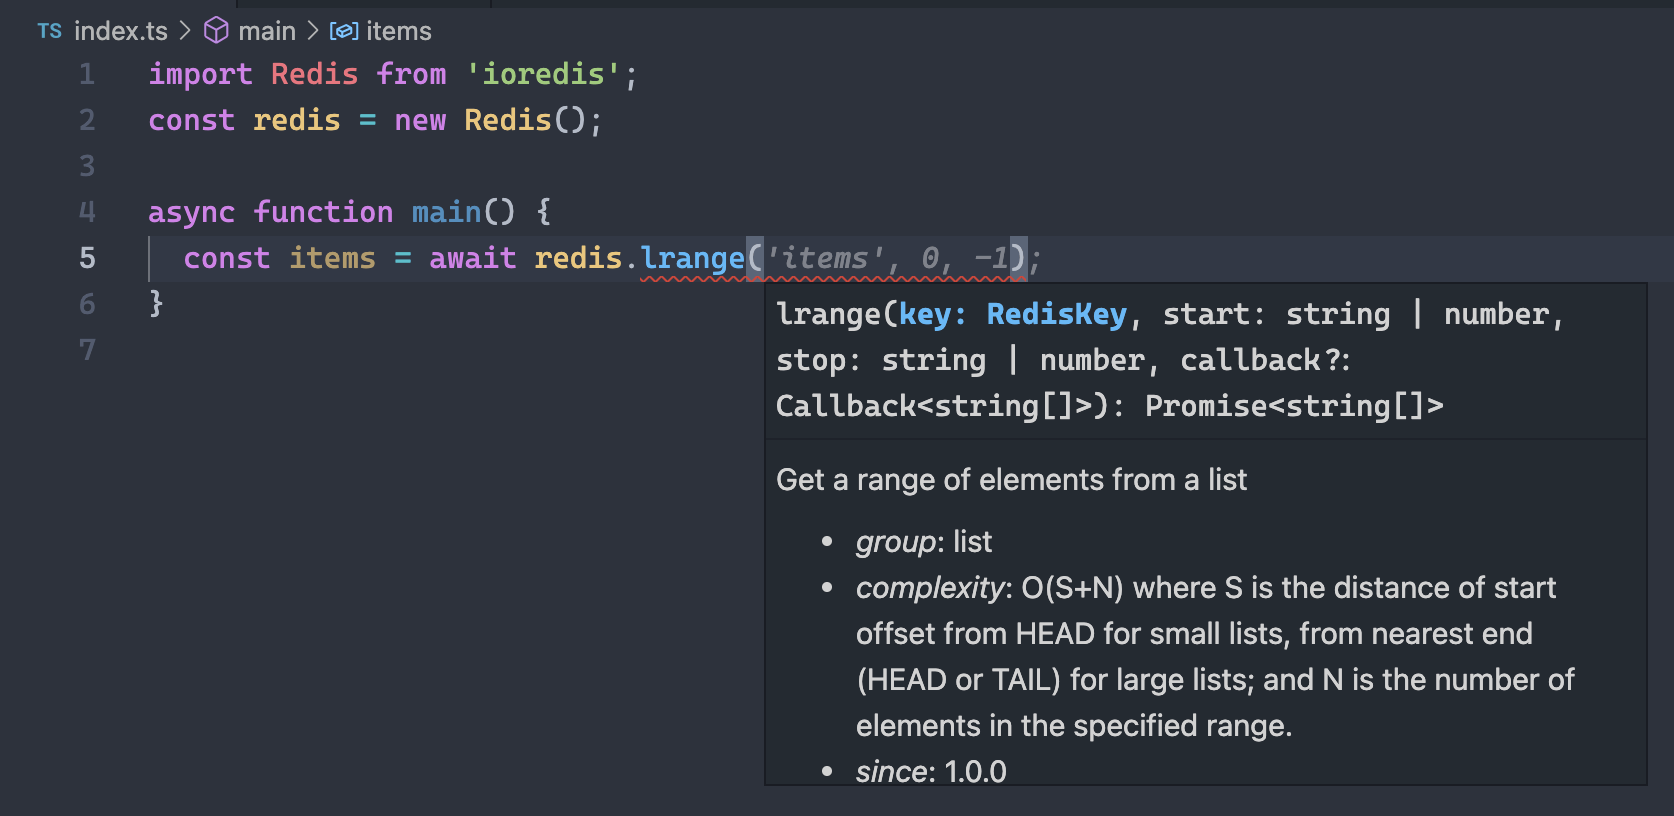
100% written in TypeScript and official declarations are provided:
Versions
| Version |
Branch |
Node.js Version |
Redis Version |
| 6.x.x (latest) |
main |
>= 20 |
6.2 ~ latest |
| 5.x.x |
v5 |
>= 12 |
2.6.12 ~ latest |
| 4.x.x |
v4 |
>= 8 |
2.6.12 ~ 7 |
Refer to CHANGELOG.md for features and bug fixes introduced in v5.
🚀 Upgrading from v5 to v6
🚀 Upgrading from v4 to v5
Links
Quick Start
Install
npm install ioredis
In a TypeScript project, you may want to add TypeScript declarations for Node.js:
npm install --save-dev @types/node
Basic Usage
// Import ioredis.
// You can also use `import { Redis } from "ioredis"`
// if your project is a TypeScript project,
// Note that `import Redis from "ioredis"` is still supported,
// but will be deprecated in the next major version.
const Redis = require("ioredis");

// Create a Redis instance.
// By default, it will connect to localhost:6379.
// We are going to cover how to specify connection options soon.
const redis = new Redis();

redis.set("mykey", "value"); // Returns a promise which resolves to "OK" when the command succeeds.

// ioredis supports the node.js callback style
redis.get("mykey", (err, result) => {
  if (err) {
    console.error(err);
  } else {
    console.log(result); // Prints "value"
  }
});

// Or ioredis returns a promise if the last argument isn't a function
redis.get("mykey").then((result) => {
  console.log(result); // Prints "value"
});

redis.zadd("sortedSet", 1, "one", 2, "dos", 4, "quatro", 3, "three");
redis.zrange("sortedSet", 0, 2, "WITHSCORES").then((elements) => {
  // ["one", "1", "dos", "2", "three", "3"] as if the command was `redis> ZRANGE sortedSet 0 2 WITHSCORES`
  console.log(elements);
});

// All arguments are passed directly to the redis server,
// so technically ioredis supports all Redis commands.
// The format is: redis[SOME_REDIS_COMMAND_IN_LOWERCASE](ARGUMENTS_ARE_JOINED_INTO_COMMAND_STRING)
// so the following statement is equivalent to the CLI: `redis> SET mykey hello EX 10`
redis.set("mykey", "hello", "EX", 10);
See the examples/ folder for more examples. For example:
All Redis commands are supported. See the documentation for details.
Connect to Redis
When a new Redis instance is created,
a connection to Redis will be created at the same time.
You can specify which Redis to connect to by:
new Redis(); // Connect to 127.0.0.1:6379
new Redis(6380); // 127.0.0.1:6380
new Redis(6379, "192.168.1.1"); // 192.168.1.1:6379
new Redis("/tmp/redis.sock");
new Redis({
  port: 6379, // Redis port
  host: "127.0.0.1", // Redis host
  username: "default", // needs Redis >= 6
  password: "my-top-secret",
  db: 0, // Defaults to 0
});
You can also pass a connection string as the first constructor argument.
Use a redis:// URL or rediss:// URL when using TLS encryption:
// Connect to 127.0.0.1:6380, db 4, using password "authpassword":
new Redis("redis://:[email protected]:6380/4");

// Username can also be passed via URI.
new Redis("redis://username:[email protected]:6380/4");
See API Documentation for all available options.
Pub/Sub
Redis provides several commands for developers to implement the Publish–subscribe pattern. There are two roles in this pattern: publisher and subscriber. Publishers are not programmed to send their messages to specific subscribers. Rather, published messages are characterized into channels, without knowledge of what (if any) subscribers there may be.
By leveraging Node.js's built-in events module, ioredis makes pub/sub very straightforward to use. Below is a simple example that consists of two files, one is publisher.js that publishes messages to a channel, the other is subscriber.js that listens for messages on specific channels.
// publisher.js

const Redis = require("ioredis");
const redis = new Redis();

setInterval(() => {
  const message = { foo: Math.random() };
  // Publish to my-channel-1 or my-channel-2 randomly.
  const channel = `my-channel-${1 + Math.round(Math.random())}`;

  // Message can be either a string or a buffer
  redis.publish(channel, JSON.stringify(message));
  console.log("Published %s to %s", message, channel);
}, 1000);
// subscriber.js

const Redis = require("ioredis");
const redis = new Redis();

redis.subscribe("my-channel-1", "my-channel-2", (err, count) => {
  if (err) {
    // Just like other commands, subscribe() can fail for some reasons,
    // ex network issues.
    console.error("Failed to subscribe: %s", err.message);
  } else {
    // `count` represents the number of channels this client are currently subscribed to.
    console.log(
      `Subscribed successfully! This client is currently subscribed to ${count} channels.`
    );
  }
});

redis.on("message", (channel, message) => {
  console.log(`Received ${message} from ${channel}`);
});

// There's also an event called 'messageBuffer', which is the same as 'message' except
// it returns buffers instead of strings.
// It's useful when the messages are binary data.
redis.on("messageBuffer", (channel, message) => {
  // Both `channel` and `message` are buffers.
  console.log(channel, message);
});
It's worth noticing that a connection (aka a Redis instance) can't play both roles at the same time. More specifically, when a client issues subscribe() or psubscribe(), it enters the "subscriber" mode. From that point, only commands that modify the subscription set are valid. Namely, they are: subscribe, psubscribe, unsubscribe, punsubscribe, ping, and quit. When the subscription set is empty (via unsubscribe/punsubscribe), the connection is put back into the regular mode.
If you want to do pub/sub in the same file/process, you should create a separate connection:
const Redis = require("ioredis");
const sub = new Redis();
const pub = new Redis();

sub.subscribe(/* ... */); // From now, `sub` enters the subscriber mode.
sub.on("message" /* ... */);

setInterval(() => {
  // `pub` can be used to publish messages, or send other regular commands (e.g. `hgetall`)
  // because it's not in the subscriber mode.
  pub.publish(/* ... */);
}, 1000);
PSUBSCRIBE is also supported in a similar way when you want to subscribe all channels whose name matches a pattern:
redis.psubscribe("pat?ern", (err, count) => {});

// Event names are "pmessage"/"pmessageBuffer" instead of "message/messageBuffer".
redis.on("pmessage", (pattern, channel, message) => {});
redis.on("pmessageBuffer", (pattern, channel, message) => {});
Streams
Redis v5 introduces a new data type called streams. It doubles as a communication channel for building streaming architectures and as a log-like data structure for persisting data. With ioredis, the usage can be pretty straightforward. Say we have a producer publishes messages to a stream with redis.xadd("mystream", "*", "randomValue", Math.random()) (You may find the official documentation of Streams as a starter to understand the parameters used), to consume the messages, we'll have a consumer with the following code:
const Redis = require("ioredis");
const redis = new Redis();

const processMessage = (message) => {
  console.log("Id: %s. Data: %O", message[0], message[1]);
};

async function listenForMessage(lastId = "$") {
  // `results` is an array, each element of which corresponds to a key.
  // Because we only listen to one key (mystream) here, `results` only contains
  // a single element. See more: https://redis.io/commands/xread#return-value
  const results = await redis.xread("BLOCK", 0, "STREAMS", "mystream", lastId);
  const [key, messages] = results[0]; // `key` equals to "mystream"

  messages.forEach(processMessage);

  // Pass the last id of the results to the next round.
  await listenForMessage(messages[messages.length - 1][0]);
}

listenForMessage();
Expiration
Redis can set a timeout to expire your key, after the timeout has expired the key will be automatically deleted. (You can find the official Expire documentation to understand better the different parameters you can use), to set your key to expire in 60 seconds, we will have the following code:
redis.set("key", "data", "EX", 60);
// Equivalent to redis command "SET key data EX 60", because on ioredis set method,
// all arguments are passed directly to the redis server.
Handle Binary Data
Binary data support is out of the box. Pass buffers to send binary data:
redis.set("foo", Buffer.from([0x62, 0x75, 0x66]));
Every command that returns a bulk string
has a variant command with a Buffer suffix. The variant command returns a buffer instead of a UTF-8 string:
const result = await redis.getBuffer("foo");
// result is `<Buffer 62 75 66>`
It's worth noticing that you don't need the Buffer suffix variant in order to send binary data. That means
in most case you should just use redis.set() instead of redis.setBuffer() unless you want to get the old value
with the GET parameter:
const result = await redis.setBuffer("foo", "new value", "GET");
// result is `<Buffer 62 75 66>` as `GET` indicates returning the old value.
Managed HIMPORT Fieldsets (experimental)
[!WARNING]
ioredis managed-fieldset support is experimental and may change in a future
release. When a managed HIMPORT SET needs fieldset preparation or recovery,
later commands may be sent before that SET resumes. Await the SET before
issuing commands that depend on its write.
HIMPORT requires Redis 8.10
or newer. It provides a faster ingestion mechanism for loading many hashes that
share the same set of field names.
Explicit pipelines containing a configured HIMPORT SET wait for required
fieldset preparation on their selected connection before the batch is sent.
Unconfigured fieldsets remain manually managed.
const redis = new Redis({
  himportFieldsets: [
    {
      name: "user-profile",
      fields: ["name", "email", "age"],
    },
  ],
});

await redis.himport(
  "SET",
  "user:42",
  "user-profile",
  "Ada",
  "[email protected]",
  "37"
);
For Cluster clients, pass himportFieldsets at the top level of the Cluster
options, not under redisOptions. ioredis prepares managed fieldsets on current
and future master connections:
const cluster = new Redis.Cluster(nodes, {
  himportFieldsets: [
    {
      name: "user-profile",
      fields: ["name", "email", "age"],
    },
  ],
});
Direct HIMPORT PREPARE, DISCARD, and DISCARDALL calls on a Cluster client
fan out to all current masters, wait for every reply, and reject if any master
fails. Inside an explicit pipeline, these commands remain connection-affine and
are not managed.
Background preparation failures do not prevent a connection from becoming
ready. Standalone and Sentinel clients report them through the error event;
Cluster clients report them through node error. A dependent managed
HIMPORT SET retries preparation and rejects if recovery fails.
See examples/himport.js for managed fieldsets and
manual batches.
Pipelining
If you want to send a batch of commands (e.g. > 5), you can use pipelining to queue
the commands in memory and then send them to Redis all at once. This way the performance improves by 50%~300% (See benchmark section).
redis.pipeline() creates a Pipeline instance. You can call any Redis
commands on it just like the Redis instance. The commands are queued in memory
and flushed to Redis by calling the exec method:
const pipeline = redis.pipeline();
pipeline.set("foo", "bar");
pipeline.del("cc");
pipeline.exec((err, results) => {
  // `err` is always null, and `results` is an array of responses
  // corresponding to the sequence of queued commands.
  // Each response follows the format `[err, result]`.
});

// You can even chain the commands:
redis
  .pipeline()
  .set("foo", "bar")
  .del("cc")
  .exec((err, results) => {});

// `exec` also returns a Promise:
const promise = redis.pipeline().set("foo", "bar").get("foo").exec();
promise.then((result) => {
  // result === [[null, 'OK'], [null, 'bar']]
});
Each chained command can also have a callback, which will be invoked when the command
gets a reply:
redis
  .pipeline()
  .set("foo", "bar")
  .get("foo", (err, result) => {
    // result === 'bar'
  })
  .exec((err, result) => {
    // result[1][1] === 'bar'
  });
In addition to adding commands to the pipeline queue individually, you can also pass an array of commands and arguments to the constructor:
redis
  .pipeline([
    ["set", "foo", "bar"],
    ["get", "foo"],
  ])
  .exec(() => {
    /* ... */
  });
#length property shows how many commands in the pipeline:
const length = redis.pipeline().set("foo", "bar").get("foo").length;
// length === 2
Transaction
Most of the time, the transaction commands multi & exec are used together with pipeline.
Therefore, when multi is called, a Pipeline instance is created automatically by default,
so you can use multi just like pipeline:
redis
  .multi()
  .set("foo", "bar")
  .get("foo")
  .exec((err, results) => {
    // results === [[null, 'OK'], [null, 'bar']]
  });
If there's a syntax error in the transaction's command chain (e.g. wrong number of arguments, wrong command name, etc),
then none of the commands would be executed, and an error is returned:
redis
  .multi()
  .set("foo")
  .set("foo", "new value")
  .exec((err, results) => {
    // err:
    //  { [ReplyError: EXECABORT Transaction discarded because of previous errors.]
    //    name: 'ReplyError',
    //    message: 'EXECABORT Transaction discarded because of previous errors.',
    //    command: { name: 'exec', args: [] },
    //    previousErrors:
    //     [ { [ReplyError: ERR wrong number of arguments for 'set' command]
    //         name: 'ReplyError',
    //         message: 'ERR wrong number of arguments for \'set\' command',
    //         command: [Object] } ] }
  });
In terms of the interface, multi differs from pipeline in that when specifying a callback
to each chained command, the queueing state is passed to the callback instead of the result of the command:
redis
  .multi()
  .set("foo", "bar", (err, result) => {
    // result === 'QUEUED'
  })
  .exec(/* ... */);
If you want to use transaction without pipeline, pass { pipeline: false } to multi,
and every command will be sent to Redis immediately without waiting for an exec invocation:
redis.multi({ pipeline: false });
redis.set("foo", "bar");
redis.get("foo");
redis.exec((err, result) => {
  // result === [[null, 'OK'], [null, 'bar']]
});
The constructor of multi also accepts a batch of commands:
redis
  .multi([
    ["set", "foo", "bar"],
    ["get", "foo"],
  ])
  .exec(() => {
    /* ... */
  });
Inline transactions are supported by pipeline, which means you can group a subset of commands
i

 ioredis is a Redis client library for Node.js, built to be robust, performance-focused, and full-featured, covering Cluster, Sentinel, Streams, Pipelining, Lua scripting and Pub/Sub.