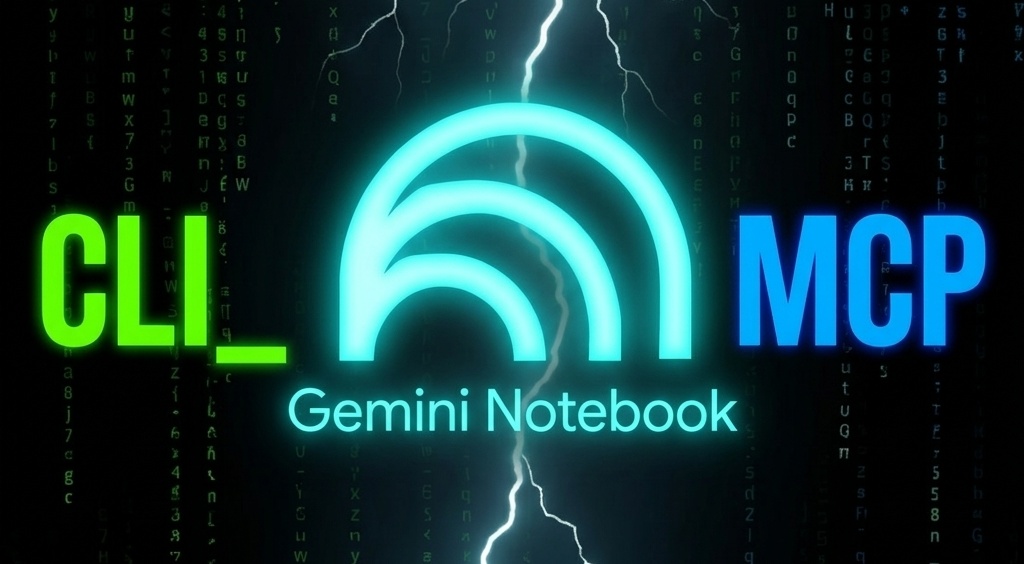





Programmatic access to Gemini Notebook — via command-line interface (CLI) or Model Context Protocol (MCP) server.
Note: Personal/consumer accounts are tested regularly. Gemini Notebook Enterprise support is experimental. The documented notebook.cloud.google.com host has been live-verified with a project-qualified global deployment; other Enterprise host variants may require additional validation.
☕ If you find notebooklm-mcp-cli useful, consider buying me a coffee.
It's free and built in my spare time — but testing every Gemini Notebook feature takes real time and resources. A coffee helps me cover it and keep shipping. Thank you! 🙏

📺 Watch the Demos
Latest
| Codex Setup + Cinematic Video & Slides |
 |
MCP Demos
| General Overview |
Claude Desktop |
Perplexity Desktop |
MCP Super Assistant |
 |
 |
 |
 |
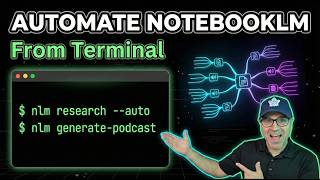
CLI Demos
| CLI Overview |
CLI, MCP & Skills |
Setup, Doctor & mcpb |
Infographics Support |
 |
 |
 |
 |
Two Ways to Use
🖥️ Command-Line Interface (CLI)
Use nlm directly in your terminal for scripting, automation, or interactive use:
nlm notebook list                              # List all notebooks
nlm notebook create "Research Project"         # Create a notebook
nlm source add <notebook> --url "https://..."  # Add sources
nlm audio create <notebook> --confirm          # Generate podcast
nlm download audio <notebook> --id <artifact-id>    # Download audio file
nlm download all <notebook> -d ./exports       # Download every artifact
nlm share public <notebook>                    # Enable public link
Run nlm --ai for comprehensive AI-assistant documentation.
🤖 MCP Server (for AI Agents)
Connect AI assistants (Claude, Gemini, Cursor, etc.) to Gemini Notebook:
# Automatic setup — picks the right config for each tool
nlm setup add claude-code
nlm setup add claude-desktop
nlm setup add gemini
nlm setup add github-copilot
nlm setup add cursor
nlm setup add cline
nlm setup add antigravity

# Generate JSON config for any other tool
nlm setup add json
Then use natural language: "Create a notebook about quantum computing and generate a podcast"
Features
| Capability |
CLI Command |
MCP Tool |
| List notebooks |
nlm notebook list |
notebook_list |
| Create notebook |
nlm notebook create |
notebook_create |
| Add Sources (URL, Text, Drive, File) |
nlm source add |
source_add |
| Query notebook (persists to web UI) |
nlm notebook query |
notebook_query |
| List/view/export chat sessions |
nlm chats list/get/export |
chat_list/chat_get/chat_export |
| Create Studio Content (Audio, Video, etc.) |
nlm studio create |
studio_create |
| Revise slide decks |
nlm slides revise |
studio_revise |
| Download artifacts |
nlm download <type> |
download_artifact |
| Download all artifacts (one or all notebooks) |
nlm download all |
download_all_artifacts |
| Web/Drive research |
nlm research start |
research_start |
| Share notebook |
nlm share public/invite |
notebook_share_* |
| Sync Drive sources |
nlm source sync |
source_sync_drive |
| Batch operations |
nlm batch query/create/delete |
batch |
| Cross-notebook query |
nlm cross query |
cross_notebook_query |
| Pipelines (multi-step workflows) |
nlm pipeline run/list |
pipeline |
| Tag & smart select |
nlm tag add/list/select |
tag |
| Configure AI tools |
nlm setup add/remove/list |
— |
| Install AI Skills |
nlm skill install/update |
— |
| Diagnose issues |
nlm doctor |
— |
📚 More Documentation:
- Getting Started — Install, login, agent setup, and migration from another Gemini Notebook MCP
- CLI Guide — Complete command reference
- MCP Guide — All 43 MCP tools with examples
- Authentication — Setup and troubleshooting
- Remote MCP — Web/mobile connector feasibility, security, and authentication limitations
- API Reference — Internal API docs for contributors
Important Disclaimer
This MCP and CLI use internal APIs that:
- Are undocumented and may change without notice
- Require cookie extraction from your browser (I have a tool for that!)
Use at your own risk for personal/experimental purposes.
Installation
🆕 Claude Desktop users: Download the extension (.mcpb file) → double-click → done! One-click install, no config needed.
Install from PyPI. This single package includes both the CLI and MCP server:
Using uv (Recommended)
uv tool install notebooklm-mcp-cli
Using uvx (Run Without Install)
uvx --from notebooklm-mcp-cli nlm --help
uvx --from notebooklm-mcp-cli notebooklm-mcp
Using pip
pip install notebooklm-mcp-cli
Using pipx
pipx install notebooklm-mcp-cli
After installation, you get:
nlm — Command-line interfacenotebooklm-mcp — Gemini Notebook MCP server for AI assistants
Alternative: Install from Source
# Clone the repository
git clone https://github.com/jacob-bd/gemini-notebook-mcp-cli.git
cd notebooklm-mcp

# Install with uv
uv tool install .
Upgrading
# Using uv
uv tool upgrade notebooklm-mcp-cli

# Using pip
pip install --upgrade notebooklm-mcp-cli

# Using pipx
pipx upgrade notebooklm-mcp-cli
After upgrading, restart your AI tool to reconnect to the updated MCP server:
- Claude Code: Restart the application, or use
/mcp to reconnect
- Cursor: Restart the application
- Gemini CLI: Restart the CLI session
Upgrading from Legacy Versions
If you previously installed the separate CLI and MCP packages, you need to migrate to the unified package.
Step 1: Check What You Have Installed
uv tool list | grep notebooklm
Legacy packages to remove:
| Package |
What it was |
notebooklm-cli |
Old CLI-only package |
notebooklm-mcp-server |
Old MCP-only package |
Step 2: Uninstall Legacy Packages
# Remove old CLI package (if installed)
uv tool uninstall notebooklm-cli

# Remove old MCP package (if installed)
uv tool uninstall notebooklm-mcp-server
Step 3: Reinstall the Unified Package
After removing legacy packages, reinstall to fix symlinks:
uv tool install --force notebooklm-mcp-cli
Why --force? When multiple packages provide the same executable, uv can leave broken symlinks after uninstalling. The --force flag ensures clean symlinks.
Step 4: Verify Installation
uv tool list | grep notebooklm
You should see only:
notebooklm-mcp-cli v0.2.0
- nlm
- notebooklm-mcp
Step 5: Re-authenticate
Your existing cookies should still work, but if you encounter auth issues:
nlm login
Note: The configured MCP server name is now gemini-notebook-mcp. The executable remains notebooklm-mcp for compatibility with existing installations.
Getting Started
If you are setting up the tool for the first time — or migrating from a
browser-based Gemini Notebook MCP — see the
Getting Started Guide. It covers install,
login, agent registration, and a step-by-step migration path that avoids
the "two Gemini Notebook servers registered" trap.
Uninstalling
To completely remove the MCP:
# Using uv
uv tool uninstall notebooklm-mcp-cli

# Using pip
pip uninstall notebooklm-mcp-cli

# Using pipx
pipx uninstall notebooklm-mcp-cli

# Remove cached auth tokens and data (optional)
rm -rf ~/.notebooklm-mcp-cli
Also remove from your AI tools:
nlm setup remove claude-code
nlm setup remove cursor
# ... or any configured tool
Authentication
Before using the CLI or MCP, you need to authenticate with Gemini Notebook:
CLI Authentication (Recommended)
# Auto mode: launches your browser, you log in, cookies extracted automatically
nlm login

# Check if already authenticated
nlm login --check

# Use a named profile (for multiple Google accounts)
nlm login --profile work
nlm login --profile personal

# Manual mode: import cookies from a file
nlm login --manual --file cookies.txt

# External CDP provider (e.g., OpenClaw-managed browser)
nlm login --provider openclaw --cdp-url http://127.0.0.1:18800
Profile management:
nlm login --check                    # Show current auth status
nlm login switch <profile>           # Switch the default profile
nlm login profile list               # List all profiles with email addresses
nlm login profile delete <profile>   # Delete a profile
nlm login profile rename <old> <new> # Rename a profile
Unattended / scheduled refresh:
A live session self-heals — when Google's short-lived cookies age out, the
client automatically runs a headless refresh. For unattended machines you can
also refresh proactively from a scheduler so a session never lapses:
nlm auth refresh                     # Headless, no interaction; exits non-zero on failure
nlm auth refresh --profile work      # Refresh a named profile
Run it on a timer (cron/launchd). It needs a saved Chrome profile from a prior
nlm login, and does not apply when NOTEBOOKLM_COOKIES is set as an
environment variable (that value overrides saved credentials).
Enterprise Authentication (Gemini Notebook Enterprise)
For organizations using Gemini Notebook Enterprise via Google Cloud, ask your Enterprise administrator for the project ID or number, the deployment location/multi-region, and confirmation that your account has access. The current documented host is notebook.cloud.google.com; older deployments may use notebooklm.cloud.google.com or vertexaisearch.cloud.google.com.
Set Base URL, GCP Project ID & Location:
export NOTEBOOKLM_BASE_URL="https://notebook.cloud.google.com"
# Required: your GCP project ID or project number from your administrator
export NOTEBOOKLM_PROJECT_ID="your-gcp-project-id-or-number"
# Optional: GCP location/multi-region from your administrator: global (default), us, or eu
export NOTEBOOKLM_LOCATION="global"
Save an Enterprise Auth Profile:
This opens the configured Enterprise URL in an isolated browser profile. Sign in with your organization account:
nlm login --profile enterprise
nlm login switch enterprise
You can switch back to a personal profile at any time:
unset NOTEBOOKLM_BASE_URL NOTEBOOKLM_PROJECT_ID NOTEBOOKLM_LOCATION
nlm login switch personal
Configure MCP Server with Enterprise Environment Variables:
When adding the MCP server to AI assistants (Claude, Cursor, etc.), pass NOTEBOOKLM_BASE_URL, NOTEBOOKLM_PROJECT_ID, and optionally NOTEBOOKLM_LOCATION:
{
  "mcpServers": {
    "gemini-notebook-mcp": {
      "command": "notebooklm-mcp",
      "env": {
        "NOTEBOOKLM_BASE_URL": "https://notebook.cloud.google.com",
        "NOTEBOOKLM_PROJECT_ID": "your-gcp-project-id-or-number",
        "NOTEBOOKLM_LOCATION": "global"
      }
    }
  }
}
Each profile gets its own isolated browser session, so you can be logged into multiple Google accounts simultaneously. Enterprise environment variables apply to the current process, so keep them in an Enterprise-only shell or MCP configuration when you also use a personal account.
If you only need the MCP server (not the CLI):
nlm login              # Auto mode (launches browser)
nlm login --manual     # Manual file mode
How it works: Auto mode launches a dedicated browser profile (supports Chrome, Arc, Dia, Comet, Brave, Edge, Chromium, Firefox, and more), you log in to Google, and cookies are extracted automatically. Your login persists for future auth refreshes.
Prefer a specific browser? Set it with nlm config set auth.browser chromium (or comet, dia, brave, arc, edge, chrome, firefox, etc.). Falls back to auto-detection if the preferred named browser is not found. For any other Chromium-compatible browser, set its executable with nlm config set auth.browser_path /path/to/browser or NLM_BROWSER_PATH; an invalid explicit path fails closed instead of launching a different browser. When Chromium/CDP is unavailable, auto can fall back to Firefox.
For detailed instructions and troubleshooting, see docs/AUTHENTICATION.md.
MCP Configuration
⚠️ Context Window Warning: This MCP provides 43 tools. Disable it when not using Gemini Notebook to preserve context. In Claude Code: @gemini-notebook-mcp to toggle. To keep it on but expose only a subset, see Selective tool exposure.
Automatic Setup (Recommended)
Use nlm setup to automatically configure the MCP server for your AI tools — no manual JSON editing required:
# Add to any supported tool
nlm setup add claude-code
nlm setup add claude-desktop
nlm setup add claude-desktop --profile 3p  # Relay AI / Claude 3P
nlm setup add gemini
nlm setup add github-copilot
nlm setup add cursor
nlm setup add windsurf

# Generate JSON config for any other tool
nlm setup add json

# Check which tools are configured
nlm setup list

# Diagnose installation & auth issues
nlm doctor
Claude Desktop setup only writes to profiles that are detected as present. If
both regular and Relay AI/3P profiles exist, the CLI asks whether to configure
regular, 3P, or both. For scripts, use --profile regular|3p|both. If no
Claude Desktop profile is detected, nothing is created or changed.
Removal uses the same profile selection, for example
nlm setup remove claude-desktop --profile regular.
Removal only offers detected profiles containing this MCP or a recognized
legacy entry; unrelated MCP servers are left untouched.
Before adding or removing the MCP, fully quit the selected Claude Desktop
profile. The CLI detects running regular and Relay AI/3P instances and refuses
to write while they are open, because Claude may rewrite the config and discard
the change. Reopen Claude Desktop after setup completes.
Install AI Skills (Optional)
Install the Gemini Notebook expert guide for your AI assistant to help it use the tools effectively. Supported for Cline, Antigravity, OpenClaw, Codex, OpenCode, Claude Code, and Gemini CLI.
# Install skill files
nlm skill install cline
nlm skill install openclaw
nlm skill install codex
nlm skill install antigravity

# Update skills
nlm skill u

 这是一个命令行工具(CLI)和 MCP 服务器,可以通过程序访问 Google 的 Gemini Notebook(原名 NotebookLM)。你可以在终端里,或通过 Claude 等 AI 智能体,创建和查询笔记本、添加来源,并生成 Studio 内容,例如播客和视频。