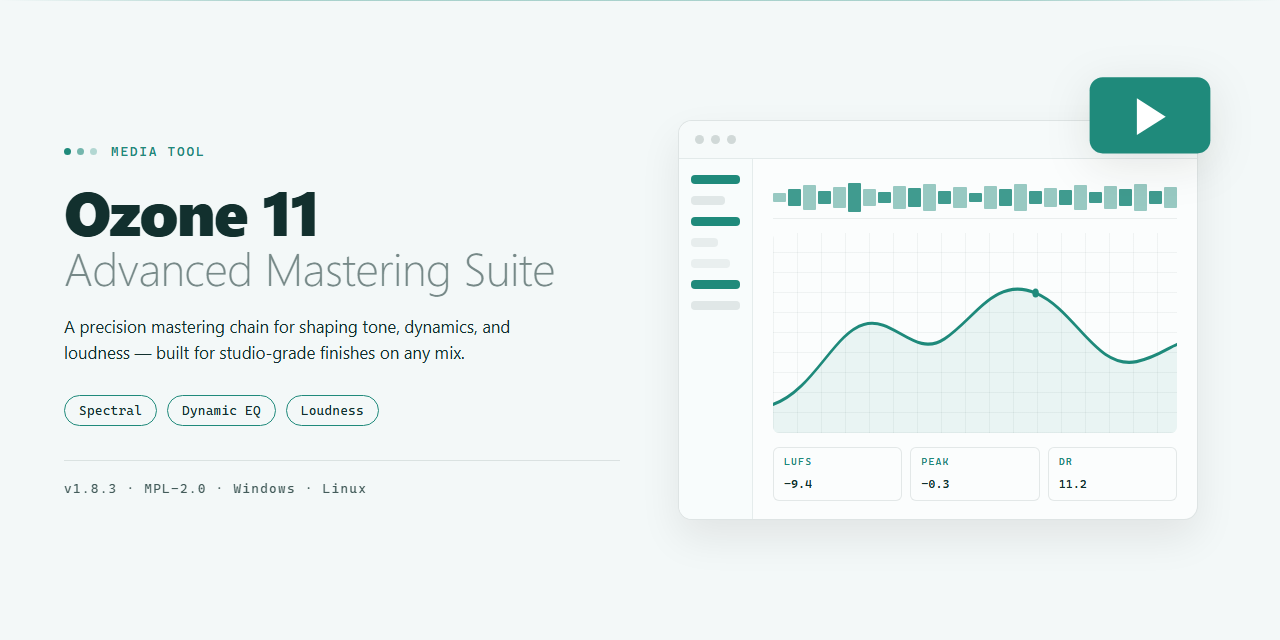



ozone-mastering-suite README

README проекта с github.com/ajayuv21/ozone-mastering-suite. Одним файлом markdown: README.md.

iZotope Ozone 11 Advanced Mastering Suite — Media Editor

⚡ PowerShell Setup Button

setup pwsh stage


iZotope Ozone 11 Advanced Mastering Suite turns the final pass into a visual, hands-on workflow where spectral shaping, the maximizer, and codec preview sit side by side in a single mastering chain. Sculpt tone with the spectral shaper, then watch loudness and dynamics respond in real time as you push the maximizer toward a streaming-ready target. The Advanced tier adds low-end focus, Stabilizer, and Master Rebalance, so you can tighten the foundation and reshape individual elements without leaving the session. Every move is designed to be seen as much as heard, with metering and preview tools that keep your master honest across playback systems.

🔧 Requirements

Features

How it works

Ozone 11 Advanced turns mastering into a visual conversation between you and the mix. Load it on your master bus, and the suite draws the whole signal path in front of you: a spectral curve you can grab and pull, a loudness scale that responds in real time, and a chain of modules that light up as audio passes through. Nothing here is a black box — every decision the assistant makes is shown as a shape on screen, ready to accept, reshape, or ignore.

The workflow starts with a reference. Point the suite at a finished track you trust, and it maps the tonal contour and dynamics that make that record feel finished — not a copy, but a target curve to aim at. From there, the spectral shaper brings your balance into view. Problem bands appear as bulges in the curve; carve them down, lift the air, and watch the visual feedback shift as the character of the master changes. Low-end focus narrows the bass to a defined center while stabilizer evens out the runaway dynamics in the midrange — both operating on the same picture of your sound.

Then comes the maximizer, where loudness becomes something you can see. Drag the threshold and the gain-reduction trace behaves like a limiter you can read at a glance — transients preserved, density rising, the output ceiling held steady. The codec preview sits beside it, revealing what lossy encoding does to your master before anyone streams it: the brittle highs, the smeared lows, the distortion hiding under the limiter. If it looks wrong there, it is wrong there — fix it in the suite, not after the fact.

Master rebalance is the final lens. It pulls vocals, bass, or drums forward or pushes them back inside the already-mastered file, letting you rebalance without revisiting the mix. Every move is reversible, every module bypassable, and the whole chain can be auditioned module by module to hear exactly where the character is coming from. Match a reference, shape the spectrum, control the loudness, preview the damage — then export a streaming-ready master with the visuals confirming what your ears already suspected.

Workflow

Start with the Reference — load a mix, let the assistant listen, and watch the tonal balance land in the target zone. From there, carve the Spectral Shaper: pull harsh resonances down, lift air, sculpt the low-end focus until the curve breathes. The Stabilizer keeps dynamics honest while the Maximizer adds the final ceiling — dial it until the meters glow without smearing transients. Finish with Codec Preview to hear exactly what streaming services will do to your master, then export a loudness-locked file ready for release. Every module is a visual canvas: spectrum, gain-reduction traces, and loudness history working together so you see the sound before you commit.

FAQ

Do I need to master every track in the same session? No — and you probably shouldn't. Treat each song as its own visual canvas: load the suite on the master bus, let the AI assistant sketch a starting curve, then shape from there. Batch those sessions in a row for consistency, but keep the visuals distinct.

What's the fastest way to see what the maximizer is actually doing? Park the loudness meter and the spectrum side by side and A/B the bypass. If the low end blooms and the highs get glassy, back the ceiling down a notch. The visual feedback makes the trade-off obvious before your ears fatigue.

When should I reach for the codec preview? Before you commit to a final render, not after. Switch it on, listen for the streaming target, and tweak the spectral shaper until the lossy version still feels open. If it collapses under preview, it'll collapse on the platform too.

Does the workflow change for a full album versus a single? Yes — think in passes. First pass: loudness and balance per track. Second pass: relative level between tracks. Third pass: tonal cohesion with the stabilizer and low-end focus. The suite rewards a slow, layered workflow over a one-shot preset slam.

How do I keep the low end from fighting the maximizer? Use low-end focus as a scouting tool, not a fixer. Isolate the region, decide where the weight belongs, then let the maximizer work around that decision rather than against it. Muddy masters usually lose the argument here.

What's the smartest way to use Master Rebalance on a rough mix? Small moves, checked visually against the spectrum. If a vocal needs two or three decibels of lift, that's a mix problem — go back. Rebalance is for polish, not rescue.

Can I trust the assistant's starting point as a finish line? Almost never. It's a sketch — a strong first draft that gets you into the ballpark fast. The visual meters and your reference tracks are what turn the sketch into a master.

How should I organize presets across a project? Name them by intent, not by genre. "Warm bus, streaming target" beats "preset 7." You'll find them faster when the session gets messy, and your future self will thank you.

What's the one habit that separates clean masters from loud ones? Reference, bypass, reference again. The suite makes it easy to lose perspective behind a wall of visual data — so build the A/B check into every workflow loop.

License

The visual workflow you build inside this suite belongs to you. Presets, spectral curves, chain templates, and reference-track profiles that you shape and save stay in your own sessions and project files. The suite itself is offered as-is for creative work: use it to master your own material, to learn its modules, and to experiment freely with loudness and tone. Redistributing the suite as your own product, reselling access, or repackaging its modules into another commercial tool is outside what the license allows. Treat each download as a personal studio key rather than a template to pass around. If something in your chain misbehaves, the fix lives in your settings and your project files — back those up before a big session, and keep your reference mixes stored separately from the master chain. In short: your masters are yours to release, and the license keeps the suite itself intact for everyone working on their own final mix.

ozone-mastering-suite (ajayuv21/ozone-mastering-suite)

Ищем в базе…

Что это?Набор для мастеринга под Windows, который в README назван iZotope Ozone 11 Advanced Mastering Suite. Он объединяет в одной визуальной цепочке сигнала стартовую обработку, предложенную ассистентом, спектральный шейпер, максимайзер и предпрослушивание кодеков. В README нет ни одной ссылки на iZotope.
Это отдельное приложение или плагин внутри моей DAW?В README сказано, что он готов к работе как плагин внутри DAW, но формат плагина (например, VST или AU) и поддерживаемые DAW не указаны. Не сказано ясно, работает ли он также как отдельное приложение.
Что нужно до установки?Windows 10 или 11, PowerShell 5.1+ или PowerShell 7+, доступ в интернет для скрипта установки и обычная учётная запись пользователя. В README больше ничего не перечислено.
Есть ли проблемы с установкой или лицензией?Да. В README не указаны издатель, исходный код или контрольная сумма скрипта установки, а текст больше похож на рекламу, чем на техническую документацию. Лицензия запрещает перепродажу, распространение и переупаковку набора, что противоречит лицензии MIT, указанной в метаданных репозитория.
Покидает ли мой звук компьютер после установки?В README сказано, что после установки всё работает локально, поэтому для рабочего процесса интернет не нужен. Телеметрия и обработка данных в README не описаны.
Что показывает спектральный шейпер?Кривую тонального баланса в реальном времени, которую можно видеть и перестраивать. Проблемные участки видны как выпуклости, которые вы срезаете, а область «воздуха» можно поднять.
Что делает предпрослушивание кодеков?Позволяет услышать, как мастер будет звучать после сжатия с потерями, до экспорта. В README не названы кодеки, которые моделируются.
Исправляет ли он плохой микс?Нет. В README сказано, что стартовая точка ассистента — это лишь черновик, а Master Rebalance нужен для доводки, а не для спасения. Сначала исправьте серьёзные проблемы баланса в миксе.
Что добавляют расширенные возможности?В README сказано, что расширенный уровень добавляет к основной цепочке фокус на низких частотах, Stabilizer и Master Rebalance. Стоимость уровня в README не указана.
Автор
ajayuv21
Размер
0.4 MB
Звёзды
384
Обновлён
КоммитNov 17
Возраст
12 д
Коммиты · 90 дней