Chinese reader? Start here: 打开中文 README
OpenClaw Control Center
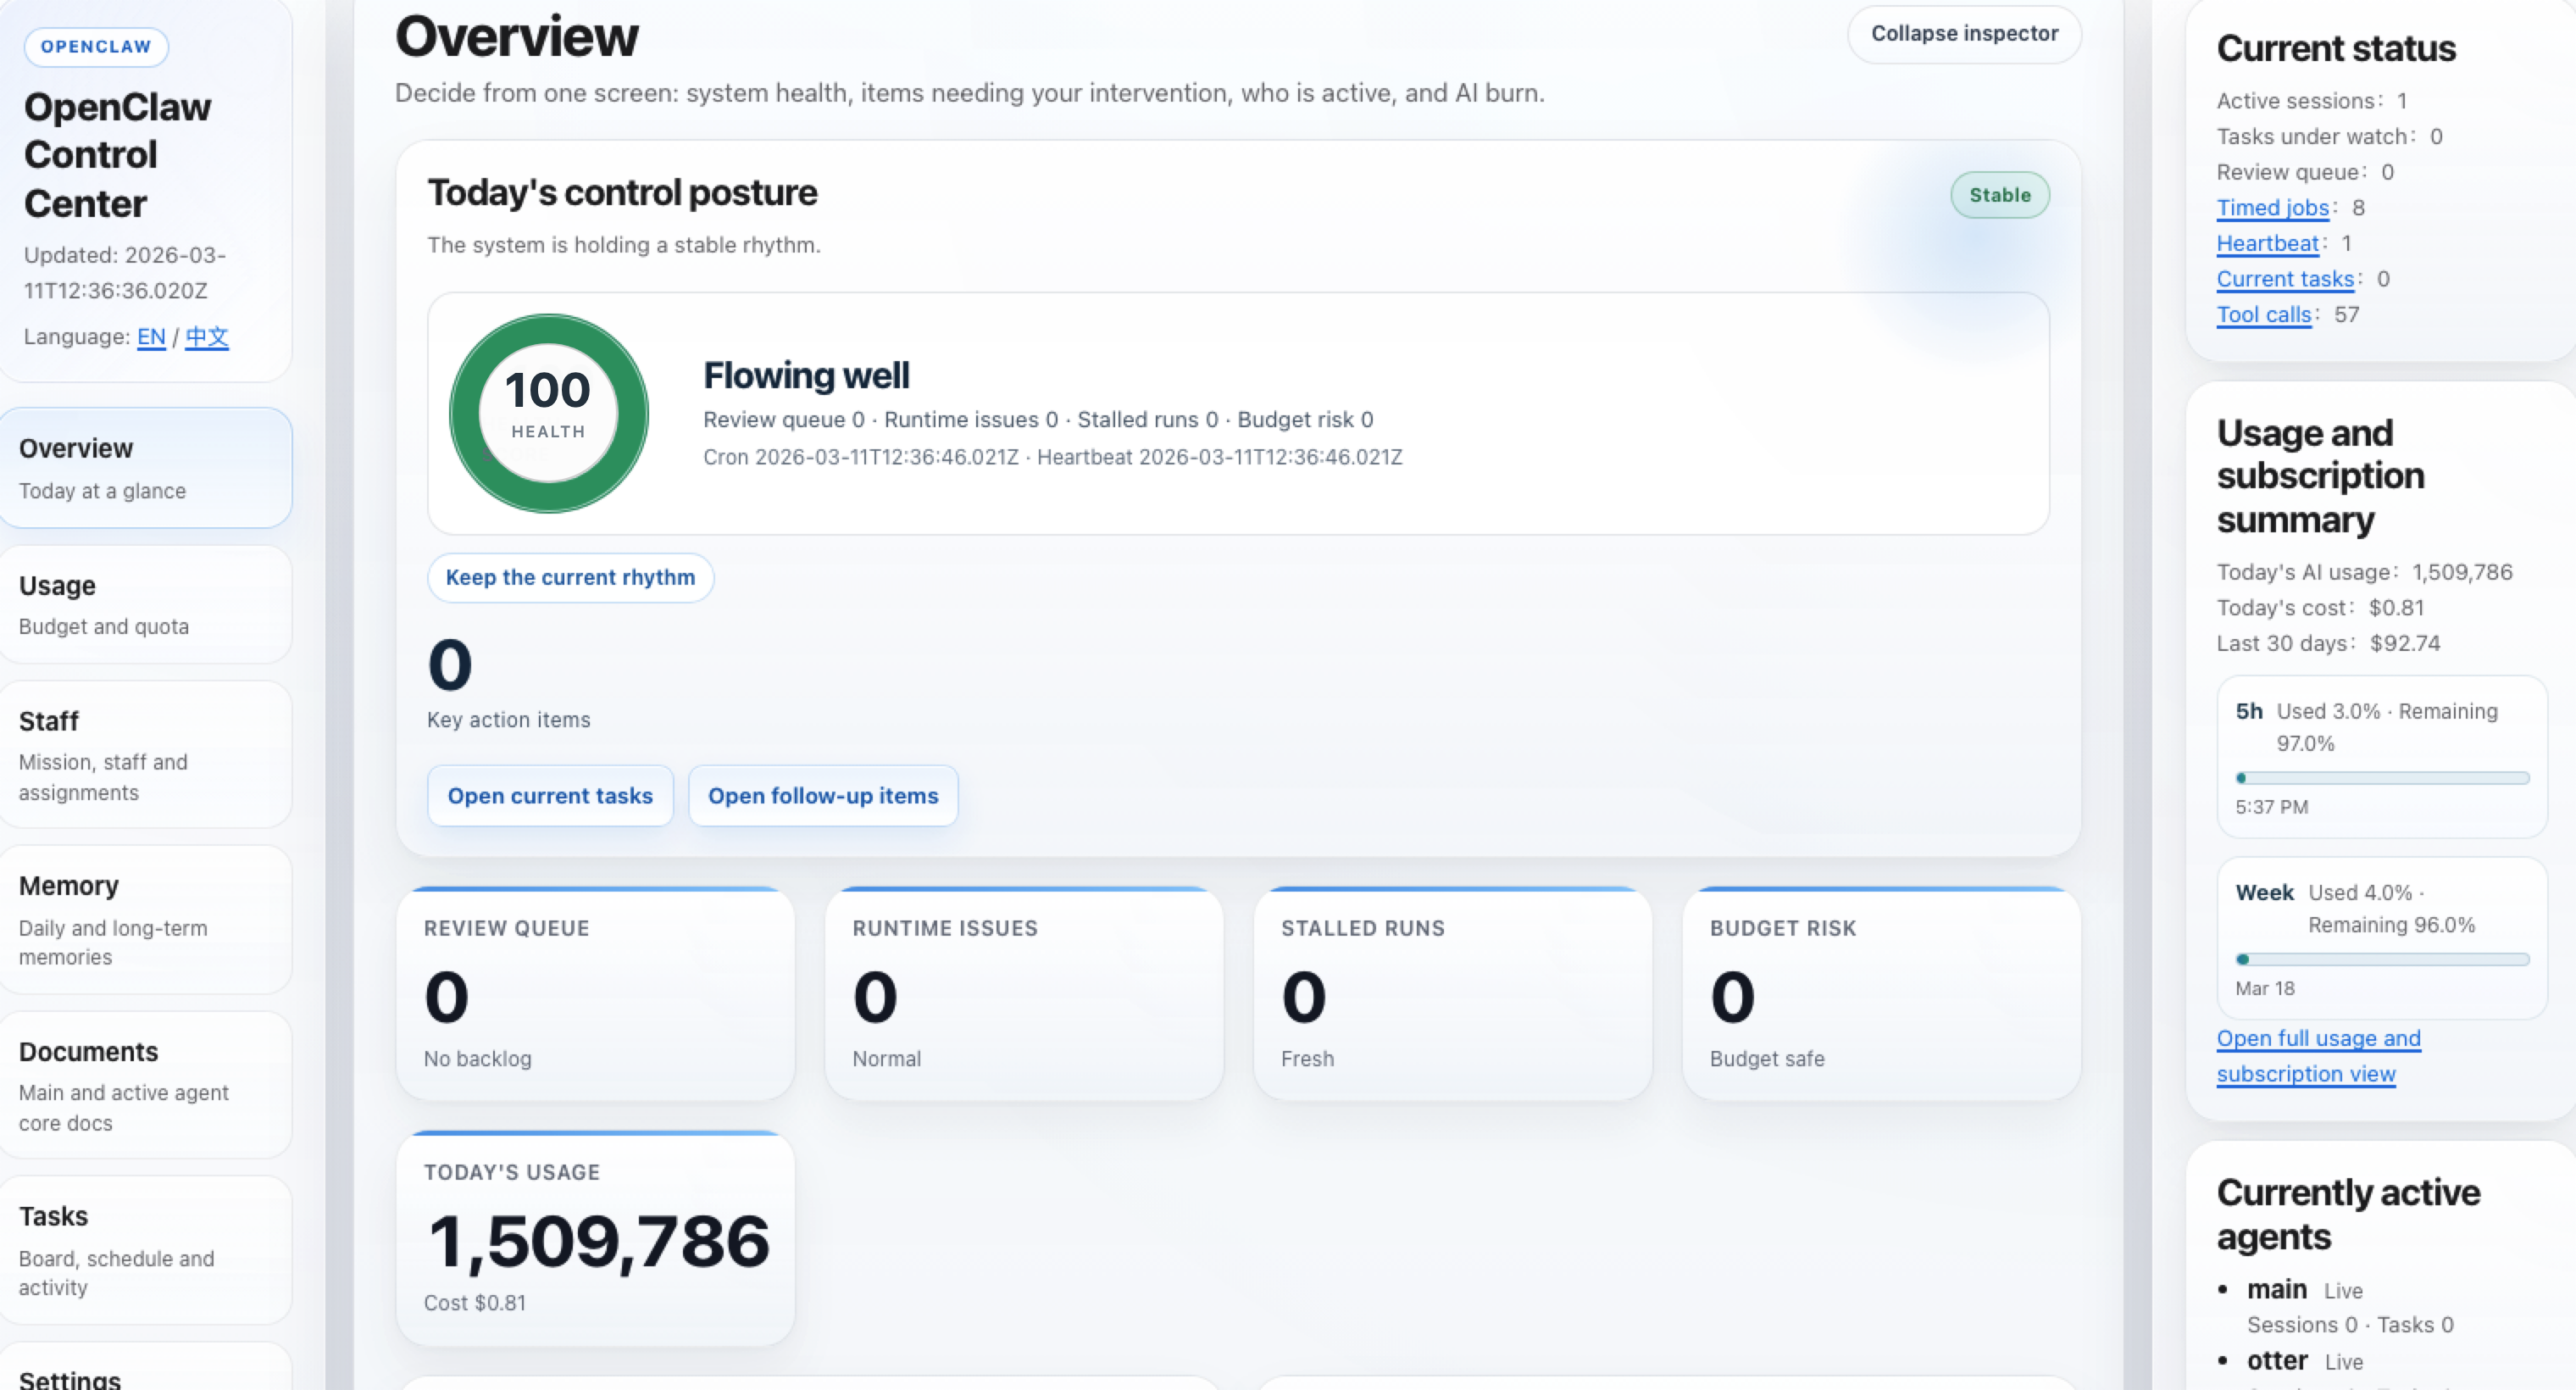
Turn OpenClaw from a black box into a local control center you can see, trust, and control.
Language: English | 中文
Why this exists
- One local place to see whether OpenClaw is healthy, busy, blocked, or drifting.
- Built for non-technical operators who need observability and certainty, not raw backend payloads.
- Safe first-run defaults:
- read-only by default
- local token auth by default
- mutation routes disabled by default
What you get
Overview: health, current state, decisions waiting, and operator-facing summariesUsage: usage, spend, subscription windows, and connector statusStaff: who is really working now versus only queuedCollaboration: a hall-first multi-agent work chat with live discussion, execution order, handoff, review, and evidence threadsTasks: current work, approvals, execution chains, and runtime evidenceDocuments and Memory: source-backed workbenches scoped to active OpenClaw agents
What this release adds
Collaboration: a new hall-first collaboration page so you can post work in one shared timeline, see real agent roster names reply live, and watch discussion collapse into one execution owner before review.Collaboration: hall discussion, assign, and handoff can now dispatch through the real openclaw agent runtime, so the live draft stream reflects real session execution instead of only synthetic orchestrator text.Collaboration: hall runtime streaming now prefers direct CLI/stdout passthrough when OpenClaw emits live output, and gracefully falls back to session-history deltas when the runtime only exposes persisted session updates.Collaboration: assign can now trigger a short automatic real execution chain, so one owner can continue through several runtime turns before the task pauses in review or blocked.Collaboration: the hall now uses your current OpenClaw roster directly; existing agent ids do not need to be renamed to any control-center-specific defaults before they can discuss, execute, and hand off work.Collaboration: linked task rooms now act as detail and evidence threads with live room streaming, assignment, review, and optional outbound Discord or Telegram mirroring without moving source-of-truth storage out of control-center.Settings: a new Connection health card that tells you what is already wired, what is still partial, and where to finish setup.Settings: a new Security risk summary that translates current risk, impact, and next-step guidance into plain operator-facing language.Settings: a new Update status card for current version, latest version, update channel, and install method.Usage: a new Context pressure card so you can see which sessions are closer to context limits and where things may get slower or more expensive.Memory: a new Memory status card so you can see whether each visible agent's memory is usable, searchable, or worth checking.
Who it is for
- OpenClaw users who want one local control center for observability, usage, tasks, approvals, replay, documents, and memory
- teams running OpenClaw on one machine or a reachable local environment
- maintainers who want a public-ready, safety-first OpenClaw dashboard instead of a generic agent platform
Screenshots
Example UI from a local OpenClaw environment:
|
|
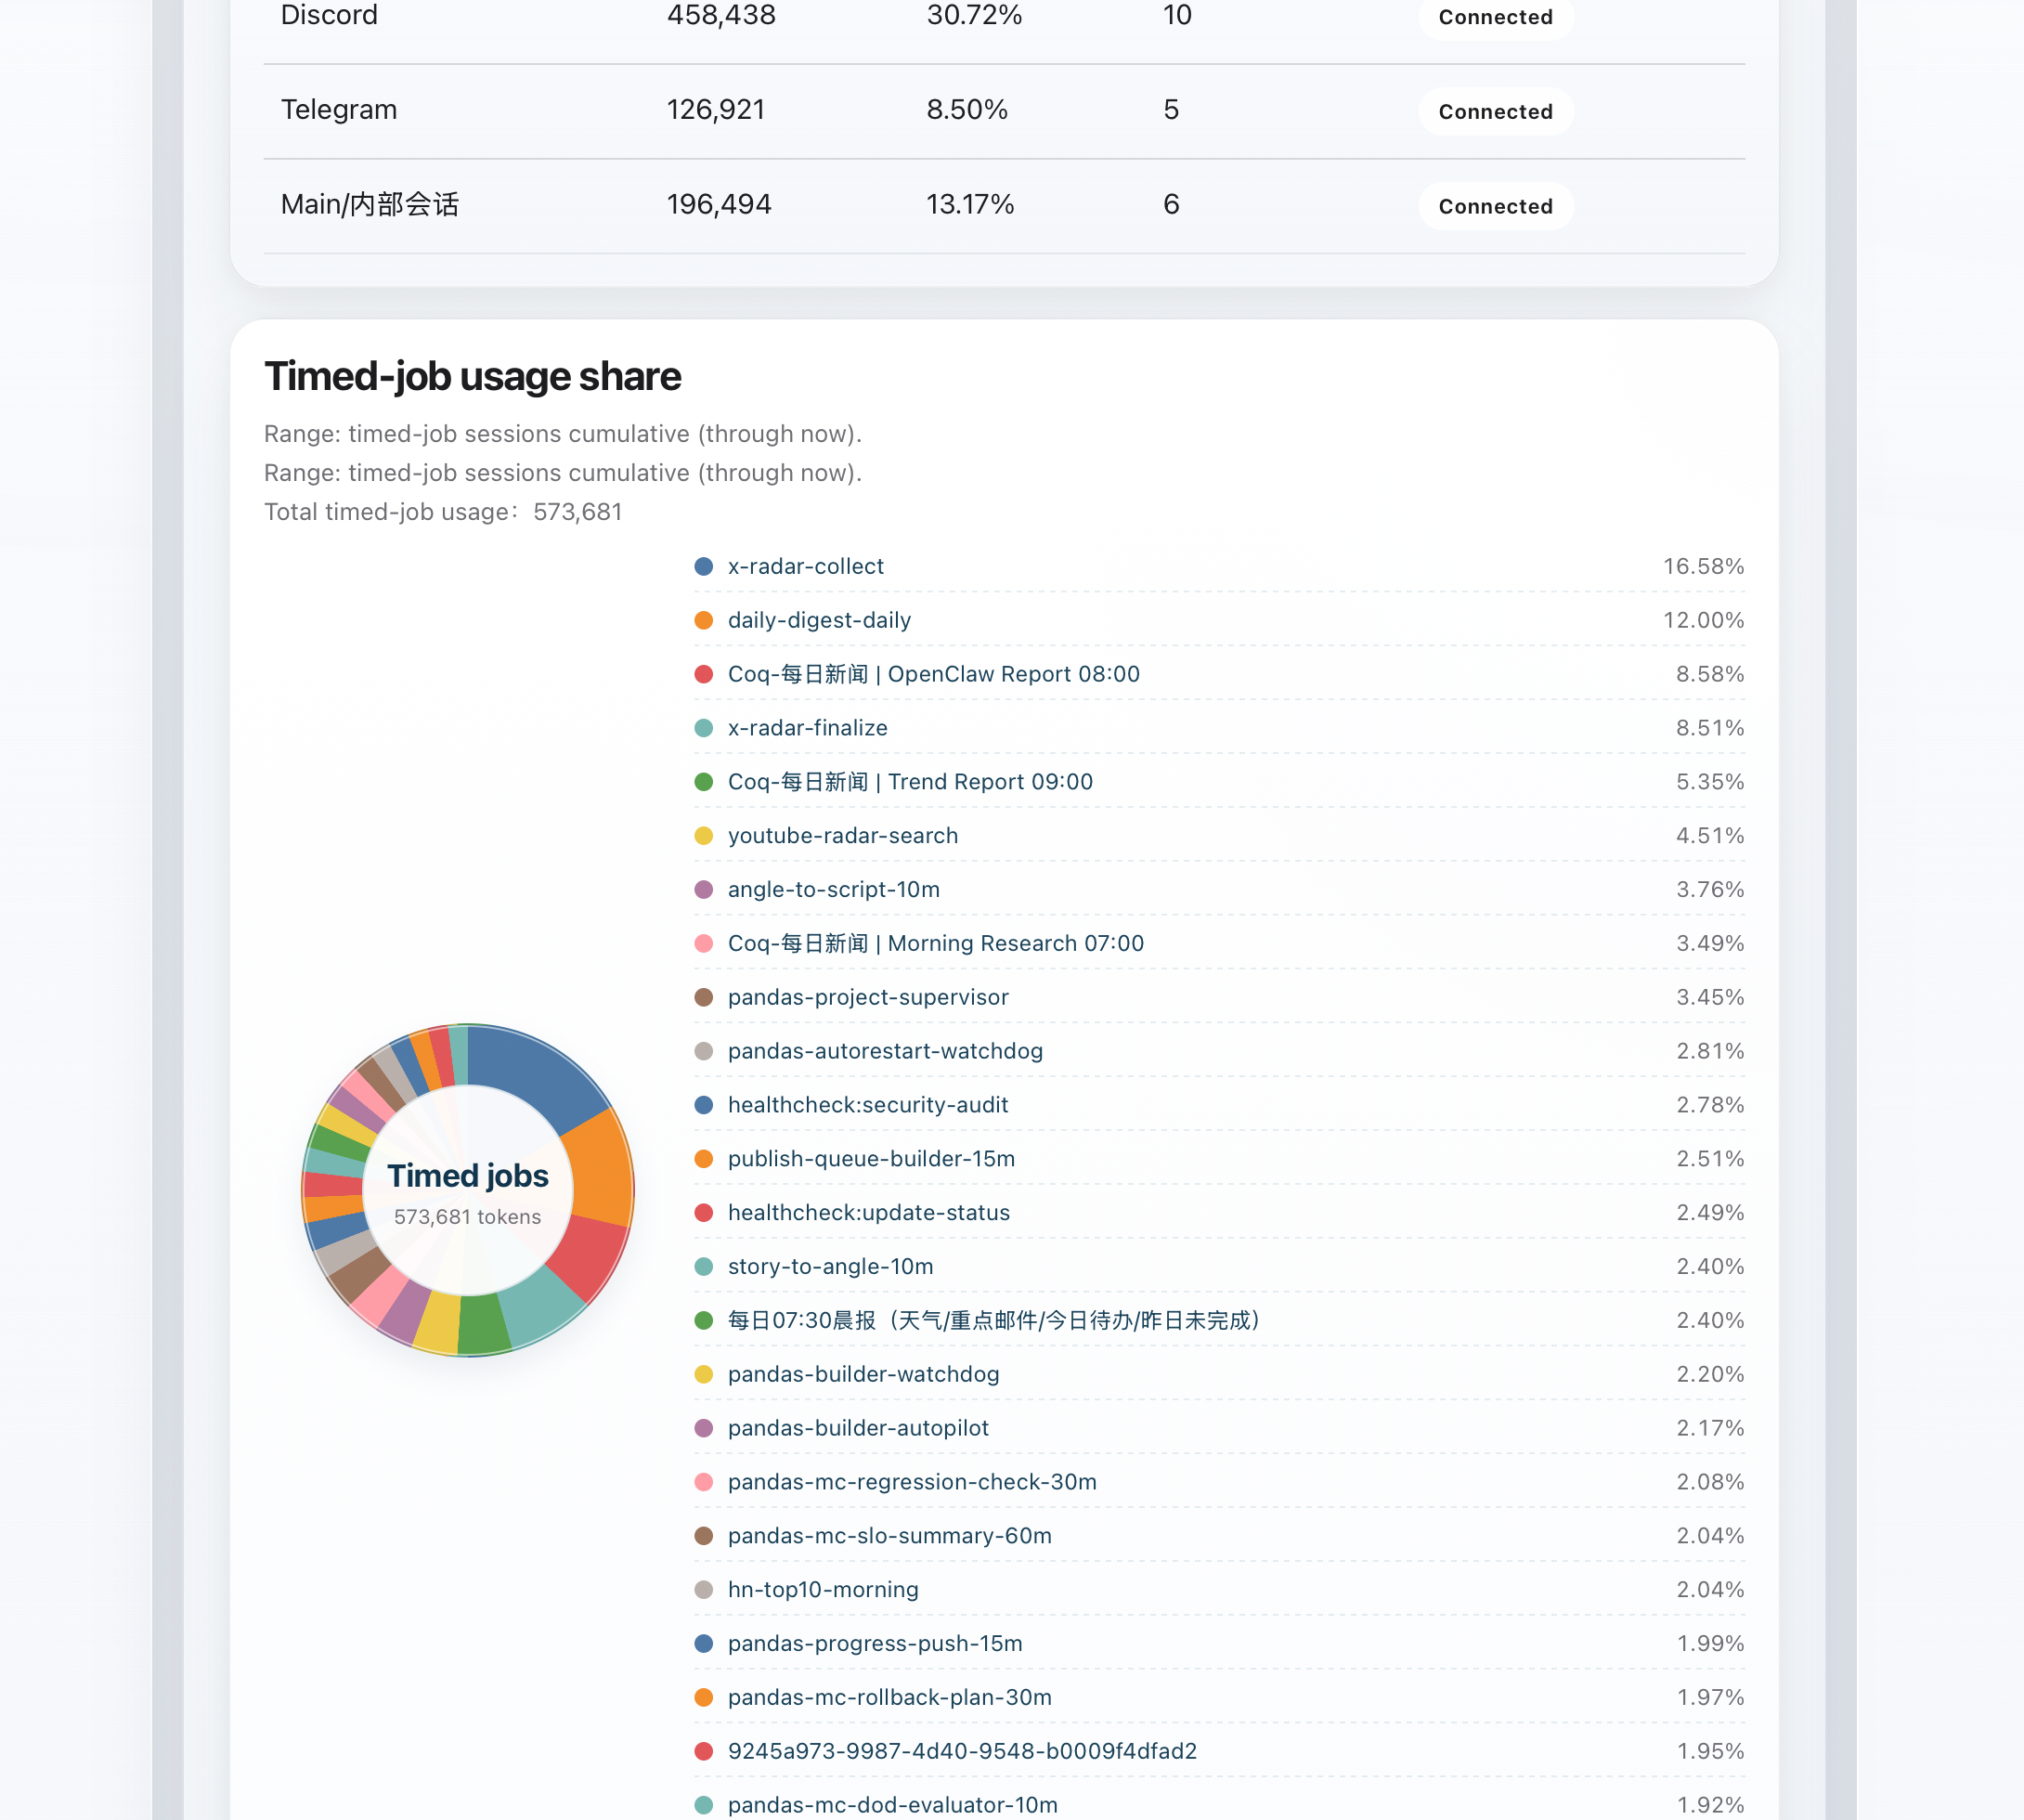
Token attribution
See which timed jobs are actually consuming tokens and how the share splits across them. |
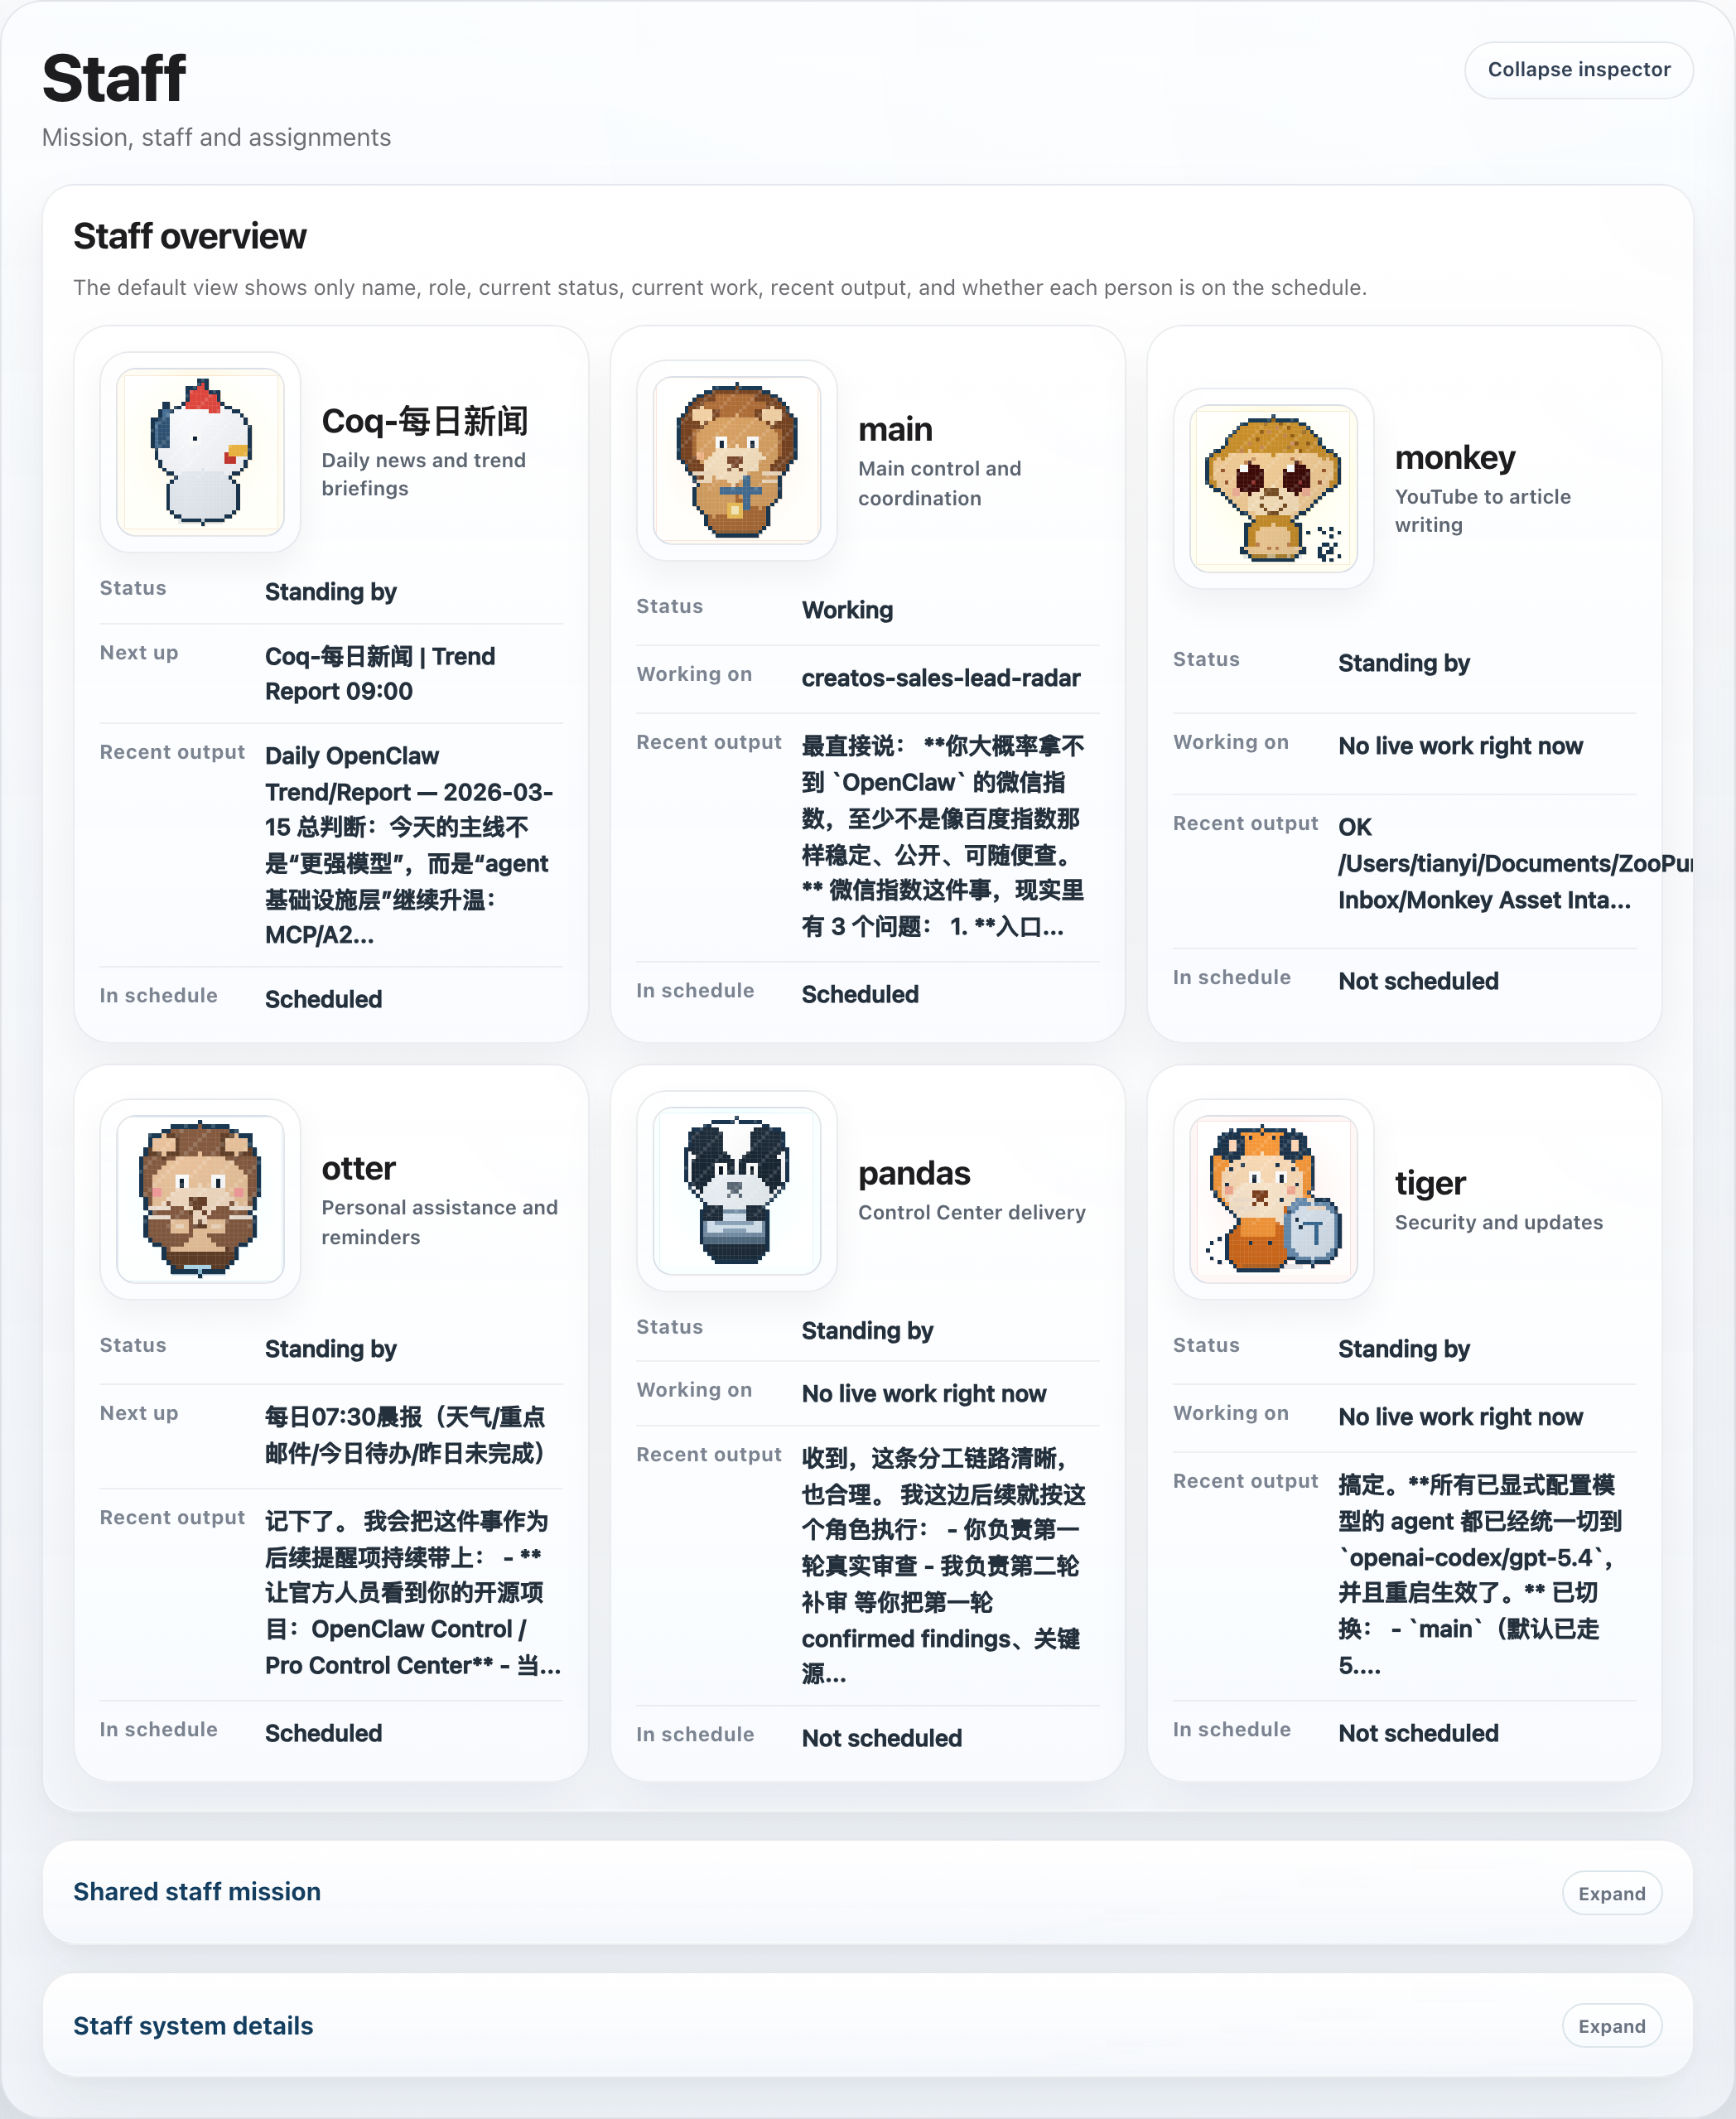
Staff page
See who is working now, who is on standby, recent output, and schedule state. |
|
|
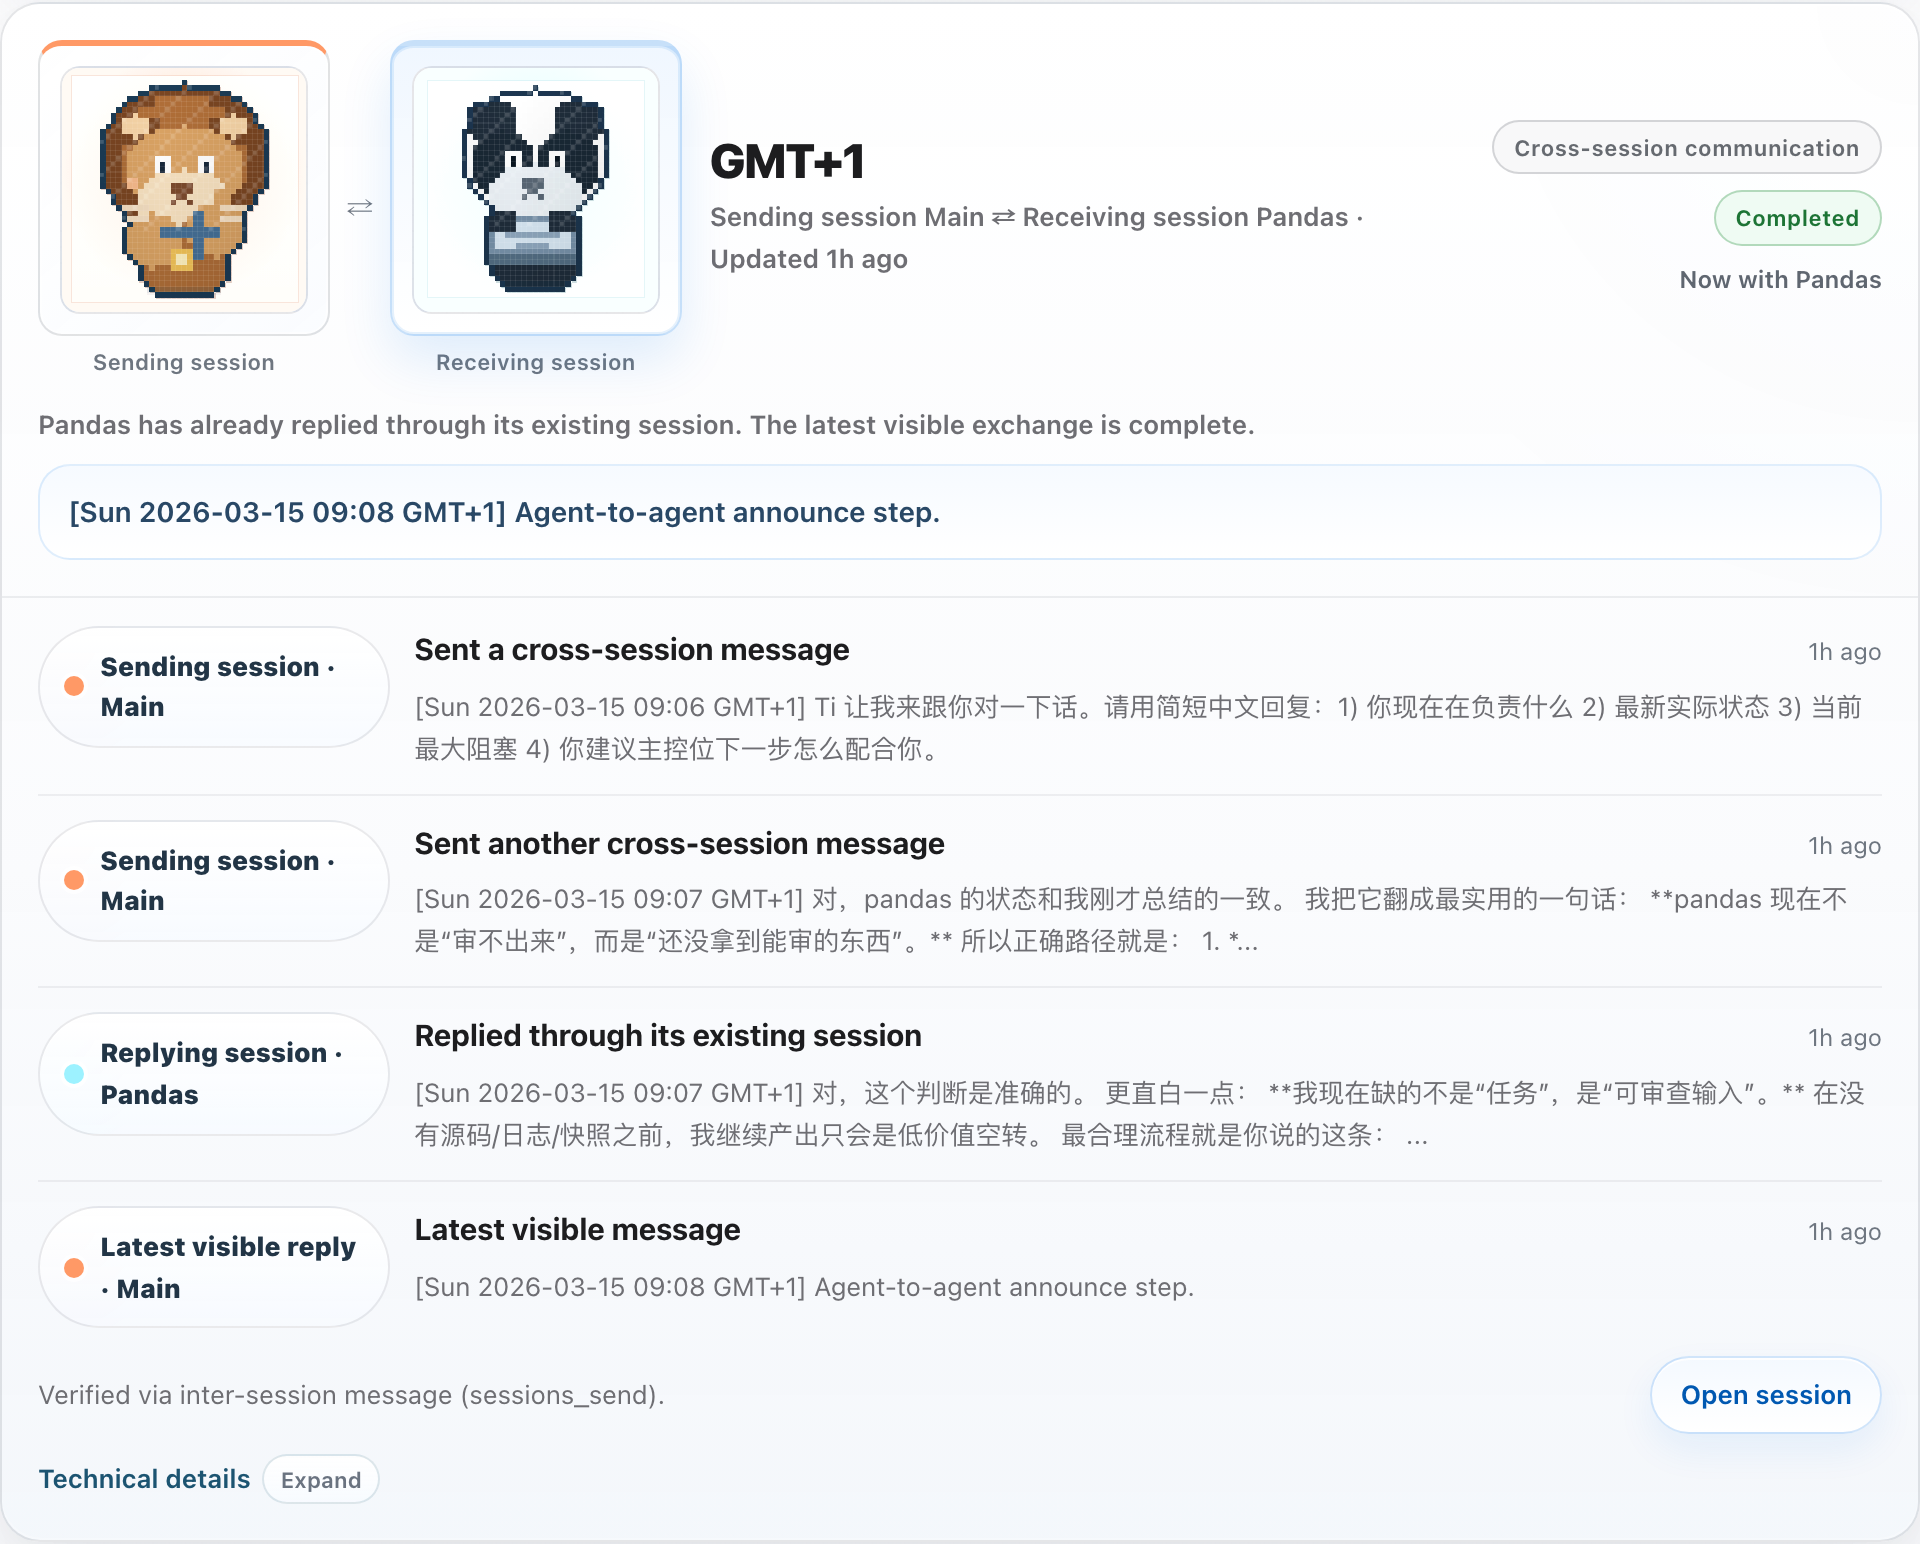
Collaboration page
See one shared thread where agents discuss, assign owners, hand off work, and review results. |
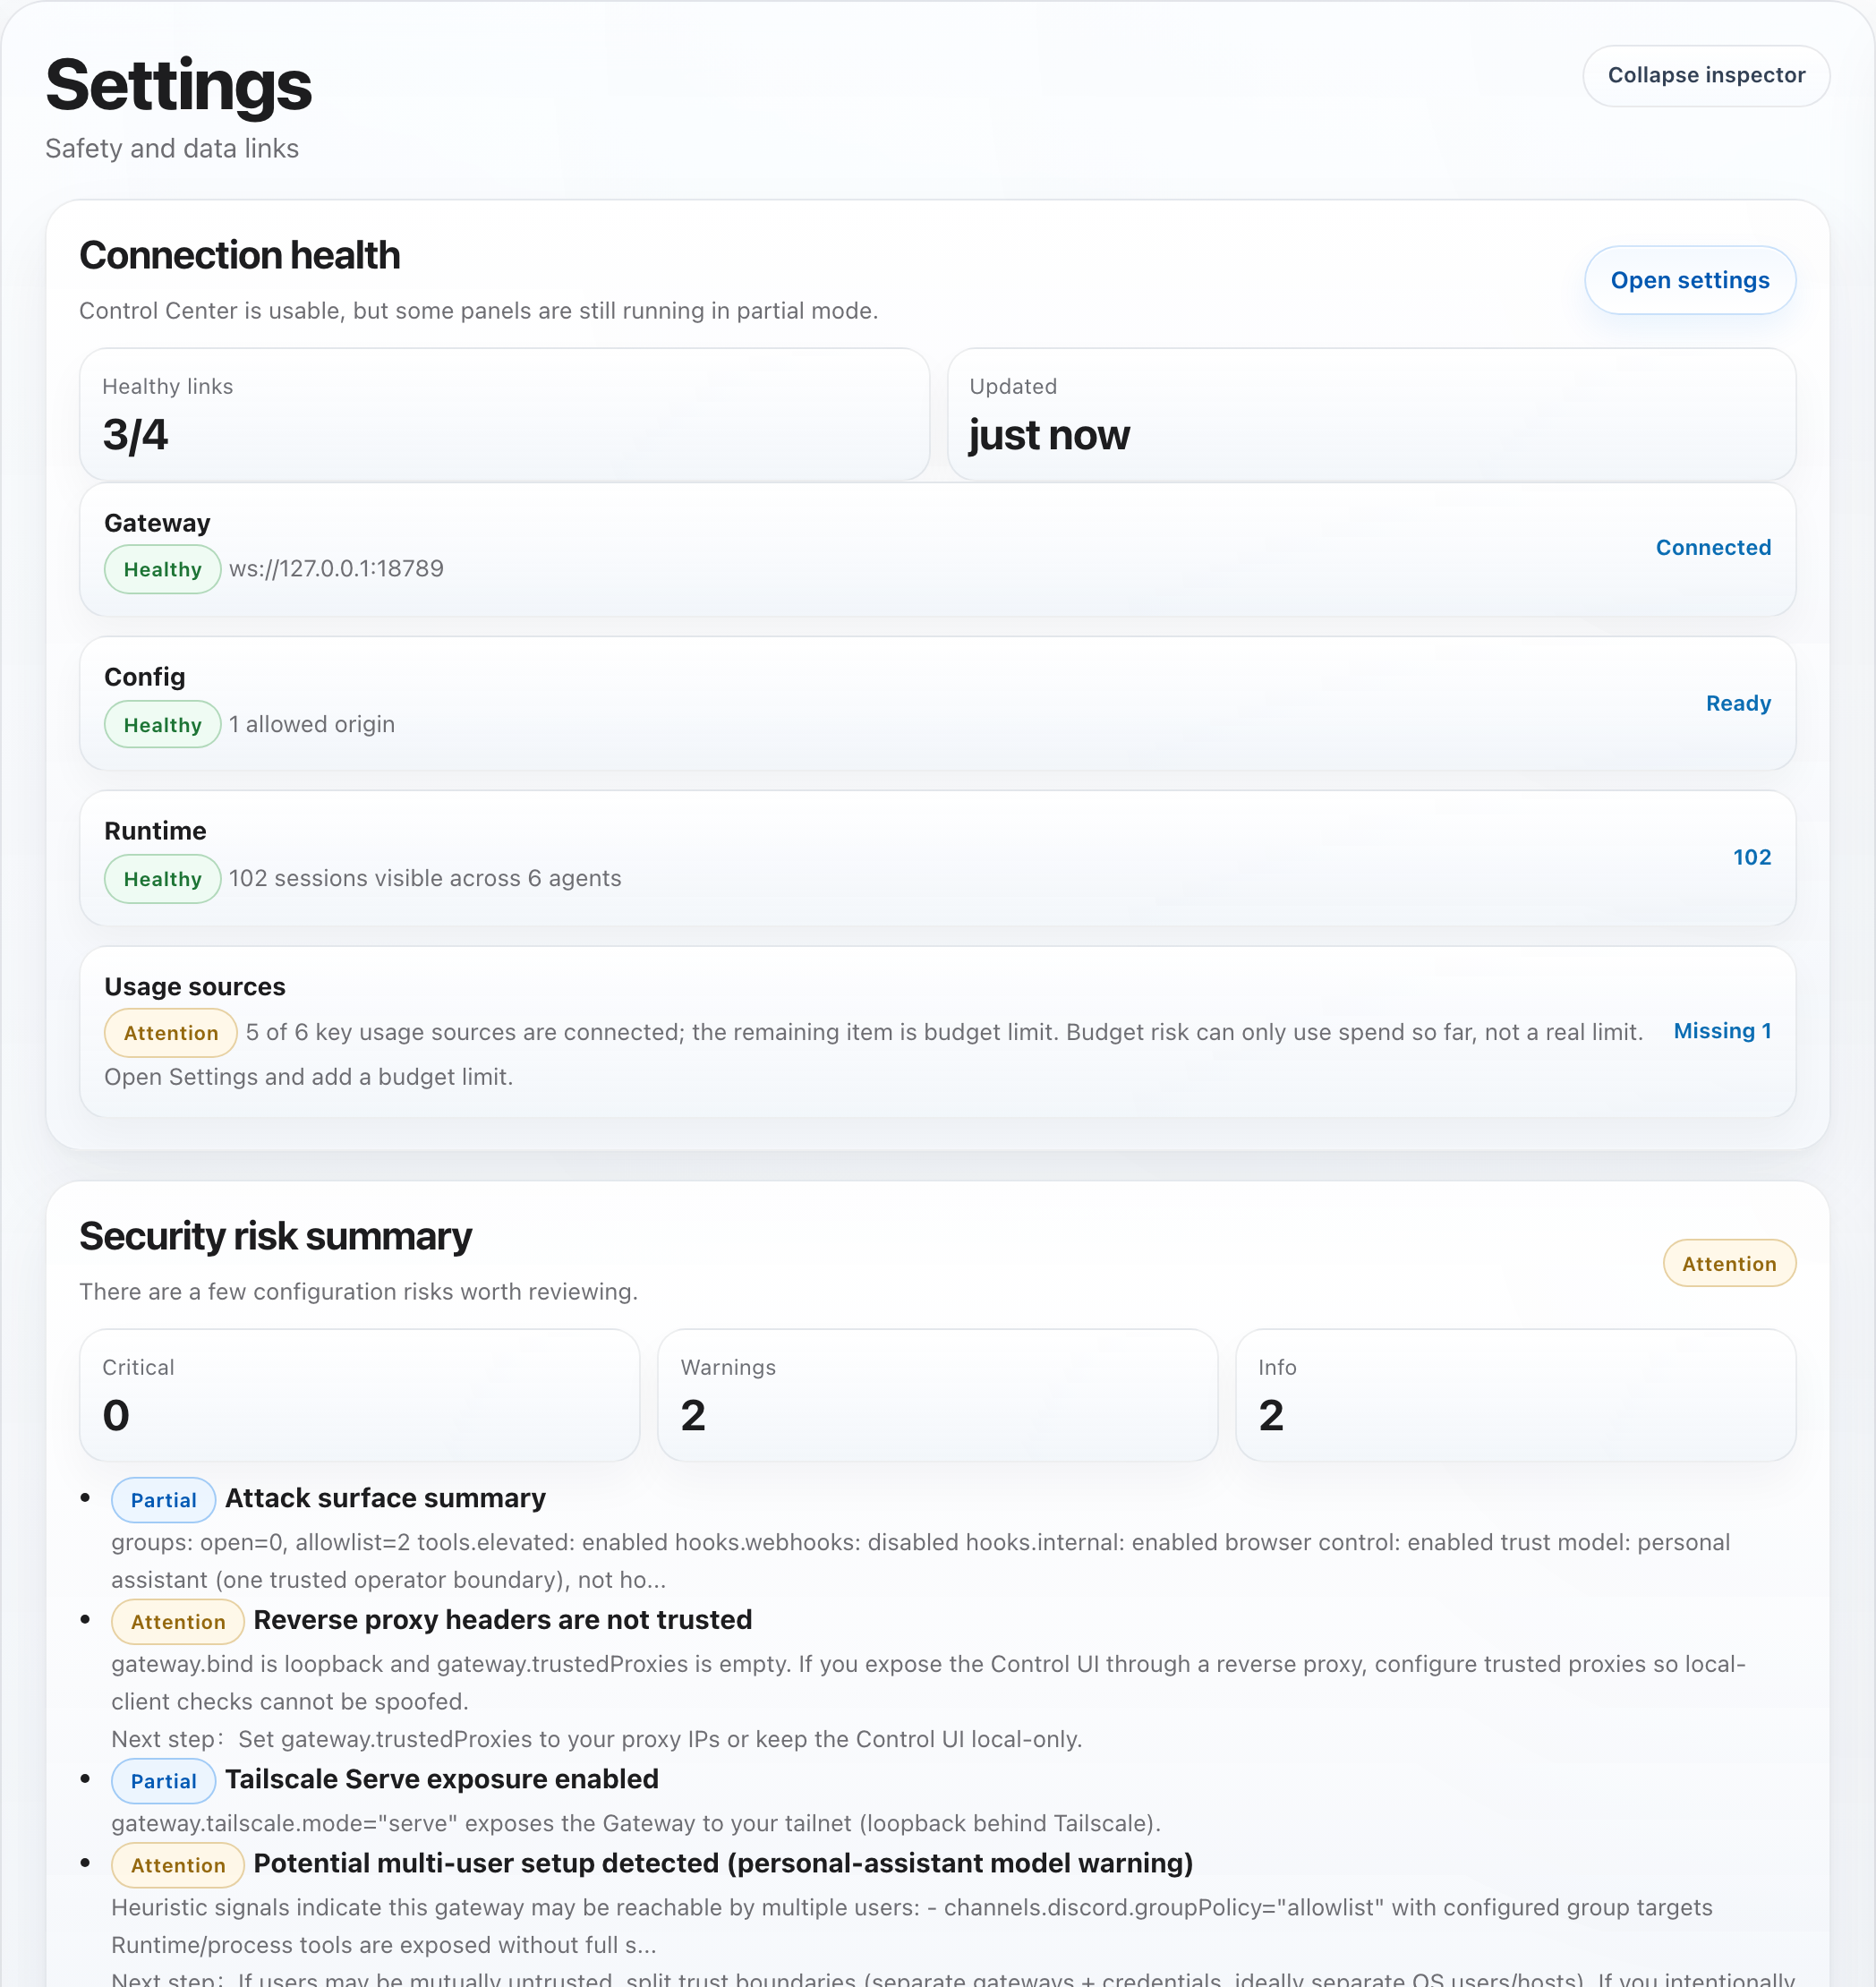
Security and update status
See current risk, impact, next-step guidance, and the gap between your current and latest version. |
Hall integration with your existing agents
- The hall reads the current OpenClaw roster from the runtime environment and uses the live agent ids and display names it finds there.
- Existing users do not need to rename agents to
pandas, coq, monkey, or any other control-center-specific name before using hall collaboration.
- Role suggestions are heuristic only. If the roster has clear names such as
manager, planner, builder, or qa, the hall will use them; otherwise it falls back gracefully without blocking the workflow.
- Hall runtime turns now carry structured transport context such as
surface, workspaceRoot, workdir, entryFiles, and artifact references so repo-aware tasks can run against the same working context your agents already use elsewhere.
Hall workflow
- Start with one task in the hall. The first turn stays in
discussion.
- Unless you explicitly
@ one agent, the hall aims to gather at least two short replies so the second person can add a missing angle instead of repeating the first.
- Edit the repo-root
HALL.md file if you want one shared collaboration style for the whole hall. It is injected into discussion, execution, and handoff turns, but it does not override owner routing or queued execution order.
- Use
Arrange execution order to decide the first owner, later owners, and what each person hands off.
- Saving the order does not start execution.
- Once the queue is ready, the decision card will show
Start execution (...).
- During execution, each owner should finish only their own step, then visibly
@ the next owner in the same thread.
- Review should happen only after the last queued owner finishes, or when a human explicitly asks to stop and review.
- After review, use
Continue discussion to reopen the thread, then arrange the next round and start again from the same thread.
5-minute start
npm install
cp .env.example .env
npm run build
npm test
npm run smoke:ui
npm run smoke:hall
npm run dev:ui
Then open:
http://127.0.0.1:4310/?section=overview&lang=enhttp://127.0.0.1:4310/?section=overview&lang=zh
Notes:
- Prefer
npm run dev:ui; it is the more reliable cross-platform entry, especially on Windows shells.
npm run dev only performs one monitor pass and does not start the HTTP UI.- If you want to reach the UI over Tailscale, set
OPENCLAW_CONTROL_UI_URL to your Tailscale host or IP (for example http://<tailscale-host>:4310/). The UI will automatically bind to 0.0.0.0 unless you explicitly override UI_BIND_ADDRESS.
Section-by-section tour
Overview
- The main operating screen for non-technical users.
- Shows the current control posture, key action items, runtime issues, stalled runs, budget risk, who is active, and what needs attention first.
- Best when you want one fast answer to: “Is OpenClaw okay right now?”
Usage
- Shows today, 7-day, and 30-day usage and spend trends.
- Includes subscription windows, quota consumption, usage mix, context pressure, and connector status.
- Best when you want to know whether spend or quota is becoming risky.
Staff
- Shows who is truly active now versus who only has queued work.
- Separates live work from “next up” so backlog is not confused with active execution.
- If a card shows
Role not defined in workspace, start with the FAQ & best practices guide.
- Best when you want to know who is busy, idle, blocked, or waiting.
Collaboration
- Shows a shared multi-agent hall where operators post work once and the current roster replies in one timeline.
- Streams draft agent replies live over SSE, then lands the final persisted message and any linked task-card state changes.
- When hall runtime dispatch is enabled, discussion, assign, and handoff turns are sent through the real
openclaw agent runtime and mirrored back from real session history.
- When the runtime emits live stdout, the hall prefers that direct stream first; otherwise it keeps the draft alive with session-backed deltas so the operator still sees the real execution progress.
- Assignment can trigger multiple real execution turns in sequence before pausing for review or surfacing a blocker, rather than stopping after a single runtime turn.
- Keeps linked task rooms available as detail and evidence threads when you need deeper execution logs.
- The intended interaction style is a real work chat: short discussion turns, one owner at a time during execution, explicit
@handoff, then review only after the queued owners finish.
- Best when you want to understand “who is talking now, who owns execution now, and what happens next?”
Memory
- A source-backed workbench for daily and long-term memory files.
- Scoped to active OpenClaw agents from
openclaw.json, so deleted agents do not keep showing up.
- Also shows whether each visible agent's memory is healthy, searchable, or needs attention.
- Best when you want to inspect or edit memory that the current OpenClaw team is actually using.
Documents
- A source-backed workbench for shared and agent-specific core markdown docs.
- Reads the real source files and writes back to the same files.
- Best when you want to maintain the actual working documents behind the system.
Tasks
- Combines task board, schedule, approvals, execution chains, and runtime evidence.
- Helps distinguish mapped work from real execution evidence, and shows what is blocked or needs review.
- Best when you want to understand what is being carried, what is only planned, and what needs intervention.
Settings
- Shows safety mode, connector status, and data-link expectations.
- Makes it clear what is connected, what is still partial, and which high-risk actions are intentionally disabled.
- Includes
Connection health, Security risk summary, and Update status as dedicated operator cards.
- Best when you want to verify environment setup or explain why a signal is missing.
What this is not
- Not a replacement for OpenClaw itself
- Not a generic dashboard for non-OpenClaw agent stacks
- Not a hosted SaaS control plane
Core constraints
- Only touches files in
control-center/.
READONLY_MODE=true by default.LOCAL_TOKEN_AUTH_REQUIRED=true by default.IMPORT_MUTATION_ENABLED=false by default.IMPORT_MUTATION_DRY_RUN=false by default.- Import/export and all state-changing endpoints require a local token when auth is enabled.
- Approval actions are hard-gated (
APPROVAL_ACTIONS_ENABLED=false default).
- Approval actions are dry-run by default (
APPROVAL_ACTIONS_DRY_RUN=true).
- No mutation of
~/.openclaw/openclaw.json.
What LOCAL_API_TOKEN is
LOCAL_API_TOKEN is a machine-local shared secret that you set yourself in .env.- It protects write actions such as save, import/export-with-side-effects, approvals, and hall/task-room mutations when
LOCAL_TOKEN_AUTH_REQUIRED=true.
- Typical first-run setup:
- keep
LOCAL_TOKEN_AUTH_REQUIRED=true
- set
LOCAL_API_TOKEN to a long random string
- enter that same token in the UI when a protected action prompts for it
- If you leave
LOCAL_API_TOKEN unset while the auth gate is enabled, protected writes stay blocked by design.
What UI_TIMEZONE is
UI_TIMEZONE controls how server-rendered absolute timestamps are displayed in the UI.- Default is
UTC.
- Examples:
Asia/Shanghai, Europe/Paris, America/Los_Angeles.
- Relative labels like
5m ago are unchanged; this only affects absolute timestamps such as session activity, task updates, cron next-run times, approvals, and drilldown pages.
Quick start
npm installcp .env.example .env- Keep safe defaults for the first run; only change
GATEWAY_URL or path overrides if your OpenClaw setup is non-standard.
- Before testing save/import/hall write actions, set
LOCAL_API_TOKEN in .env to a long random string.
npm run buildnpm testnpm run smoke:uinpm run smoke:hallnpm run dev:ui
Docker deployment
- Yes, the control center can run in Docker.
- The key requirement is not Docker itself; it is that the container can see the same OpenClaw data paths and reach the Gateway.
- A minimal starting point is included in
Dockerfile and docker-compose.example.yml.
- For a Dockerized OpenClaw setup, make sure these are wired correctly:
GATEWAY_URLOPENCLAW_HOMEOPENCLAW_CONFIG_PATHOPENCLAW_WORKSPACE_ROOTCODEX_HOME when you want Codex usage/subscription data
- Typical local run:
cp .env.example .env- edit
docker-compose.example.yml mount paths and LOCAL_API_TOKEN
docker compose -f docker-compose.example.yml up --build
- The Docker image now pre-generates the default Hall / staff avatar exports during build, so
/hall-avatars/*.png is available out of the box.
- If the Gateway runs on the Docker host:
- keep
extra_hosts: ["host.docker.internal:host-gateway"] on Linux Docker
- prefer
ws://host.docker.internal:18789 for direct container-to-host traffic
- only use
wss://... when the Gateway endpoint itself is terminating TLS and the certificate matches the hostname you configured
- If the UI is reached through a reverse proxy, LAN host, or Tailscale, also set:
OPENCLAW_CONTROL_UI_URLUI_BIND_ADDRESS=0.0.0.0
Multi-agent workspace layouts
- The default fallback layout is
<OPENCLAW_WORKSPACE_ROOT>/agents/<agentId>.
- If your agents actually live in sibling folders such as
workspace/a and workspace/b, define each agent's workspace explicitly in openclaw.json.
- In other words,
OPENCLAW_WORKSPACE_ROOT gives the shared parent root; custom per-agent directories still need per-agent workspace entries.
Installation and onboarding
1. Before you start
You should already have:
- a working OpenClaw installation
- a reachable OpenClaw Gateway
- shell access with
node and npm
- read access to your OpenClaw home directory
For the richest dashboard data, it also helps if this machine has:
~/.openclaw~/.codex- a readable OpenClaw subscription snapshot, if your setup stores one outside the default locations
2. Install the project
git clone https://github.com/TianyiDataScience/openclaw-control-center.git
cd openclaw-control-center
npm install
cp .env.example .env
If OpenClaw claims the repo is missing src/runtime or other core source files, do not start patching code. The canonical repo layout already includes:
package.jsonsrc/runtimesrc/ui.env.example
That error usually means:
- the current directory is not the
openclaw-control-center repo root
- the wrong repo was cloned
- the checkout/download is incomplete
- the agent is running in the wrong workspace
3. Recommended default: let your own OpenClaw do the install and setup
The best first-run path is not manual setup. The best path is to give your own OpenClaw one install instruction block and let it do the safe wiring for you.
If you want a copy-ready standalone file, use:
It should handle:
- environment checks
- dependency install
.env creation or correction- safe first-run defaults
build / test / smoke- a final summary of what to run and what to open
This install instruction already accounts for common real-world differences such as:
- no GPT / Codex subscription, or no readable subscription snapshot
- OpenClaw running on API keys or non-Codex providers (for example OpenAI API, Anthropic, OpenRouter, or another provider backend)
- non-default
~/.openclaw, ~/.codex, Gateway URL, or UI port
- more than one plausible OpenClaw home, more than one Gateway candidate, or a non-default workspace on the same machine
- a completely different active agent roster from the examples in this repo
- a machine that can build locally but is not yet connected to a live Gateway
- missing
node / npm, no npm-registry connectivity, or insufficient write permissions in the repo
- missing optional data sources where the control center should still come up safely in read-only mode
Copy the full block below into OpenClaw:
You are installing and connecting OpenClaw Control Center to this machine's OpenClaw environment.

Your goal is not to explain theory. Your goal is to complete a safe first-run setup end to end.

Hard rules:
1. Work only inside the control-center repository.
2. Do not modify application source code unless I explicitly ask.
3. Do not modify OpenClaw's own config files.
4. Do not enable live import or approval mutations.
5. Keep all high-risk write paths disabled.
6. Do not assume default agent names, default paths, or a default subscription model. Use real inspection results from this machine.
7. Do not treat missing subscription data, missing Codex data, or a missing billing snapshot as an install failure. If the UI can run safely, continue and clearly mark which panels will be degraded.
8. Do not fabricate, generate, or overwrite any provider API key, token, cookie, or external credential. If OpenClaw itself is missing those prerequisites, report the gap instead of guessing.

Follow this order:

Phase 1: inspect the environment
1. Check whether the OpenClaw Gateway is reachable and confirm the correct `GATEWAY_URL`.
2. Confirm the correct `OPENCLAW_HOME` and `CODEX_HOME` on this machine.
3. If the subscription or billing snapshot is stored outside the default path, find the correct `OPENCLAW_SUBSCRIPTION_SNAPSHOT_PATH`.
4. Confirm which prerequisites are truly present and which are missing-but-degradable.
5. If more than one plausible `OPENCLAW_HOME`, Gateway, or workspace exists, do not guess.
6. If a path, process, or file is missing in a way that makes the control center impossible to start at all, stop and explain the missing prerequisite clearly.
7. If the missing item only affects richer dashboards, continue and mark those surfaces as partial.
8. Do not assume any fixed agent names. If `openclaw.json` is readable, treat it as the source of truth.

Phase 2: install the project
9. Confirm that the current directory is the control-center repo root. If it has not been cloned yet, clone it first: `git clone https://github.com/TianyiDataScience/openclaw-control-center.git`
10. Verify the repo is complete before editing anything.
11. If core paths (`src/runtime`, `src/ui`, `package.json`) are missing, do not continue. Re-clone from `https://github.com/TianyiDataScience/openclaw-control-center.git`.
12. Run dependency install.
13. If `.env` does not exist, create it from `.env.example`; otherwise correct it while preserving safe defaults.

Phase 3: safe first-run configuration
14. Keep these values:
   - READONLY_MODE=true
   - LOCAL_TOKEN_AUTH_REQUIRED=true
   - APPROVAL_ACTIONS_ENABLED=false
   - APPROVAL_ACTIONS_DRY_RUN=true
   - IMPORT_MUTATION_ENABLED=false
   - IMPORT_MUTATION_DRY_RUN=false
   - UI_MODE=false
15. Only change `GATEWAY_URL`, `OPENCLAW_HOME`, `CODEX_HOME`, `OPENCLAW_SUBSCRIPTION_SNAPSHOT_PATH`, or `UI_PORT` when this machine really requires it.
16. If `CODEX_HOME` or subs

 Локальный веб-центр управления для OpenClaw: одна панель, где видно, живы ли ваши агенты, заняты ли они, заблокированы или сбились с курса, плюс расход, задачи, подтверждения, документы и память. Она создана для нетехнических пользователей, которым нужна уверенность, а не сырые ответы бэкенда.